Update: New blog posts - Stable Diffusion QR Code 101
Last week, I wrote a blog post about how I learned to generate scannable QR Codes. When doing so, I consider my goal is to find an image that looks like a QR Code as little as possible to humans, but still be recognizable by the machine.
We need to find a balance, tweaking the weights to try and error. It’s still quite hard to find a good composition that represents the black & white spots, while keeping the content meaningful to human. If you go too far, the QR Code will be unscannable, and if you don’t go far enough, the image will just be like a boring QR Code.
Since there is quite some randomness in the process, sometimes it could be a pity when you find a good one but realize it’s not scannable. To improve this, my workflow was to open up Photoshop, overlay the generated image with the original QR Code, manually check the difference, use the brush to mark those spots and send to inpaint to draw those areas. It works to some extent, but pretty inefficient as you need to go back and forth quite a few times. Meanwhile, doing this manually can also be inaccurate as the scanning algorithm might see them differently.
So, I need to find a way to automate this, helping me to verify and refine the generated QR Code easier. And I came up with a simple web tool to do so. Let me introduce you to a bit about it.
Anthony's QR Code ToolkitGenerating the Base QR Code
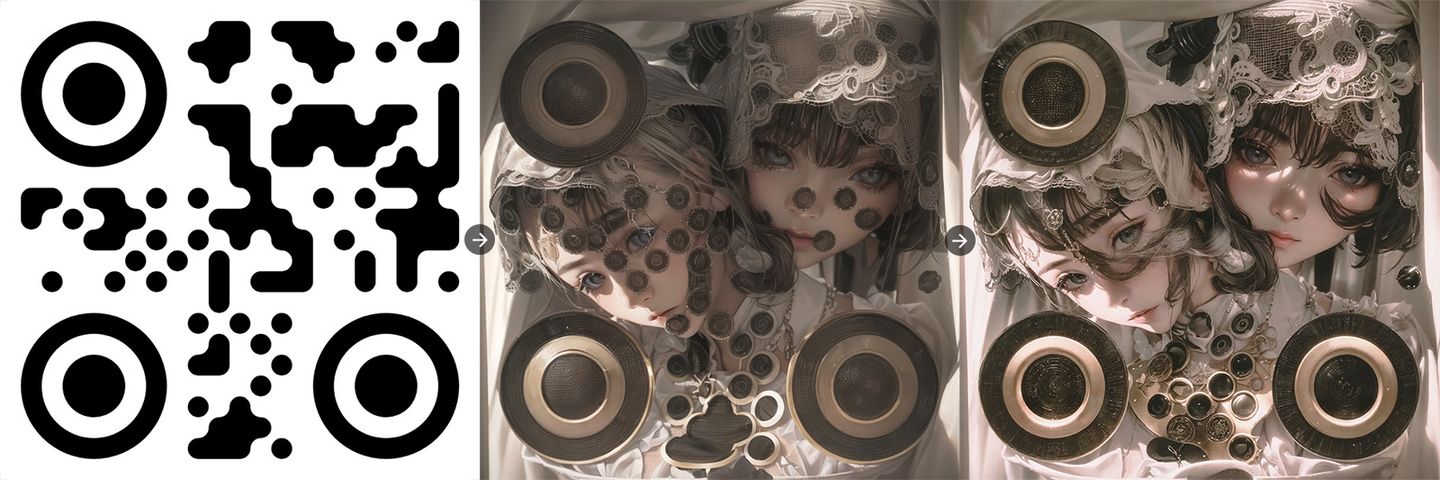
One thing I found quite important is that the generated QR Code we put in the ControlNet affects the image quite a lot. The basic square QR Code will lead to a more square-ish and blocky image. It’s worth to try with dots, rounded, or other styled QR Codes to see if they can help to generate a better image.
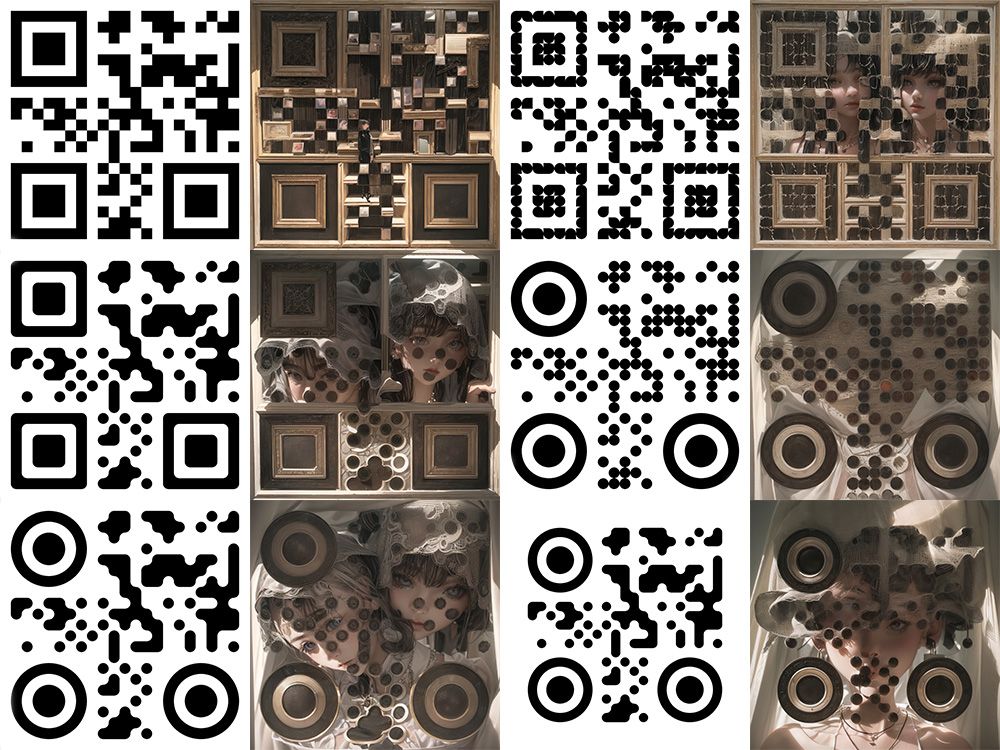
The images above are generated with the exactly same parameters, and the same seed, except the QR Code inputs has slightly different on the styles. You can see the difference is quite significant.
In addition, since the distribution of QR Codes is directly affecting the image’s composition. Sometimes we might find some patterns might be hard to work around. We would need to find different versions of the QR Code to find a better fit to the image we want. If you are familiar with QR Code enough, you might know there is a step in QR Code generated called Mask Pattern. There are in total 8 different kind of patterns can apply to the QR Code that serves the same content. Sadly, most of the generators do not provide the capability to change it. Ok, I’ll build it.
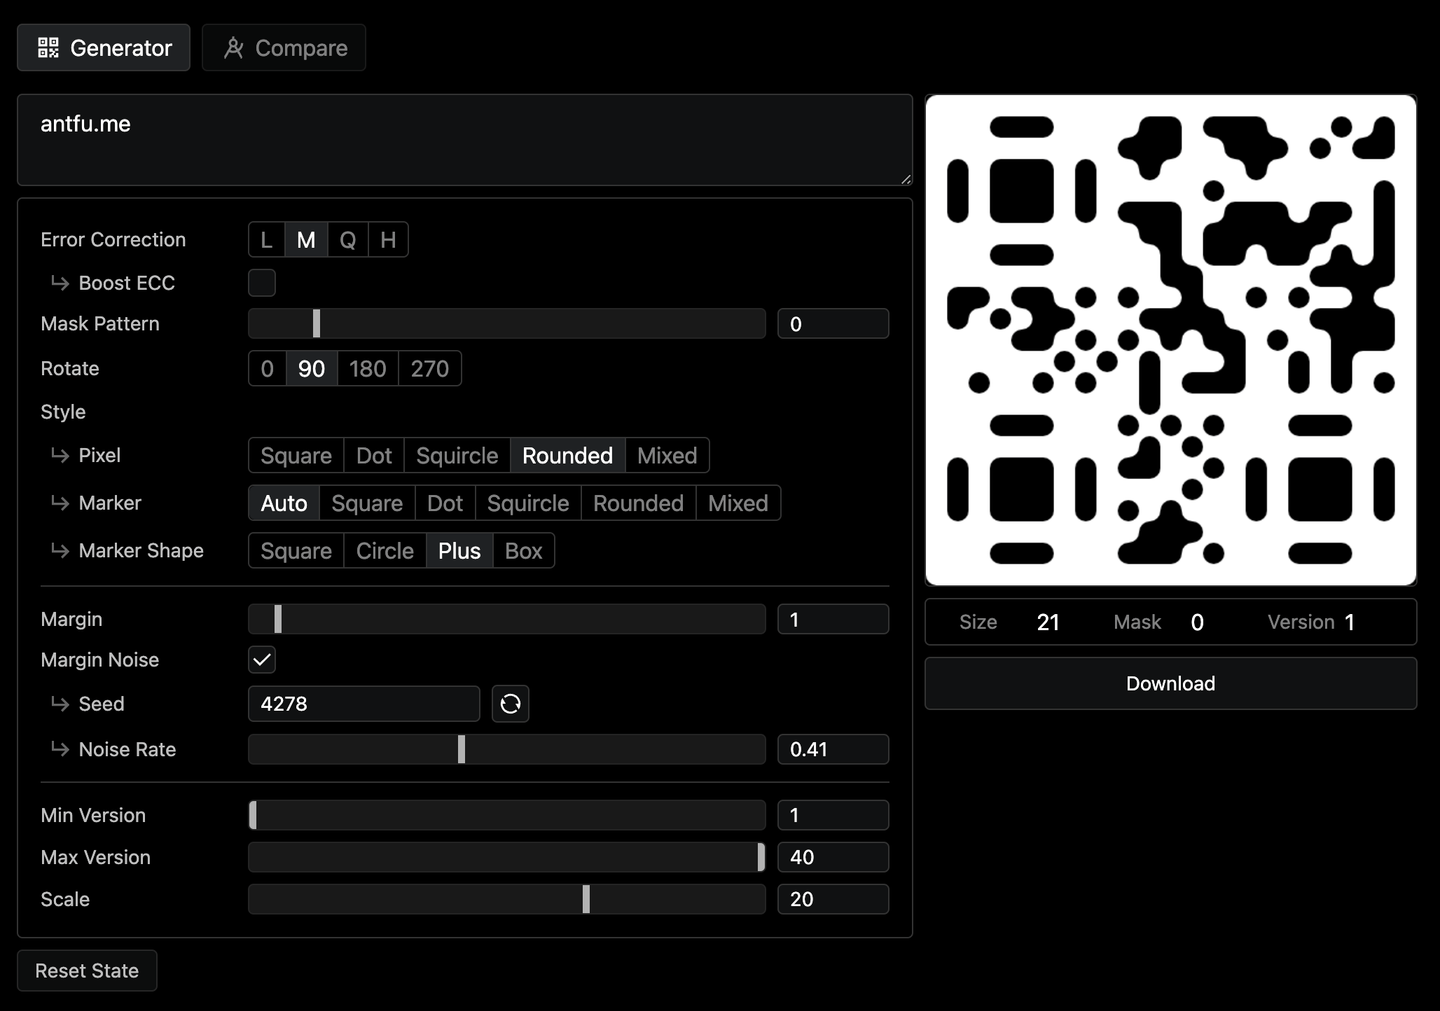
So specifically for this need, I built a QR generator based on QR Code Generator Library:
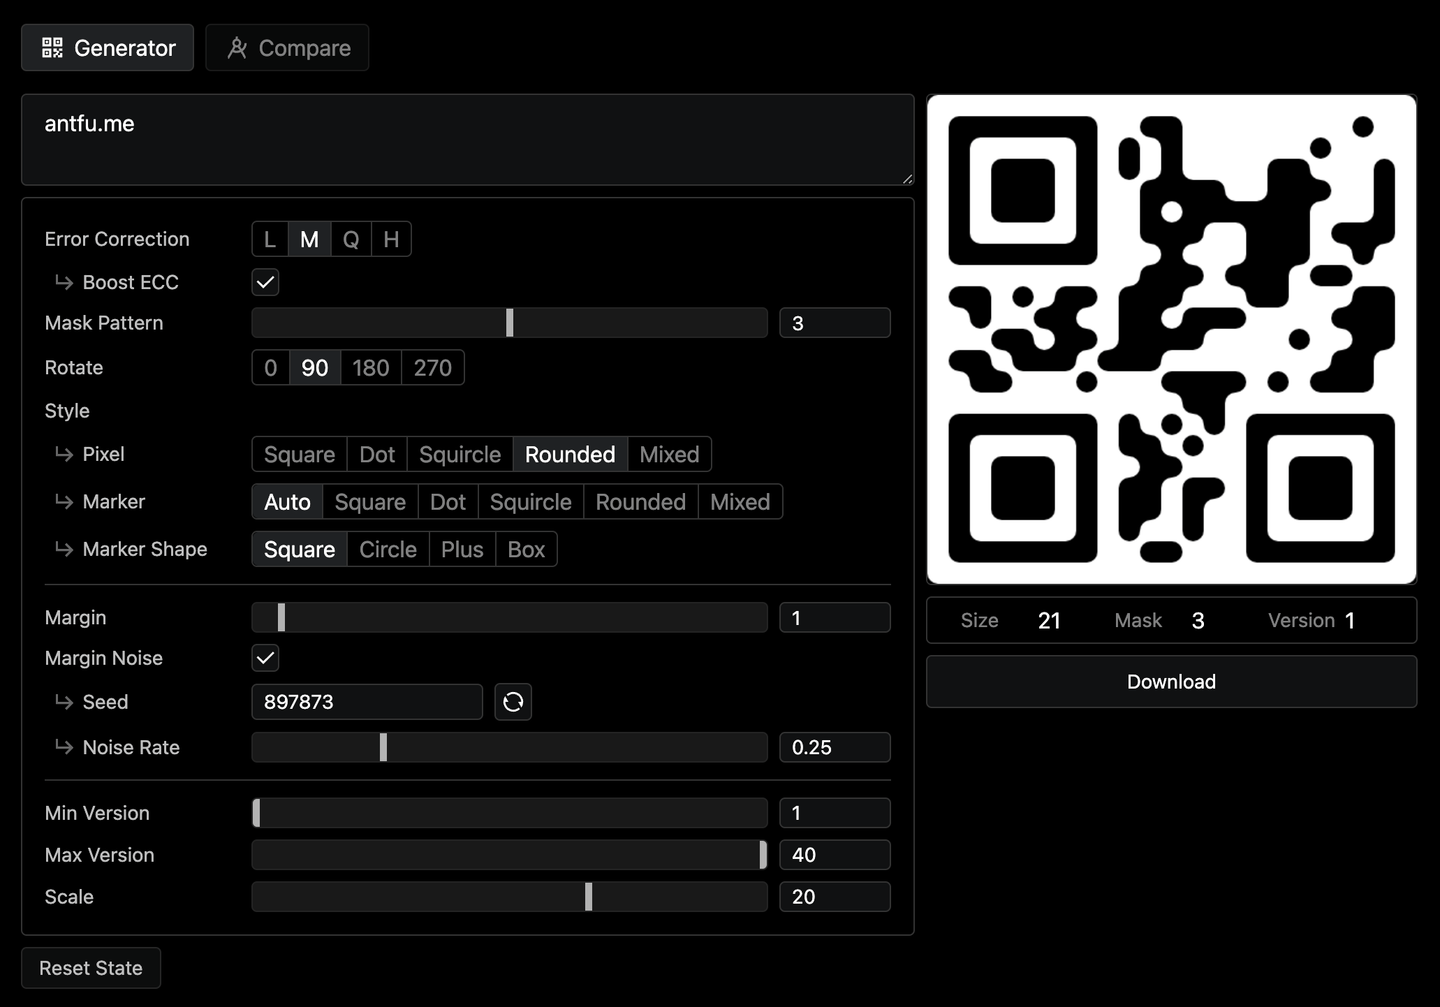
It offers me the full capability of the generation process. You can change the error correction level, mask pattern, version of the QR Code, and rotation to find a good distribution of the black & white spots. Also, it allows you to change the styles of the dots, or add some random noise to the border making the generated image more blended-in.
Generating the Images
Now we have the QR Code, we could move up to generate those images with Stable Diffusion and ControlNet. For detailed steps, please refer to my previous blog post.
Verify and Refine the QR Code
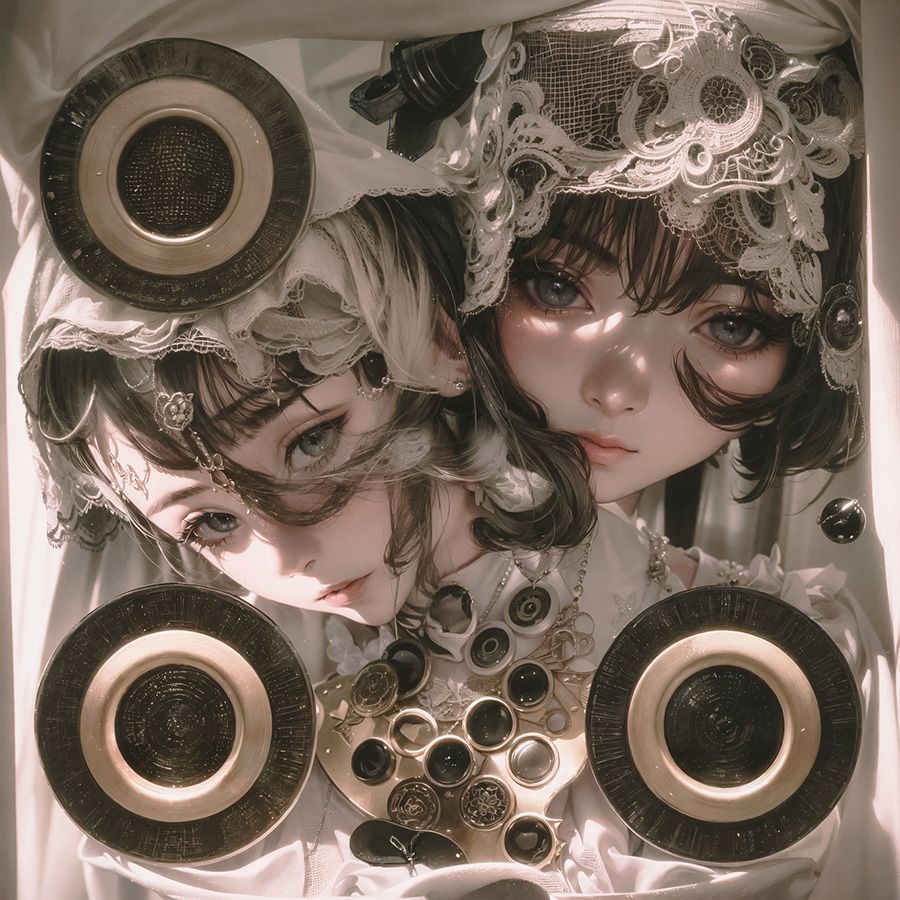
Running overnight, I now got like 200 images generated. Say I find one quite interesting and see some potential of being a good one. I will first use my phone to try to scan it. As mentioned earlier, you may not get lucky every time. This one is unfortunately not scannable.
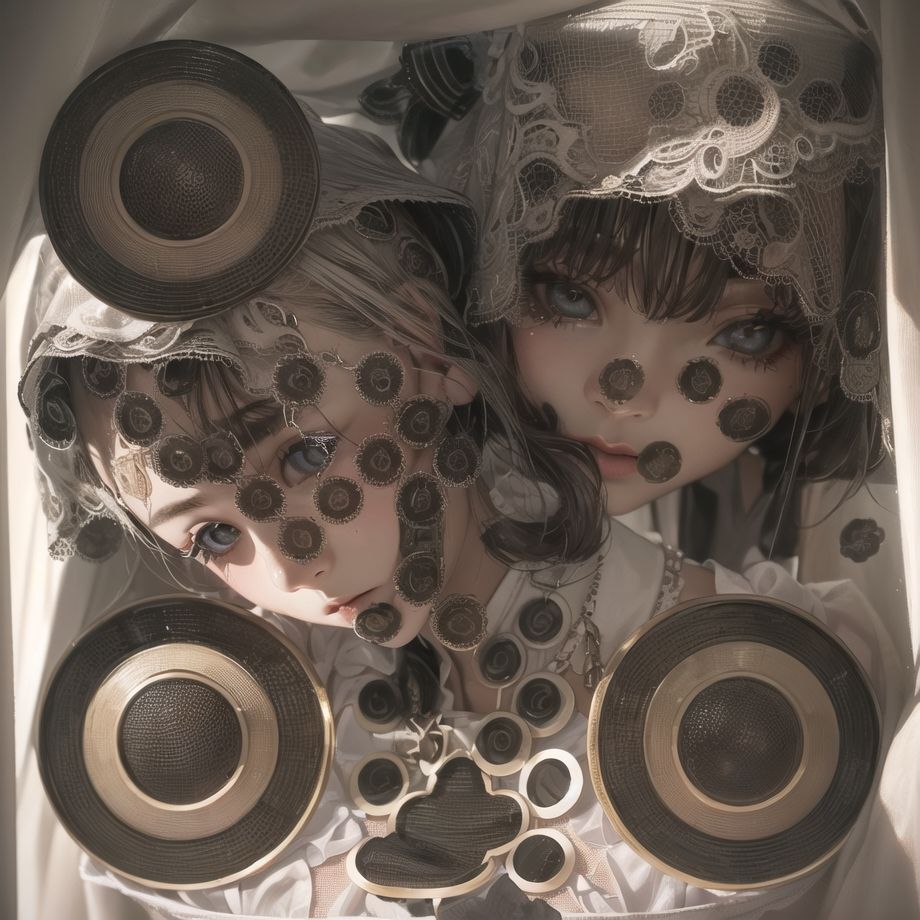
From a glance, we see there are quite some QR Code-ish spots in this image, which should make it recognizable by the scanner. But why not? Let’s find out why:
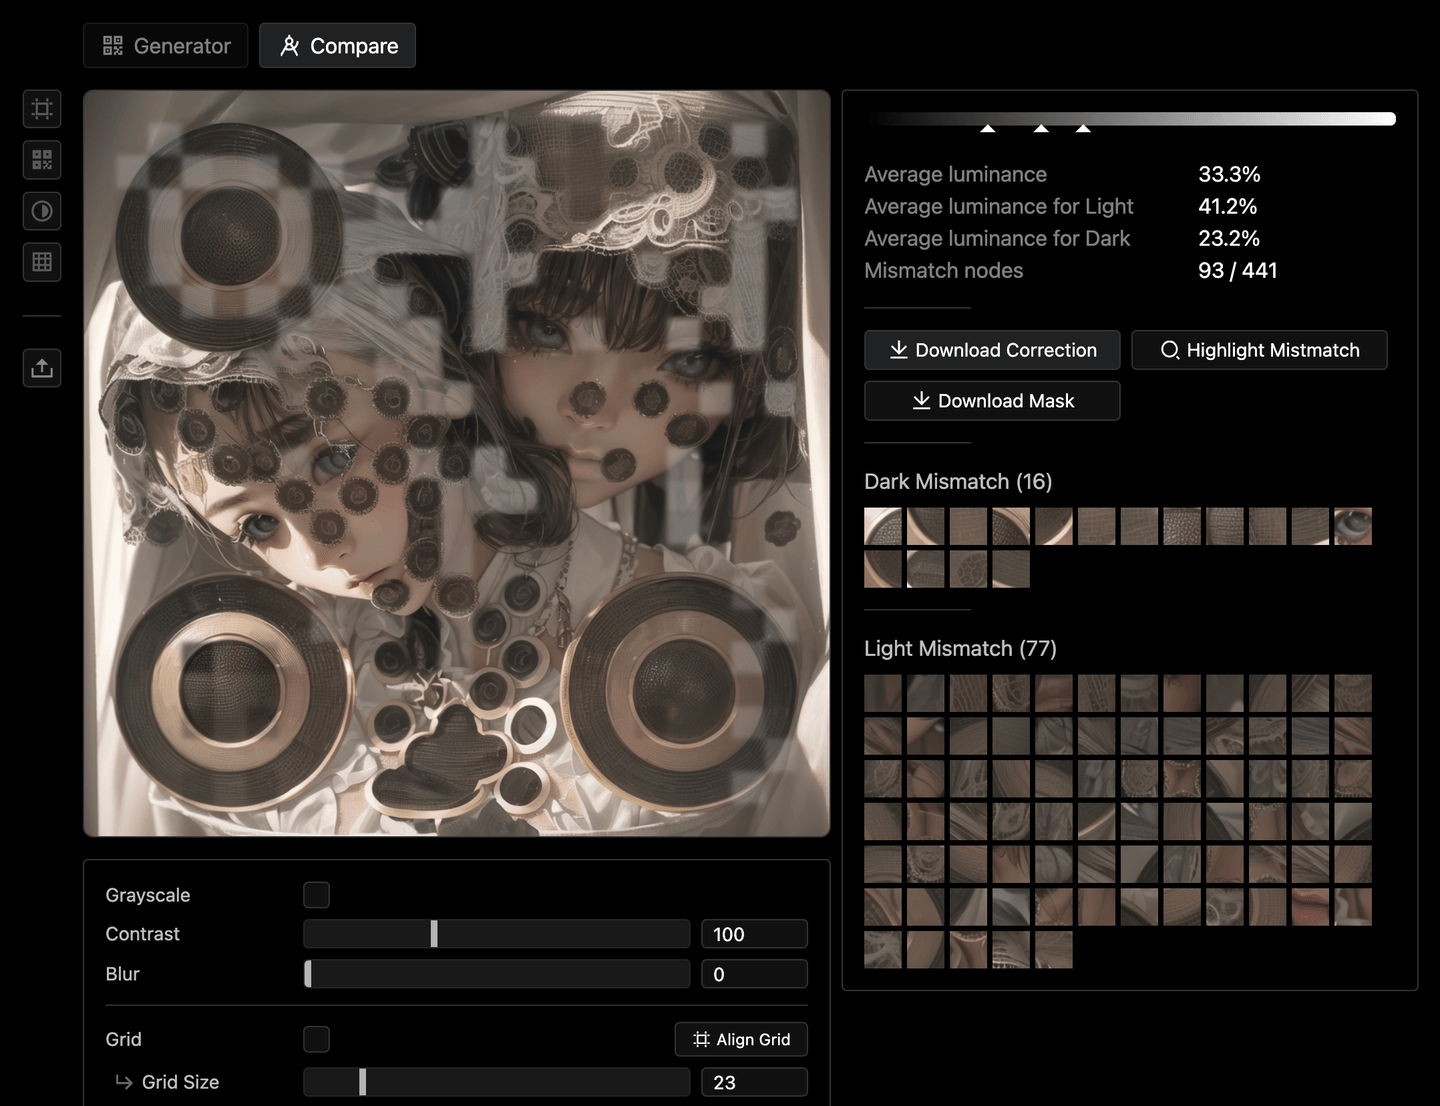
Using the Compare tab of the toolkit, upload both the generated image and the original QR Code, tweak the grid size, and then we could see the mismatched spots and inspect the nodes.
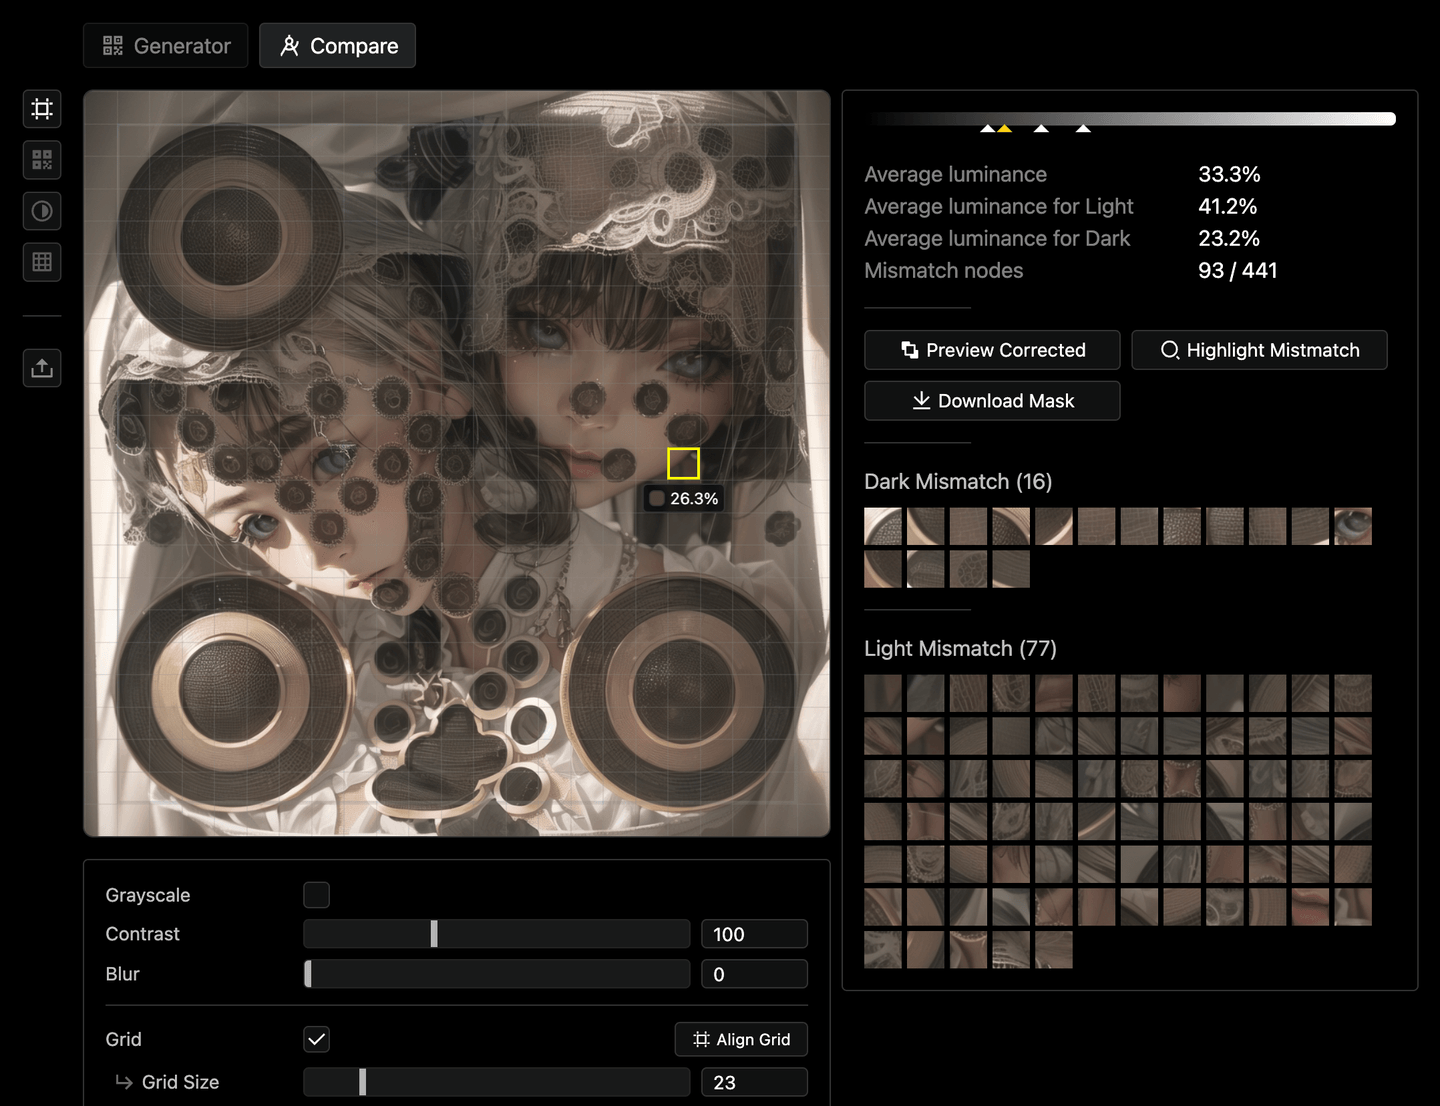
We can see that the image is not scannable because we have quite a lot of mismatches, saying that some parts of the image might not have enough contrast. Hover on the Highlight Mismatch button, we can see the mismatched spots highlighted:
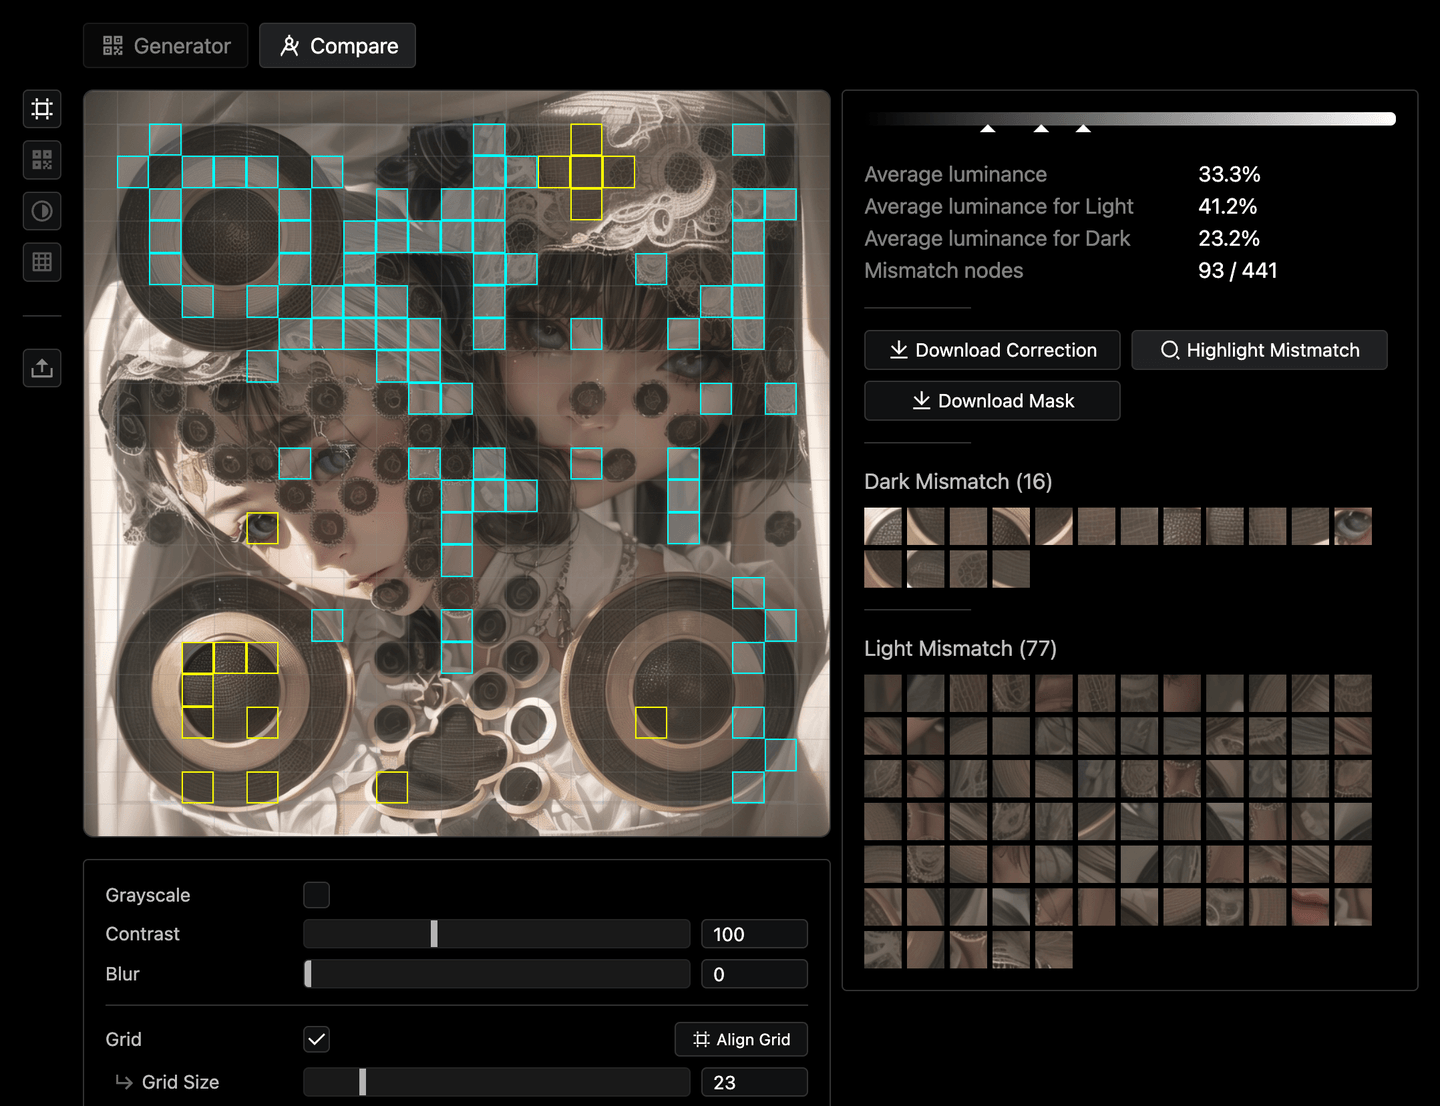
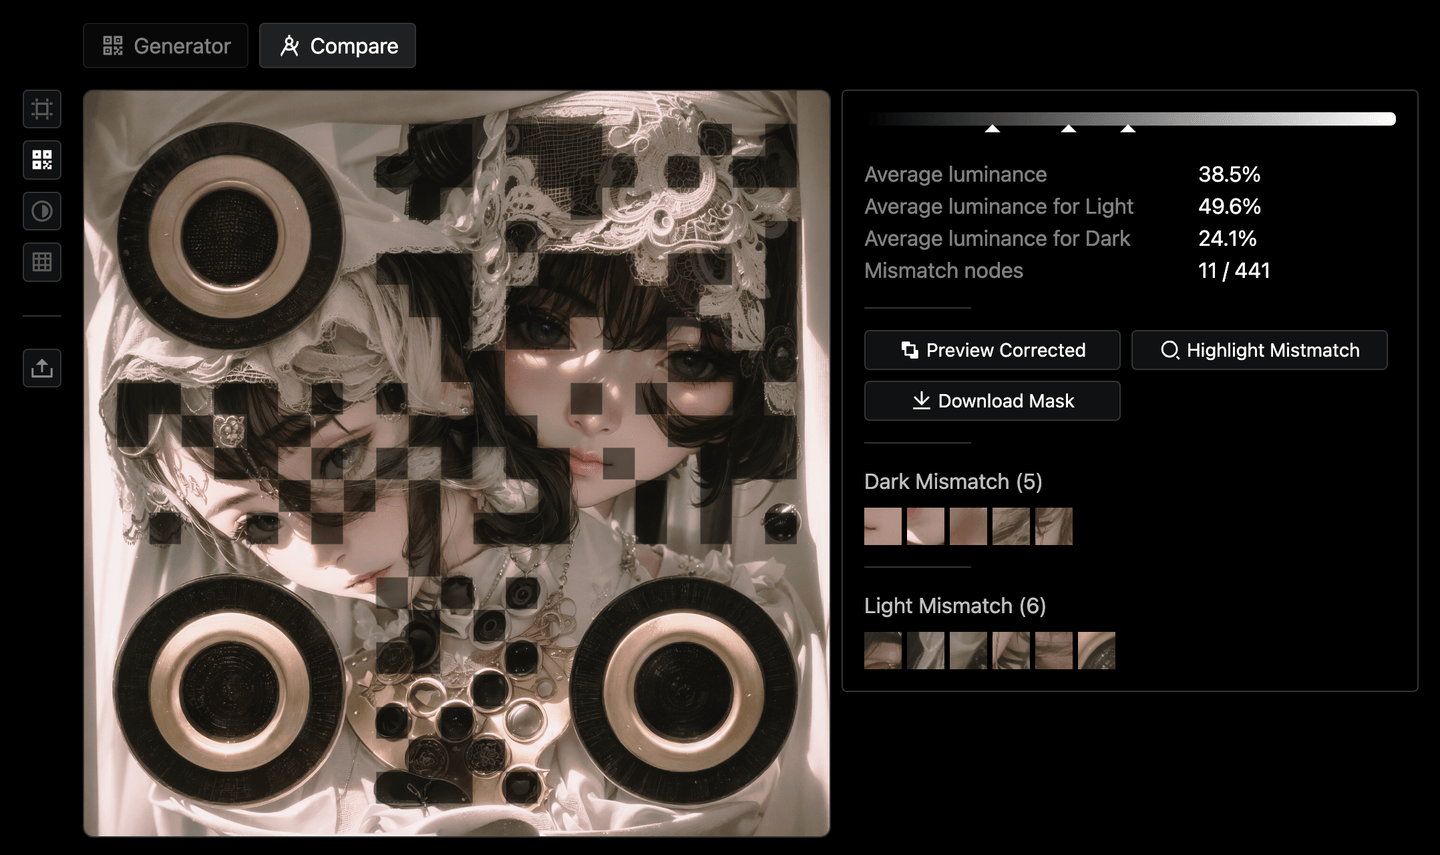
It seems the top half part of the image is a bit too dark and makes the scanner hard to distinguish. We can also try to increase the image contrast to see how it would look like in the scanner:
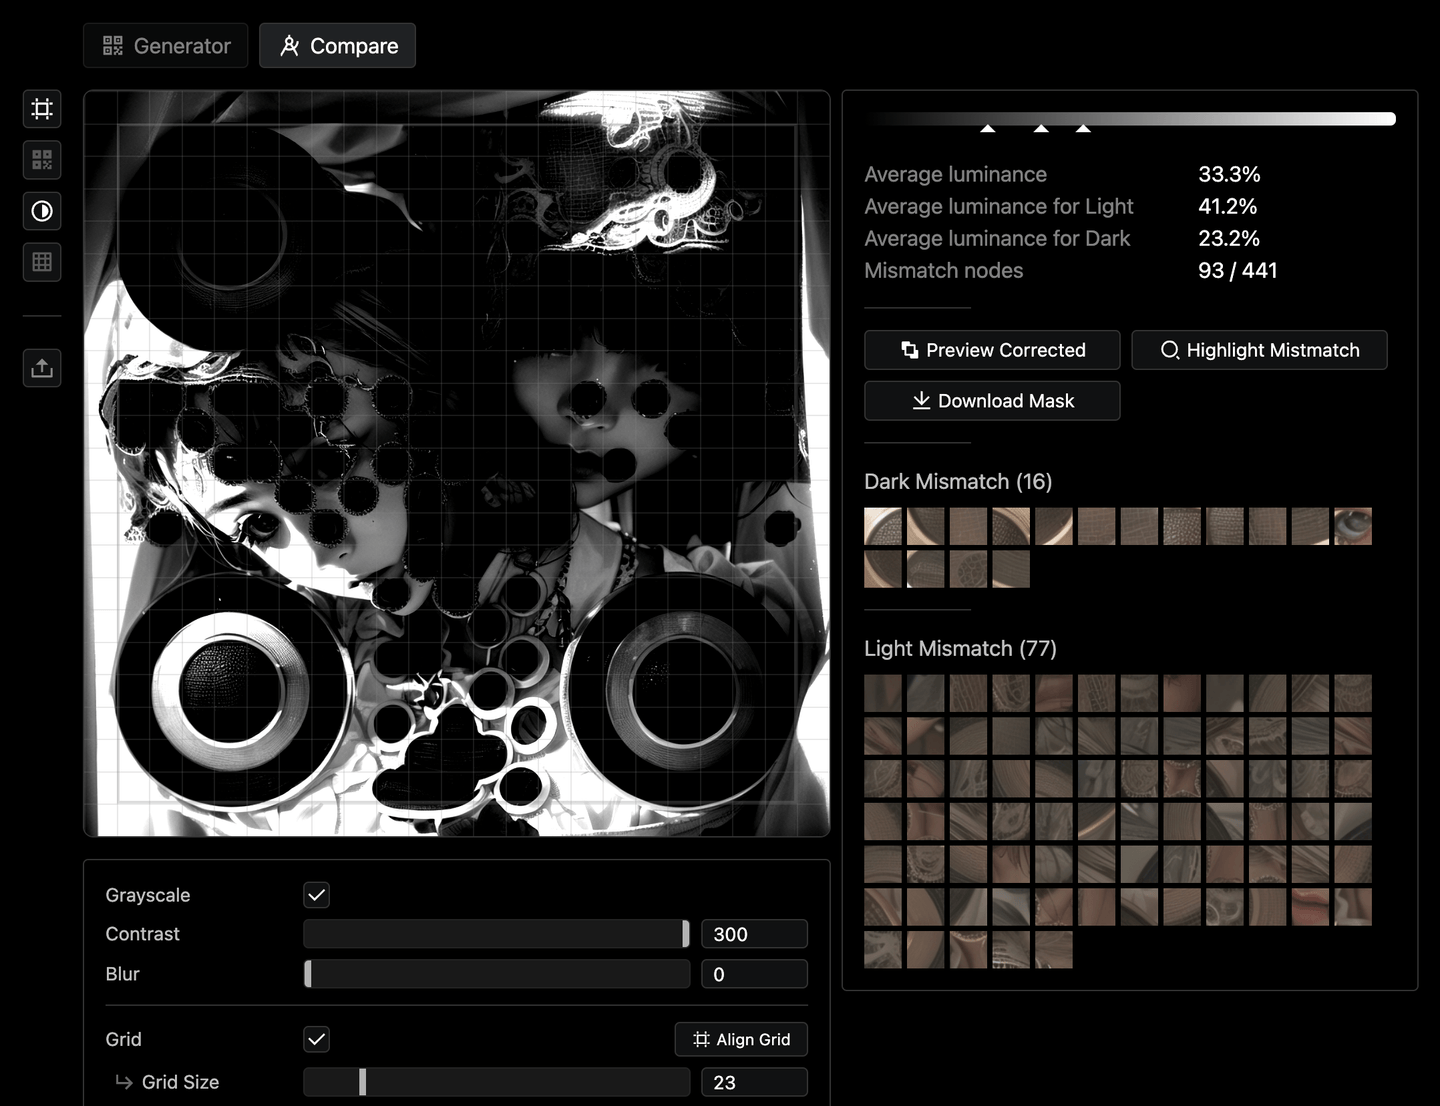
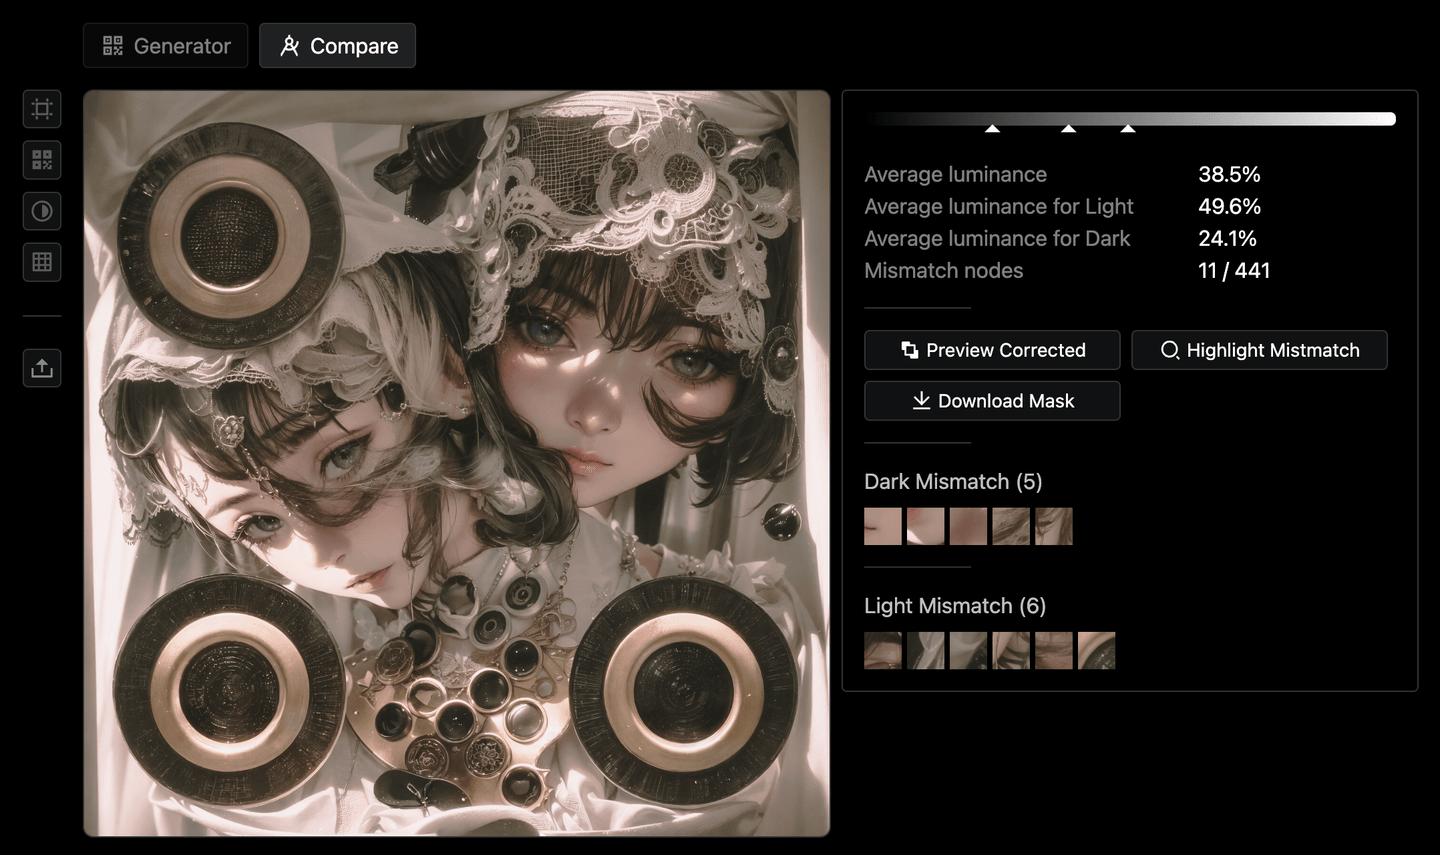
Now it’s quite clear what’s the problem. Then how can we fix it? You can then try to hover on the Preview Corrected button, to see what needs to be changed:
It will lighten the spots that are too dark, and darken the spots that are too bright. Then you see this image immediately becomes scannable now!
It’s great but definitely not the final result we would end up with. We can download the correction overlay, or the mask from the toolkit, to use them on inpaint or fine-grained adjustment in Photoshop.
Final
After a few rounds of inpainting and adjustment, upscale to improve details, and now we have the final image as:
Put it back to the toolkit, we see that the mismatched spots are now reduced a lot! Some of the mismatches are actually made on purpose, since QR Code has the error correction capability allowing that.
In case you are interested, here you can see what it looks like when overlaid with the original QR Code:
It’s quite interesting to see how the QR Code is been distorted and blended as different parts of the image.
Hide the Markers
The current result is already surprisingly good to me. The only thing that is missing probably is that the position makers do not blend very well, but I guess that’s kinda the limitation. When I was about to call it a day and go to bed, thinking about the possibility of making the QR Code makers less obvious, I saw in classic.qrbtf.com (created by the creator that came up with the AI QR Code idea), there is a style call SP-1 that has a "Plus shape" style of the position markers. It looks much less artificial than the squared or double-circle ones. I didn’t know it would also work for the scanner, so I think it might be worth a try.

So I implemented it in my generator, and it looks like this:
As you can see, the marker looks much less distinguishable from the other data points (be aware it also make the code less scannable). It might be worth trying as the control net input to see if it can generate better images. But since we already have a pretty good one, let’s use the new QR Code to redraw the markers.
So doing the inpainting process again using the new QR Code, and a few more editing, we have the final result as:
Even though I made it step by step, it’s still mind-blowing to see the final result looks like this but still scannable! 🤯
Bonus Tip: Distort the QR
Since we found the QR Code input affects the output image quite significantly. In another way of thinking, instead of refining the generated image in the post, maybe we can also try to manipulate the QR Code itself before sending it to the model.
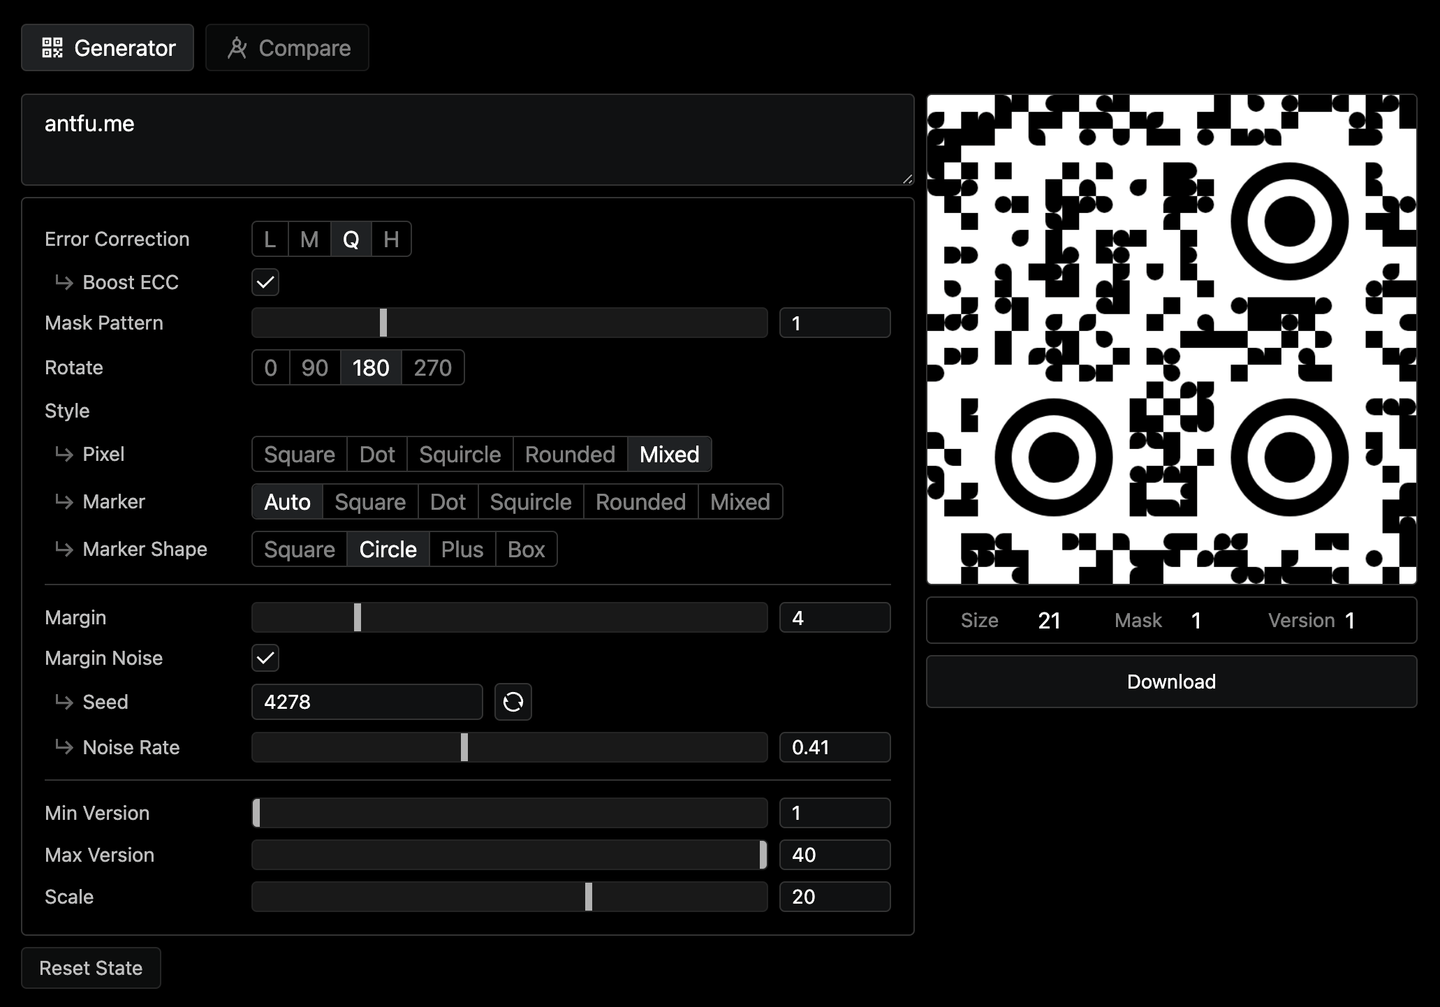
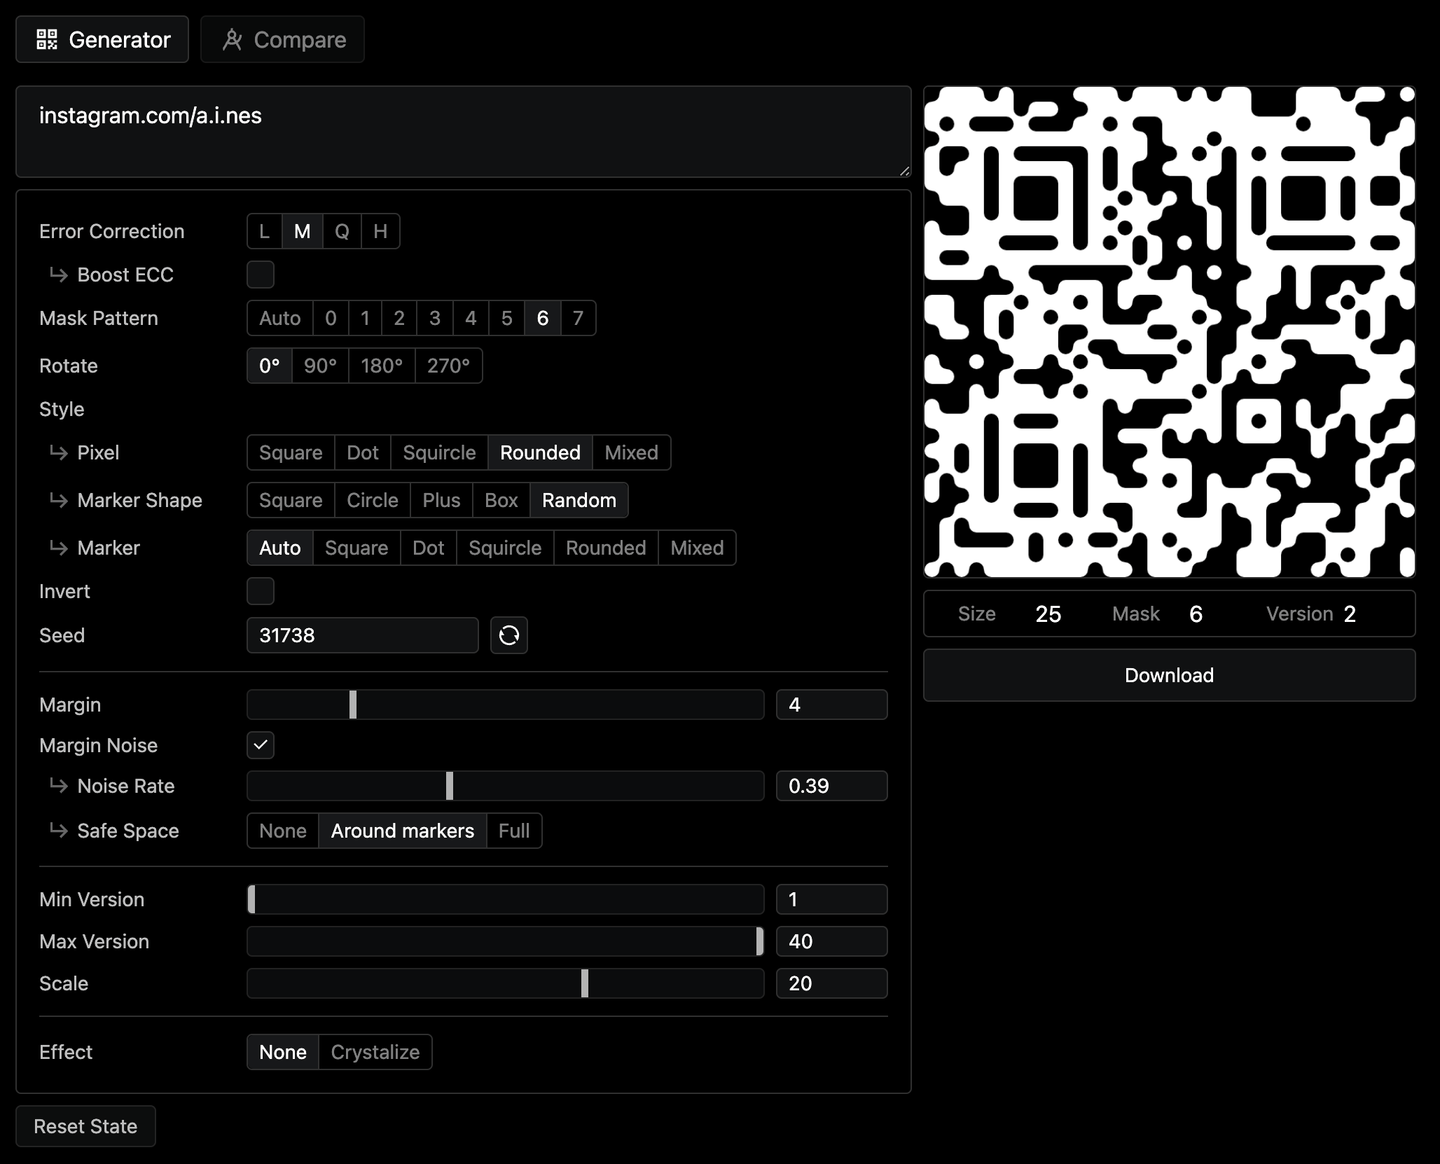
For example, we could use the generator to try different patterns and configurations, to generate a better distribution of the data points. Adding some noise in the margin, making the position makers more randomized, and rounding up the hard edges to reduce the blocky feeling. We could have:
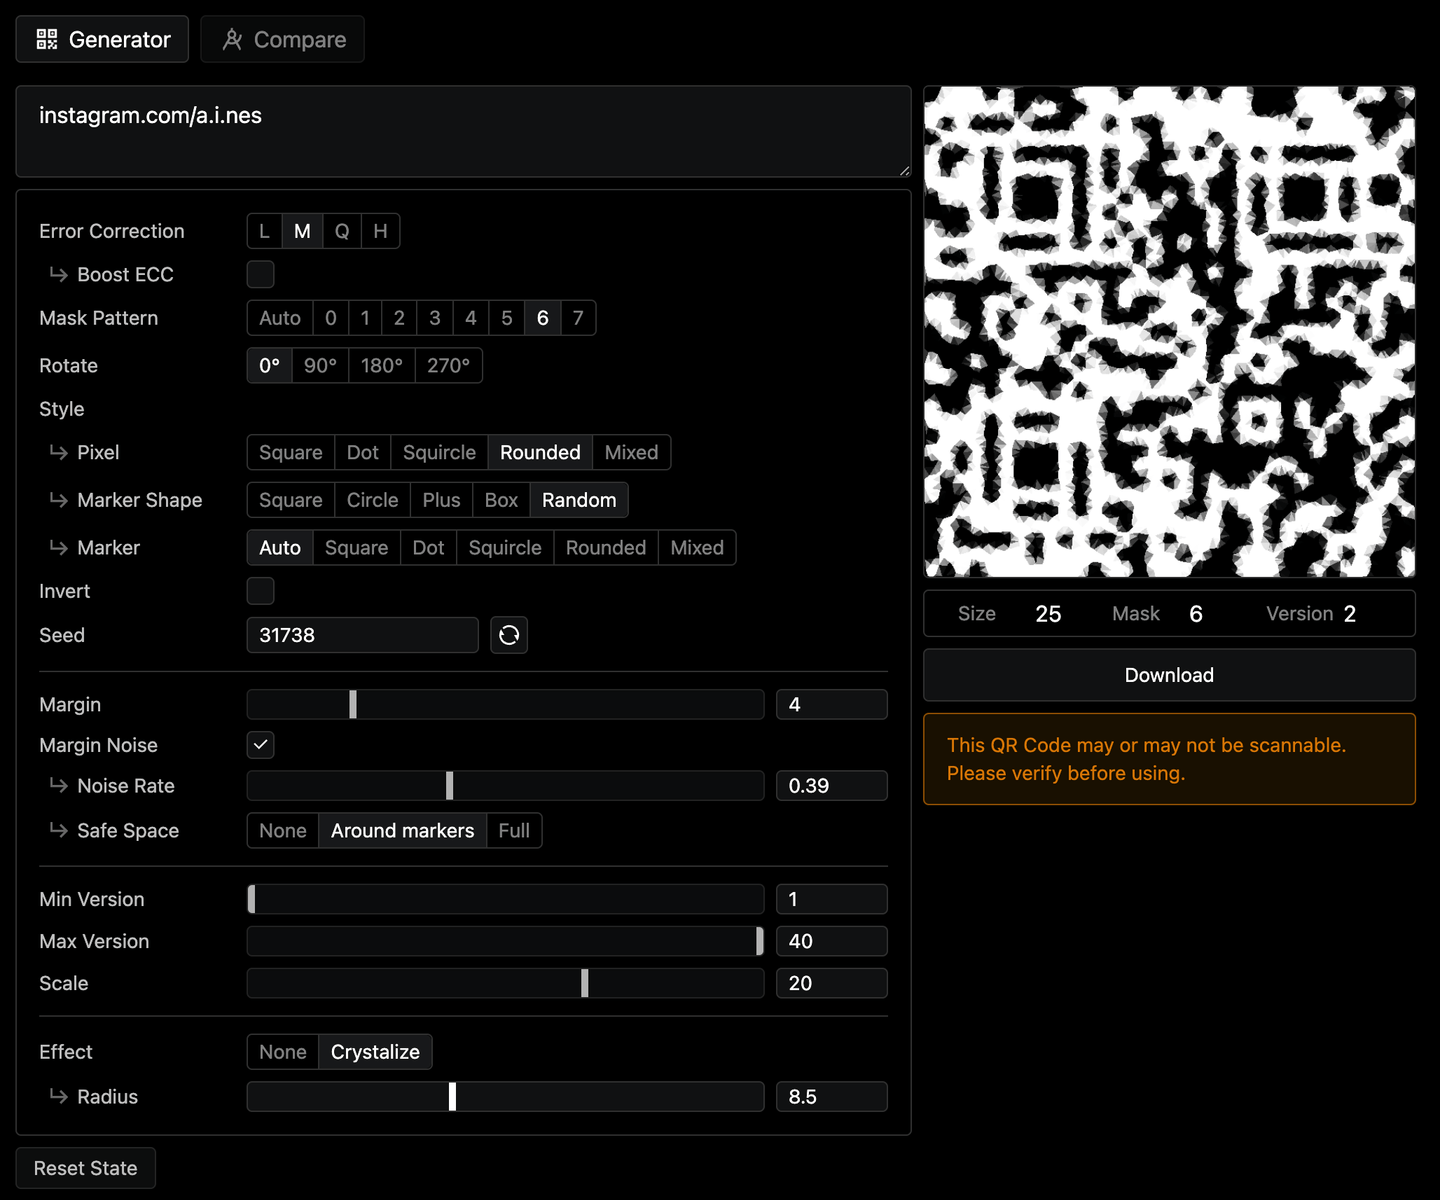
Then I started to think about what more we could do. So I tried to play filter effects in Photoshop. I found that the Distort > Ripple and Pixelate > Crystallize filters have quite a balanced distortion effect. So I reimplemented the crystallize effect in the toolkit, and we have:
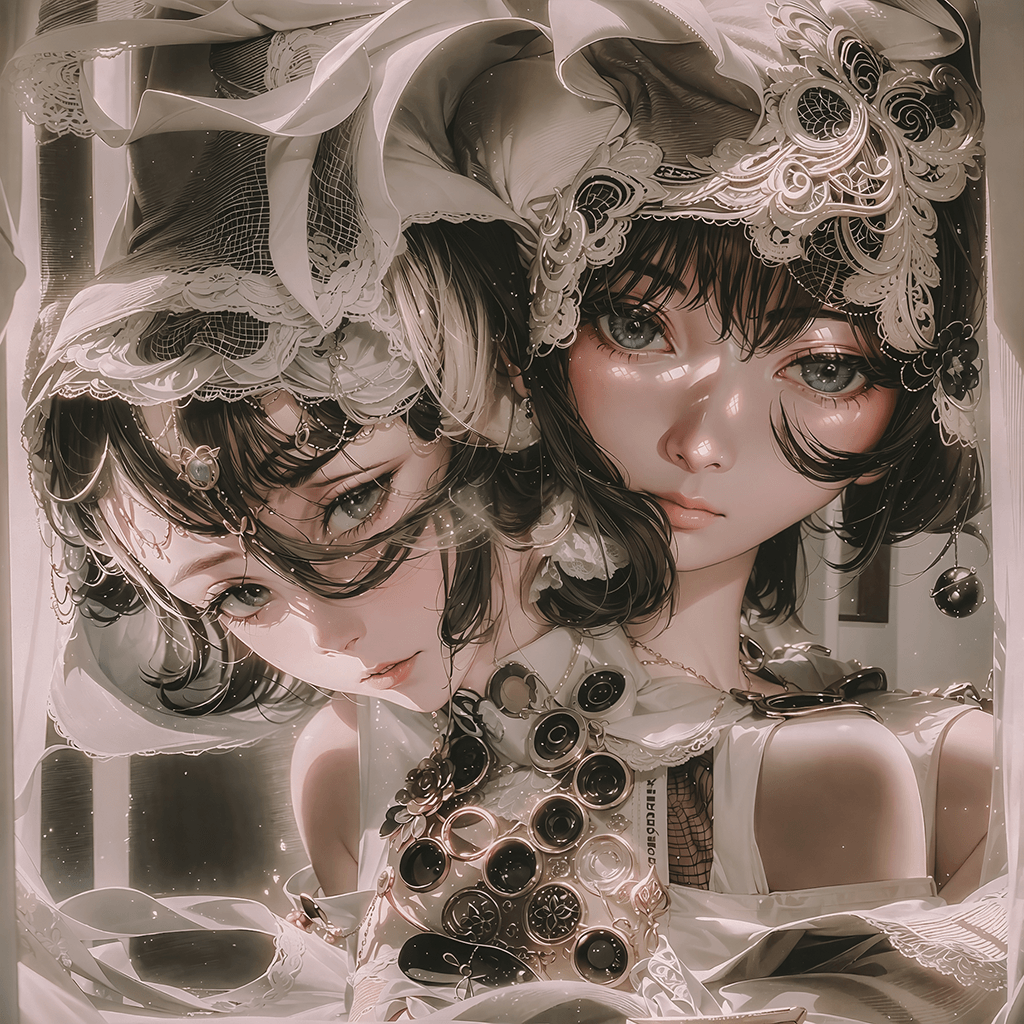
This further blurs the distinction between data points in human eyes. Sending it to the model, we get surprisingly very good results! Here is one of the examples:

Since input has much more soft edges with some shades, it makes the model being able to "guess" with items with more freedom. Hope you’ll find this tip useful! I will try to implement more useful effects in the toolkit as we go.
Conclusion
I hope you enjoy the walkthrough. If you just started doing AI QR Code, give a try to the tool and let me know if it helps. You can find the app and the source code below.
Anthony's QR Code Toolkitantfu/qrcode-toolkit
Join my Discord Server, share what you are working on, and let’s explore more together!
If you are interested in how I make such tools, I’d recommend continuing reading About Yak Shaving to learn the philosophy I follow when building tools. And if you like my work, consider sponsoring on GitHub Sponsor to support me in coming up with more ideas and tools.
Thank you and happy hacking!