Co-authored by Anthony Fu, 赛博迪克朗, wangcai and 代々木
This is a live document, will be updated as we learn more. Check back occasionally.
A summary of discussions made in QRBTF’s Discord server and Anthony’s Discord server. Thanks to everyone who participated in those servers.
What’s a Stable Diffusion QR Code?
Images that are generated with Stable Diffusion with QR Codes as ControlNet’s input, making the QR Code data points blend into the artwork while still being scannable by QR Code readers.
The original idea was created by the people behind QRBTF, and was first revealed on this reddit by nhciao.
QRBTF recently launched their online generation service for open beta. As of July 14th, 2023, they haven’t released their model or methodology yet, you can join their Discord server to follow the latest news.
The methods mentioned in this guide are based on community research and experiments.
How to Generate?
There are a few online services you can try, but this guide will focus on doing it locally on our own. You will need the basic knowledge of Stable Diffusion and ControlNet, a computer with a GPU (or a cloud GPU instance) to start.
If you are new to Stable Diffusion, we recommend reading these guides to get started:
Once you set them up, there are two approaches to generating a stylized QR Code:
Method A: Text to Image with ControlNet
Generate an image with prompts, and use ControlNet with a QR Code input to intervention the generation process.
- Stylistic QR Code with Stable Diffusion - by Anthony Fu
- Refining AI Generated QR Code - by Anthony Fu
- [Video] 二维码融合技术2.0 - by 赛博迪克朗
Method B: Image to Image
Use a QR Code image as input, and let Stable Diffusion redraw each part of the QR Code. Doesn’t require ControlNet.
- How to make a QR code with Stable Diffusion - by Andrew
Our Recommendation
We found that Method A, Text to Image approach produces much better results, and it’s easier to control the output. We will mostly focus on that approach in this guide.
ControlNet Models
Here are a few ControlNet models we found useful:
- QR Pattern
- QR Code Monster
- IoC Lab Control Net
- Brightness Model
- Illumination Model
See model comparison section for more details.
The Code is Not Scannable
Before going into details, let’s picture the goal of your QR Code first. Here are 3 typical approaches listed by @1r00t:
- Artistic code that scans 100% and is obvious but creative
- Code that is kind of hidden but with a bit of fiddling you get it
- Code that is completely hidden as a sort of secret message
All these approaches are viable. They are on a different balance between the art and the functionality. It’s better to have such expectations so you can tune your models, parameters and prompts accordingly.
Scanners
When the images are generated, we will use a QR Code scanner to verify if the code is scannable.
If your goal is to make a more blended-in QR Code, and you are okay with the code not being scannable by all QR Code readers, it’s better to use an error-tolerant scanner to verify. We recommend using iOS’s code scanner from the Control Center, or the scanner from WeChat to verify your QR Code. They are the most tolerant ones we found so far.
Meanwhile, if you failed to find a good scanner on your phone, or want to verify the QR Codes directly in your computer, we recently enrolled a new scanner in Anthony’s QR Toolkit, based on WeChat’s open sourced algorithm (Ported to WebAssembly, source code at antfu/qr-scanner-wechat).
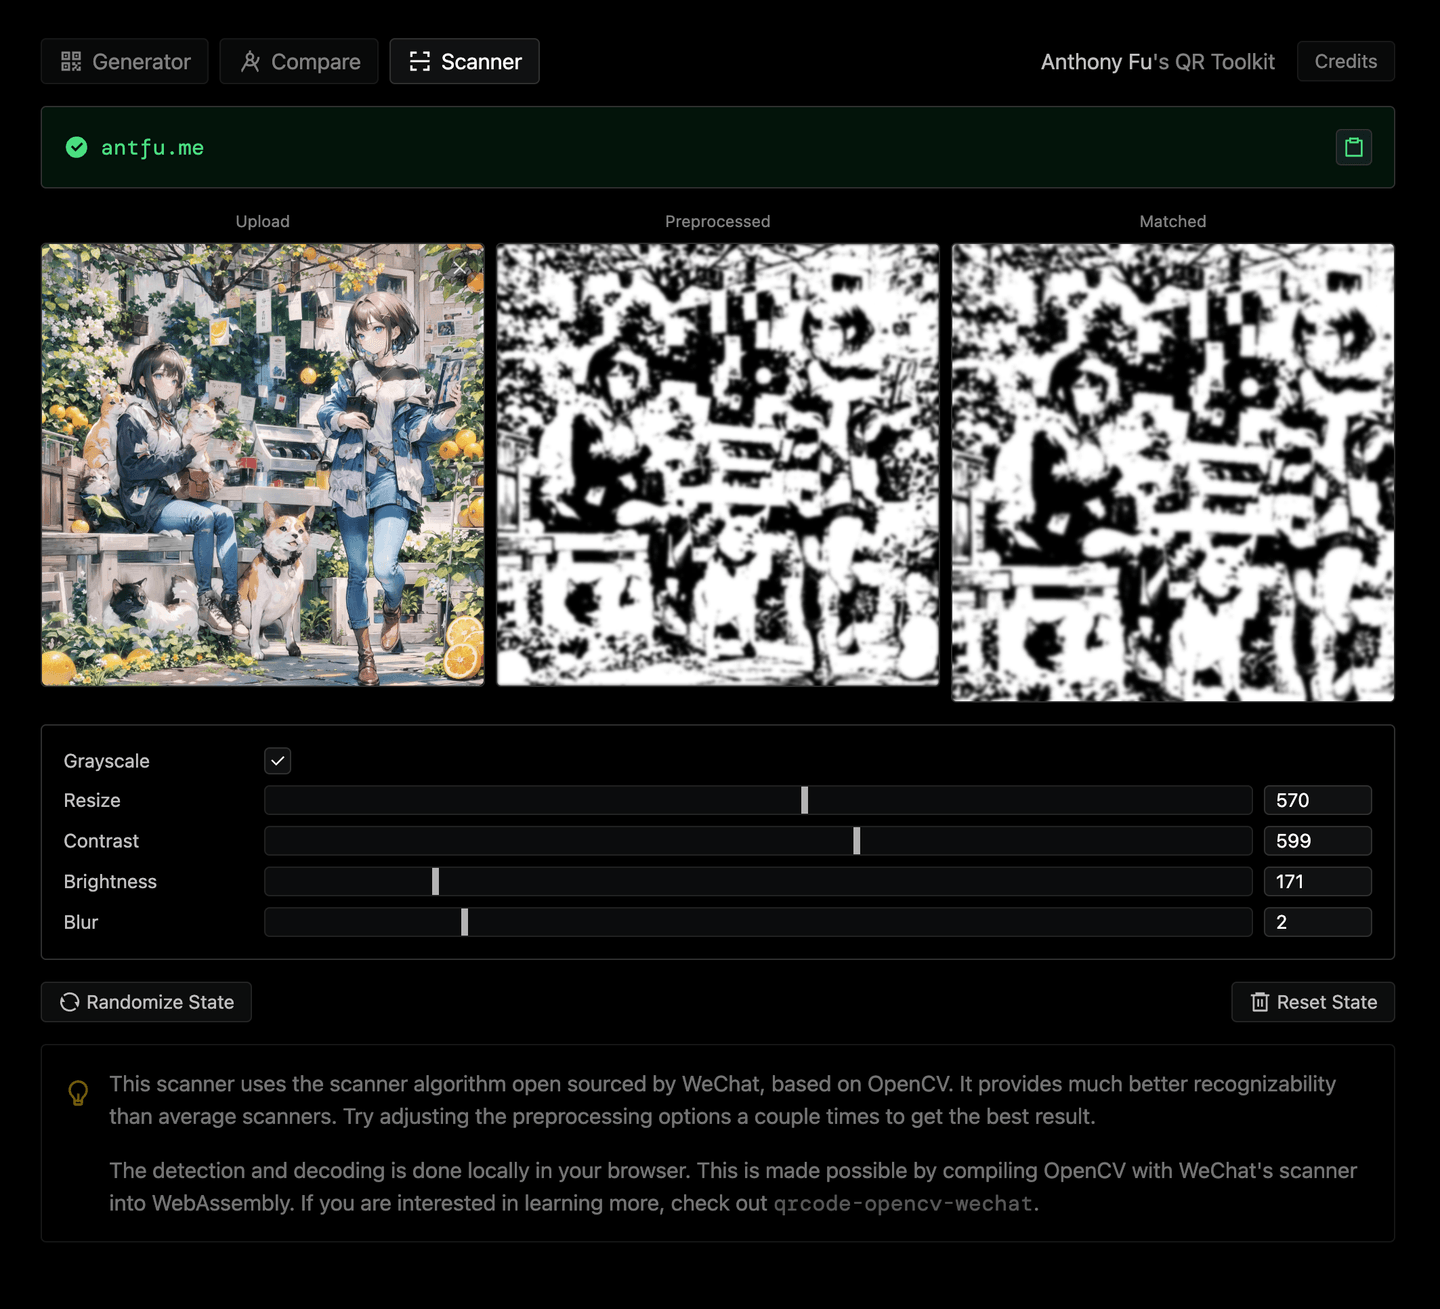
Compare with the Original QR Code
You can use Anthony’s QR Toolkit to compare the generated QR Code with the original one. It will show you the mismatches and help you to optimize the generation process.
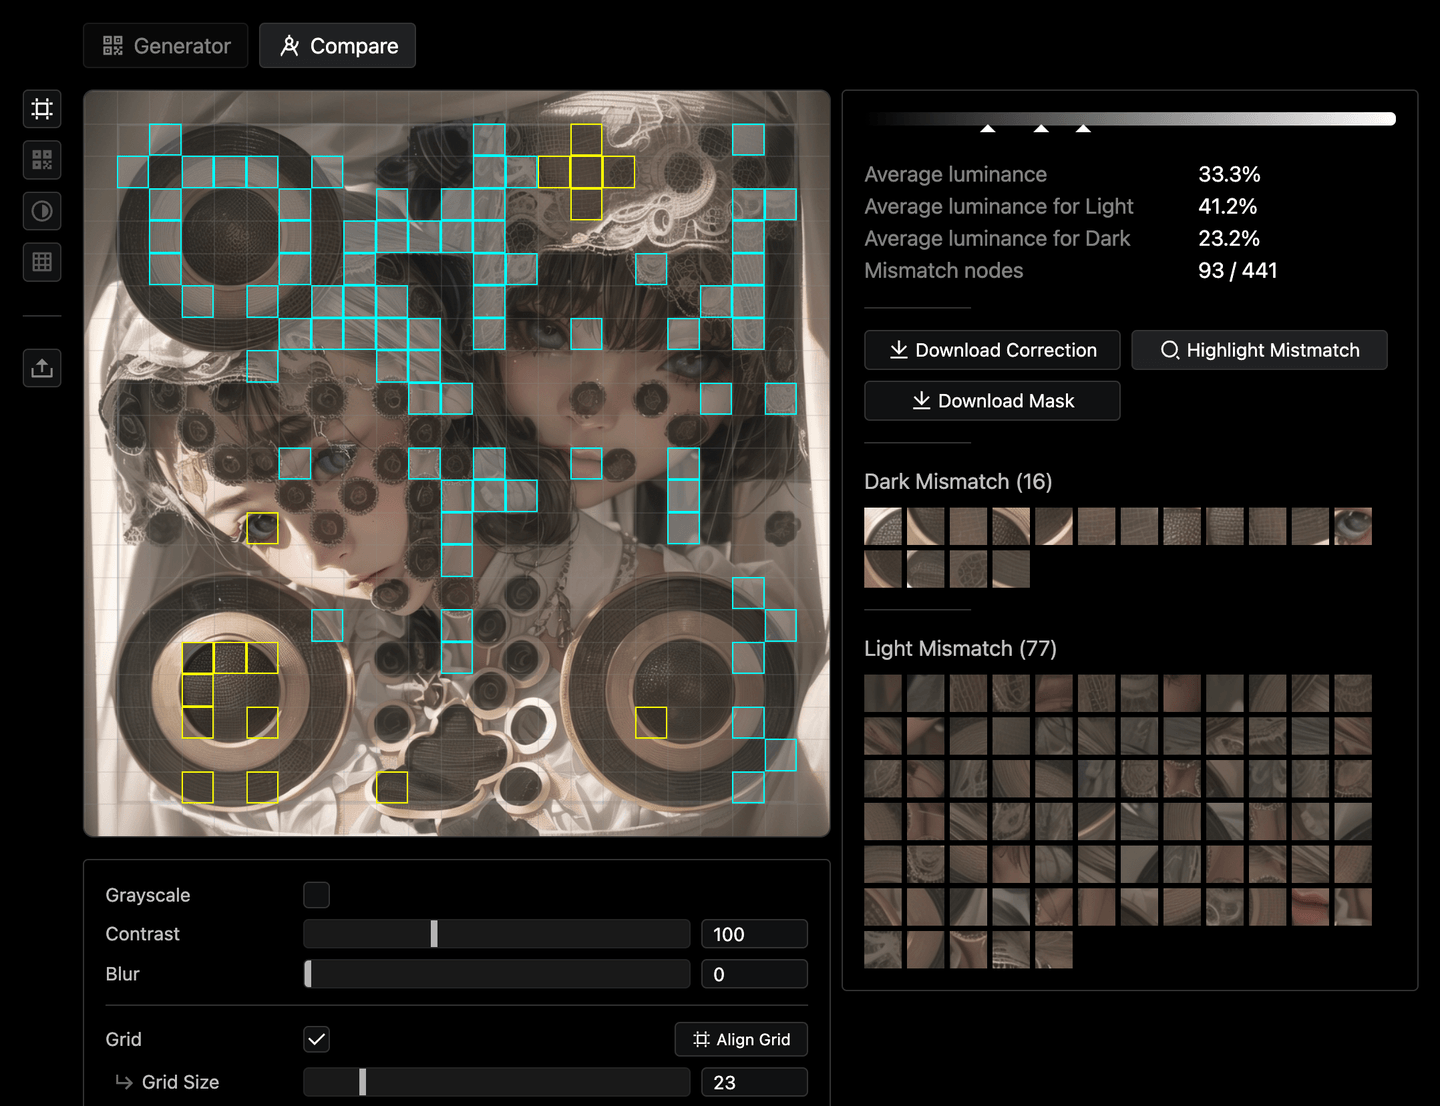
Read more about it in this post.
Parameters
ControlNet
The parameters of the ControlNet affect when and how the control is applied to the generation process.
- Control weight - The weight of the ControlNet. The higher the weight, the more the output will be affected by the ControlNet.
- Start control step - The percentage of the generation process when the ControlNet starts to take effect.
- End control step - The percentage of the generation process when the ControlNet stops taking effect.
The start control step will allow the prompts and the model to be creative before it knows the QR Code control exists. And the end control step will allow the model to try to blend the QR Code into the artwork more (but will make the code less scannable).
It requires a few trials and errors to find the right balance so that the ControlNet has enough time to intervene, but not too much so the code can be artistic enough.
Different models might have different strengths of the control, so you might need to adjust the parameters accordingly. It’s better to read their instructions first.
Model Comparison
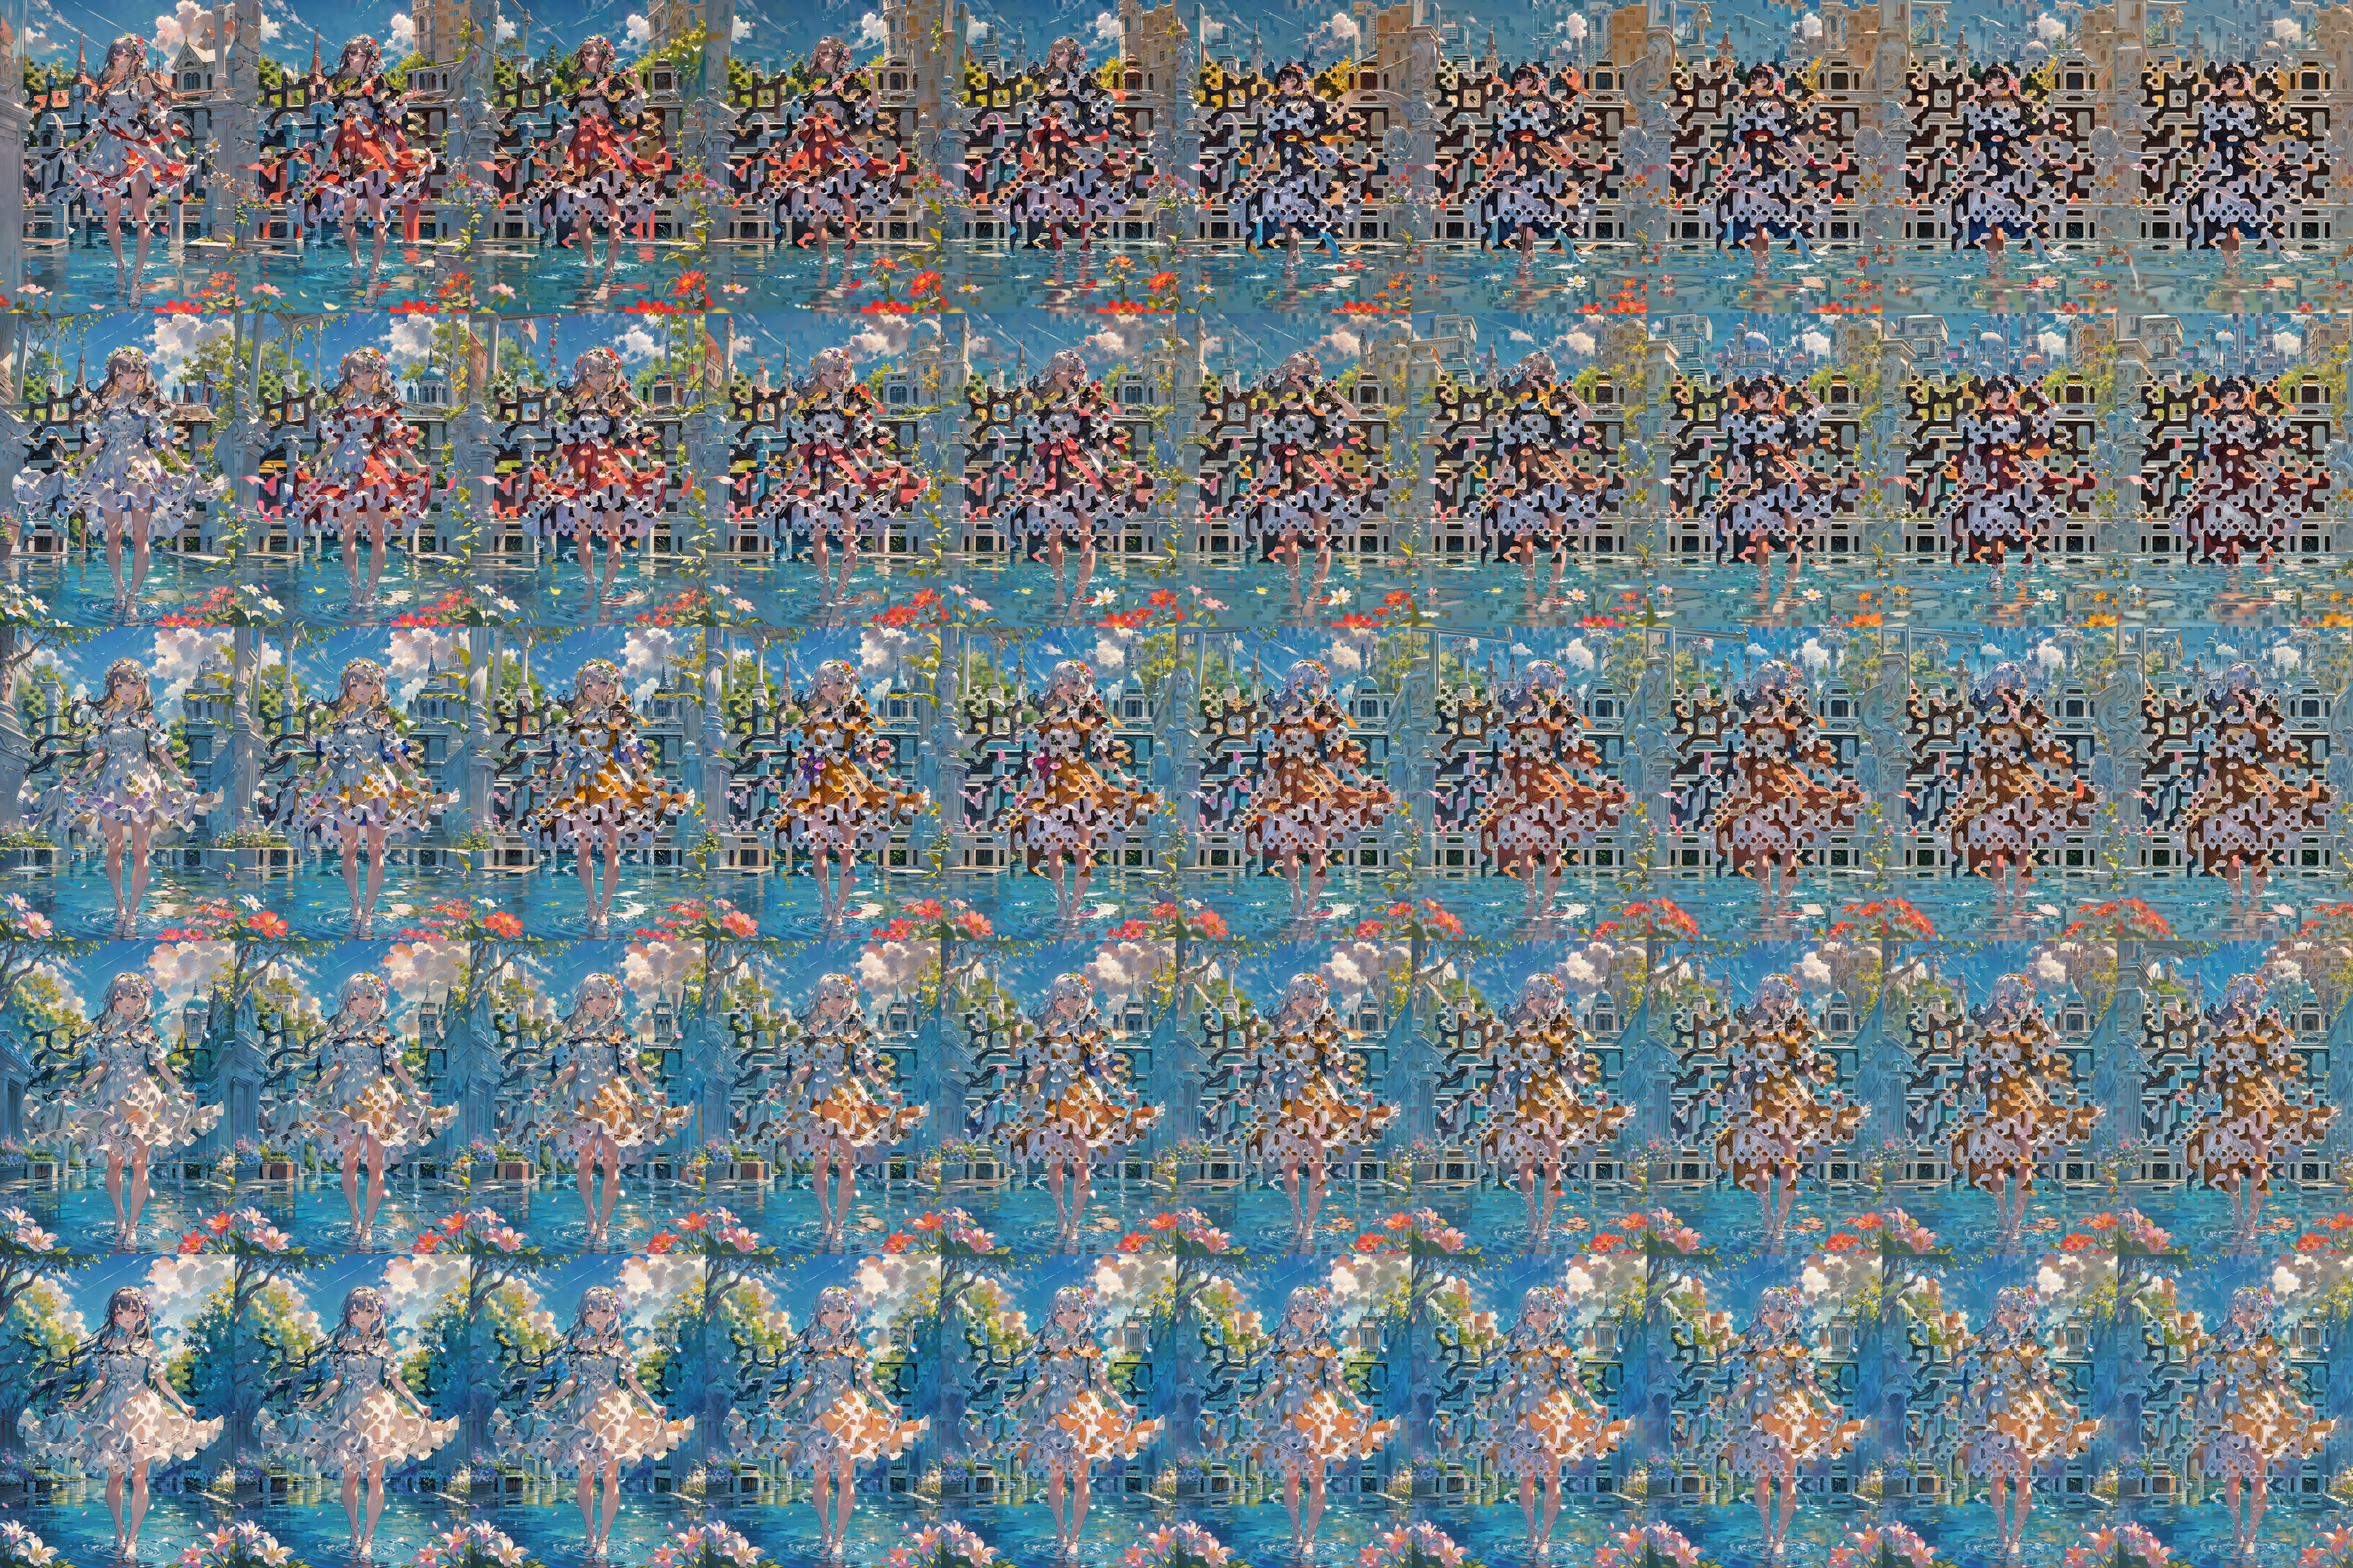
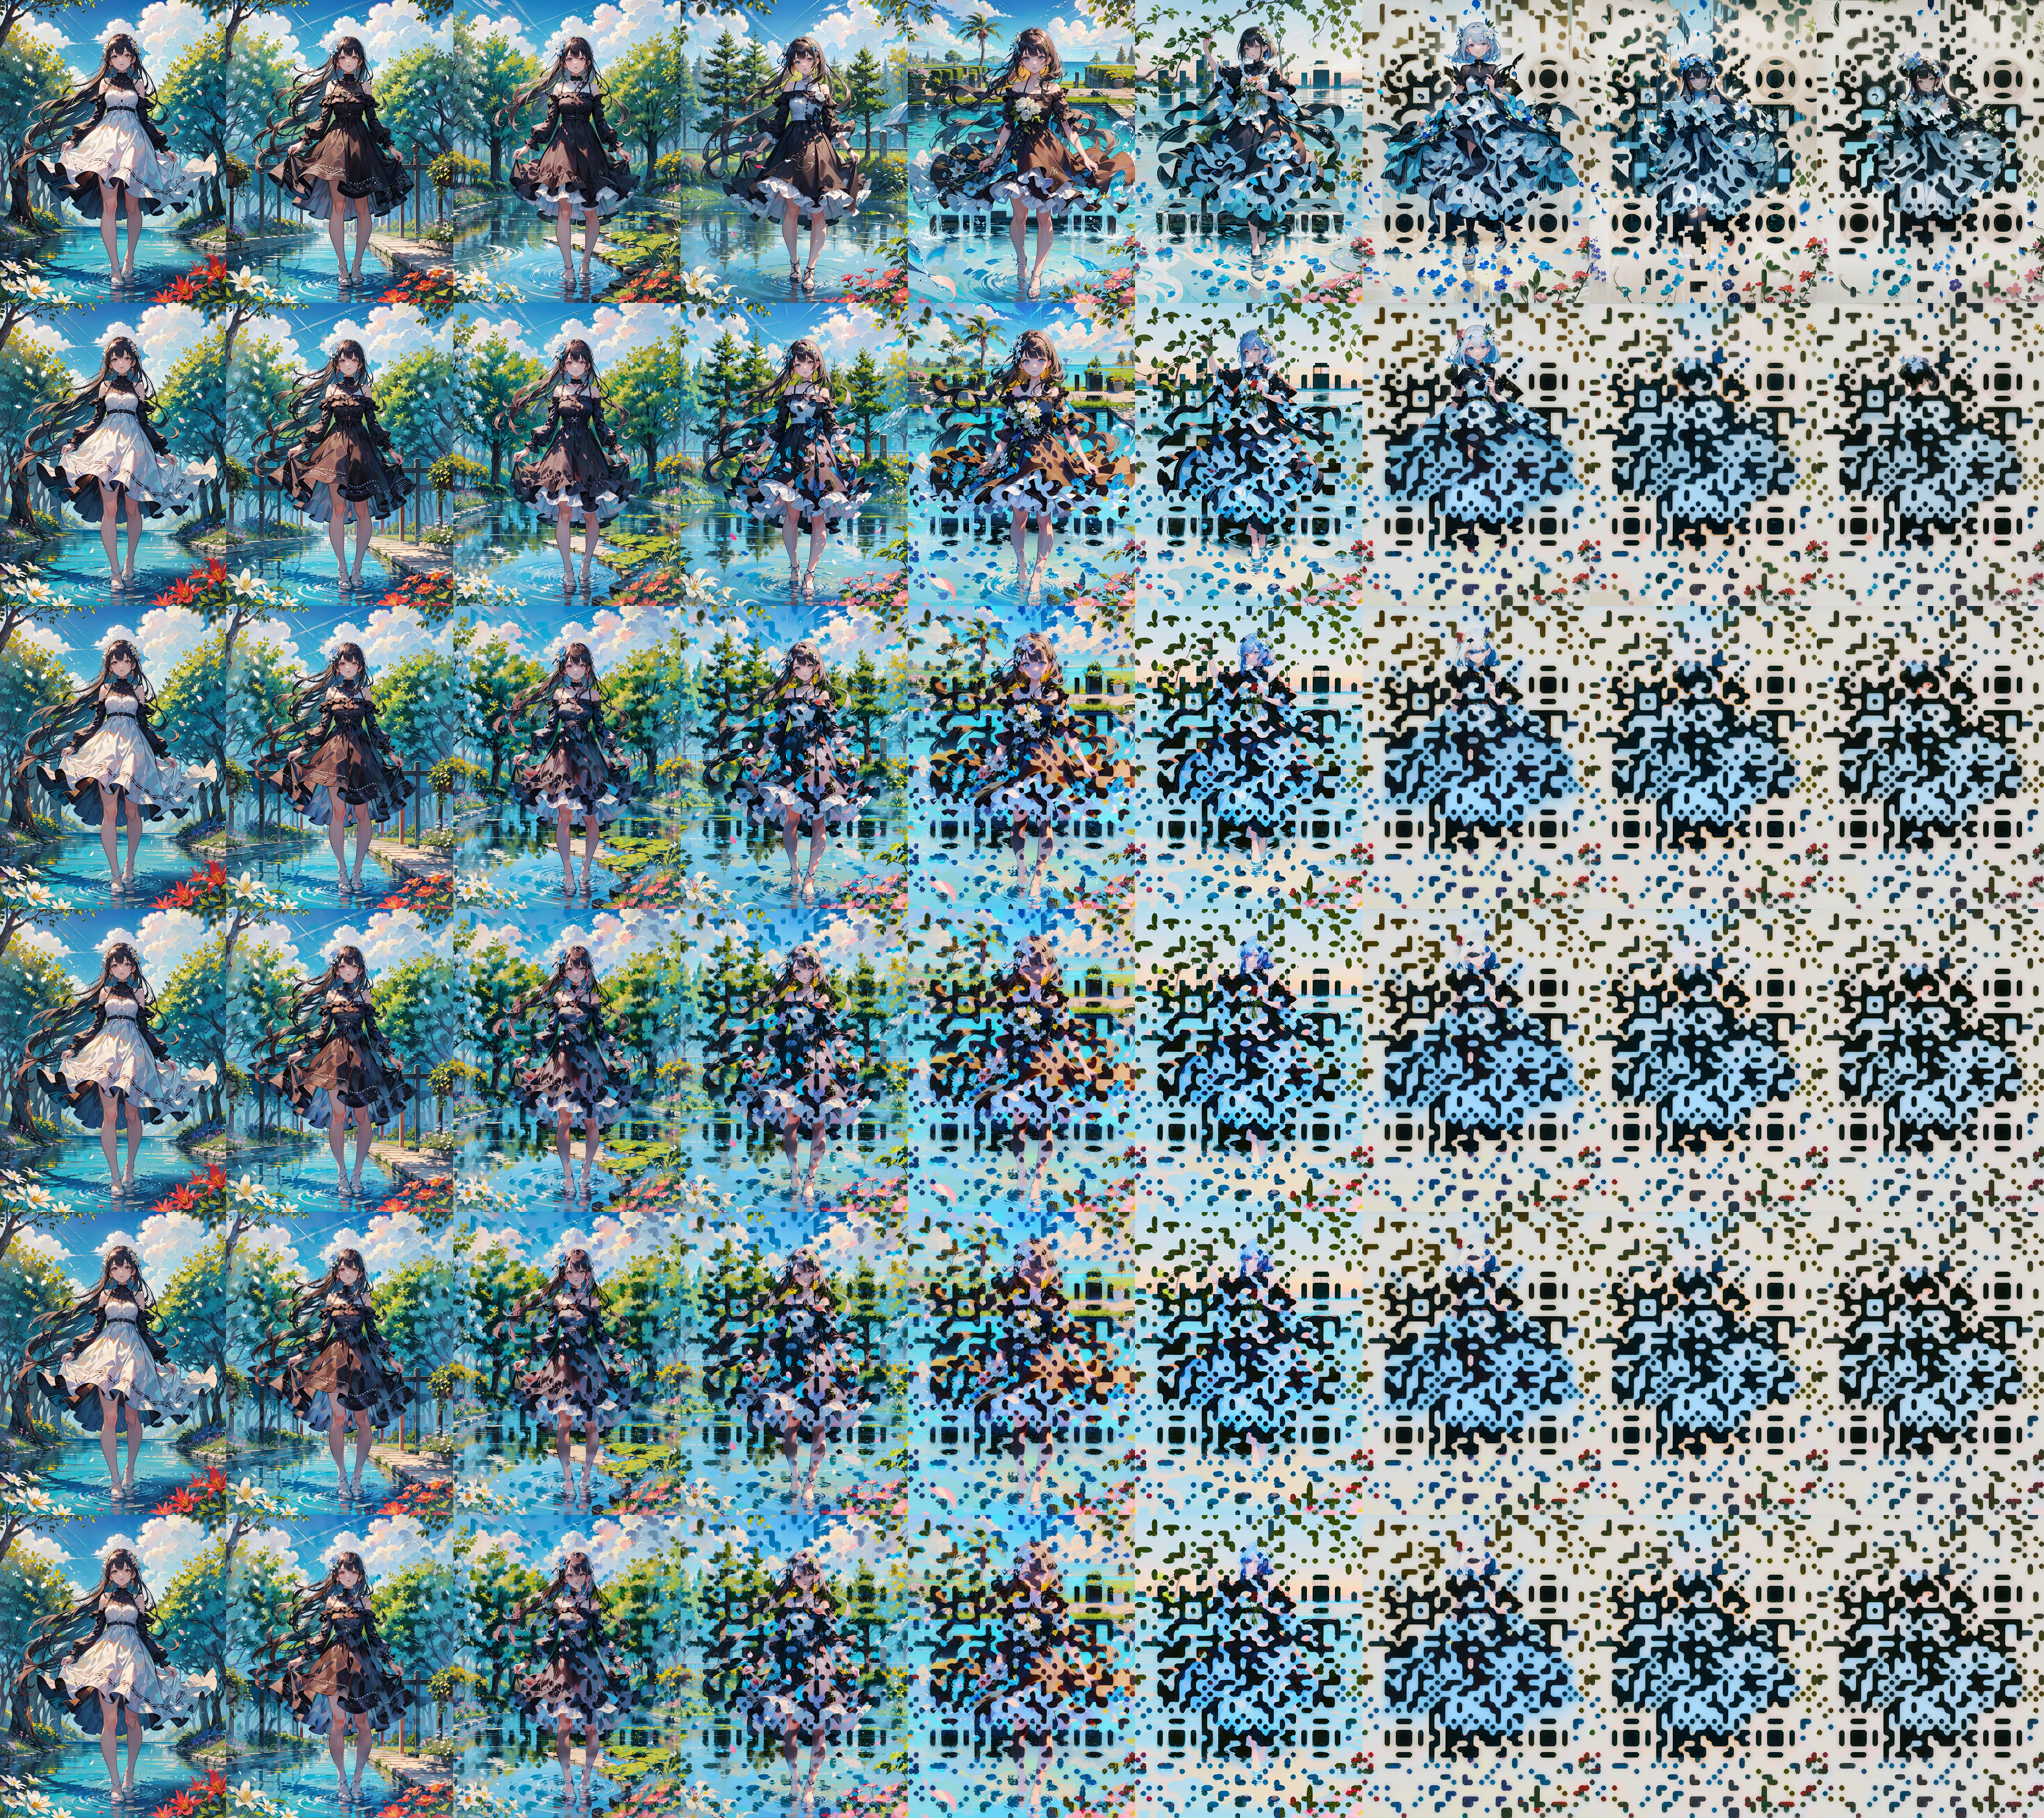
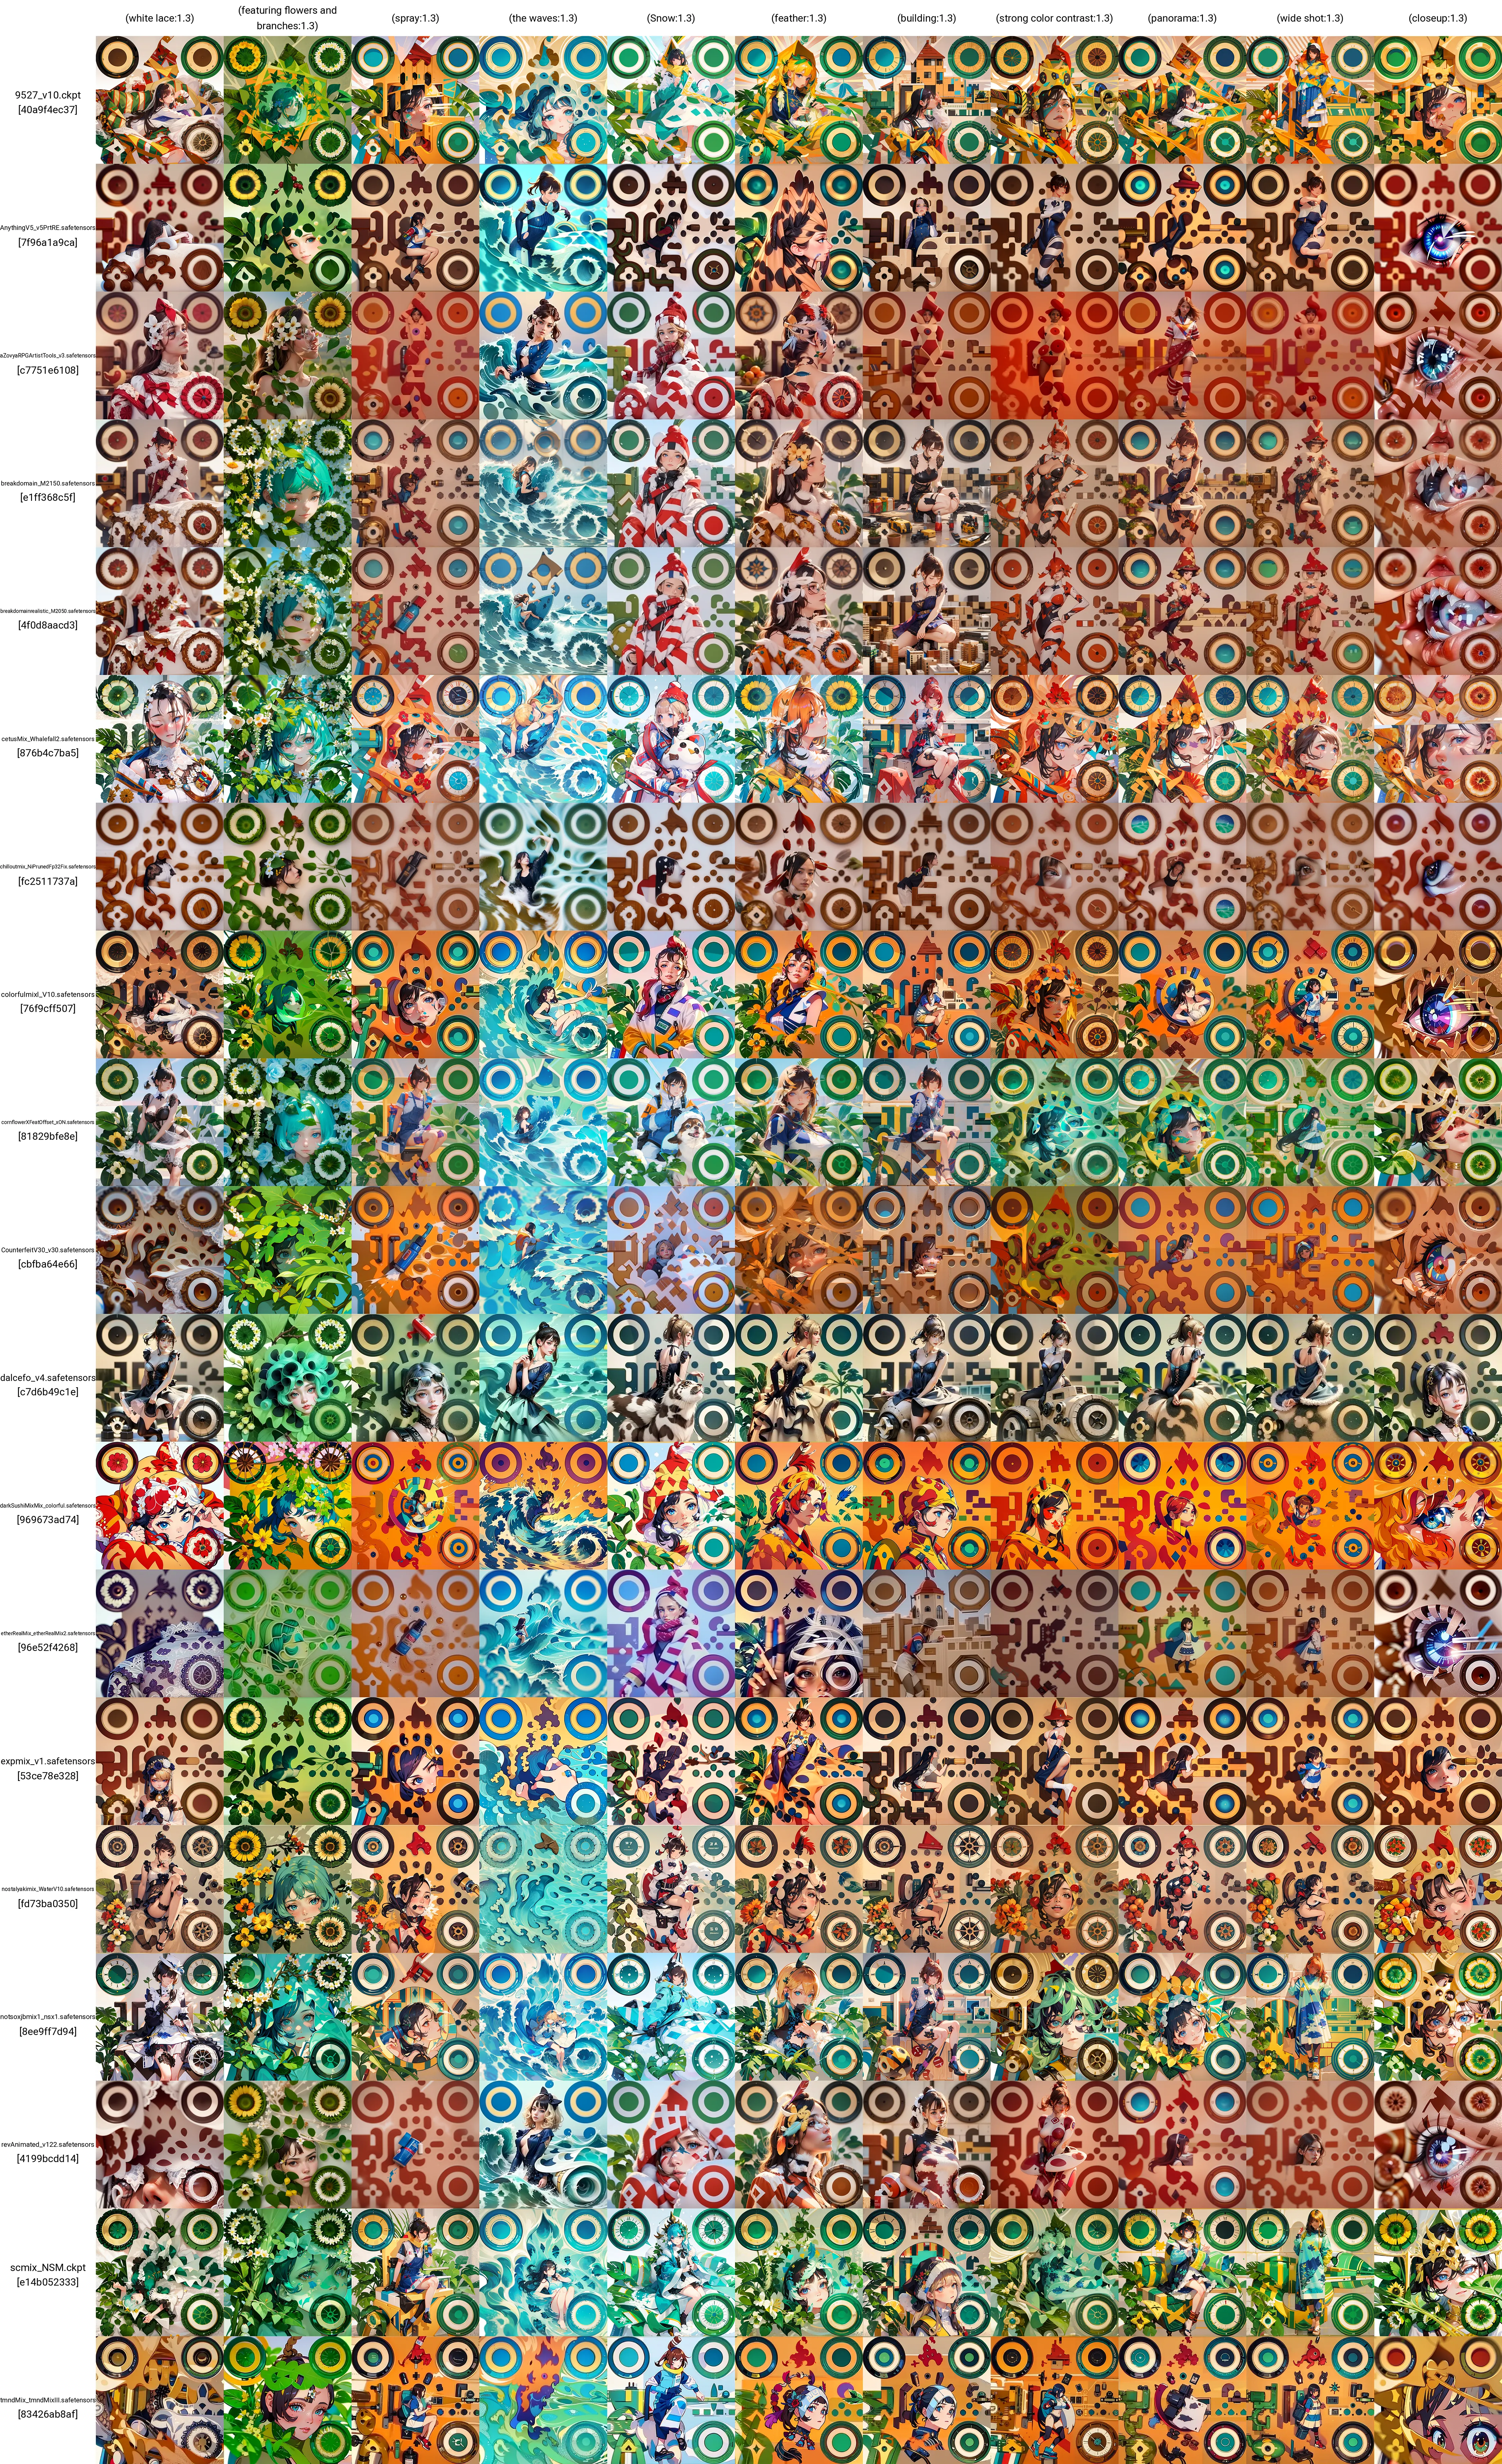
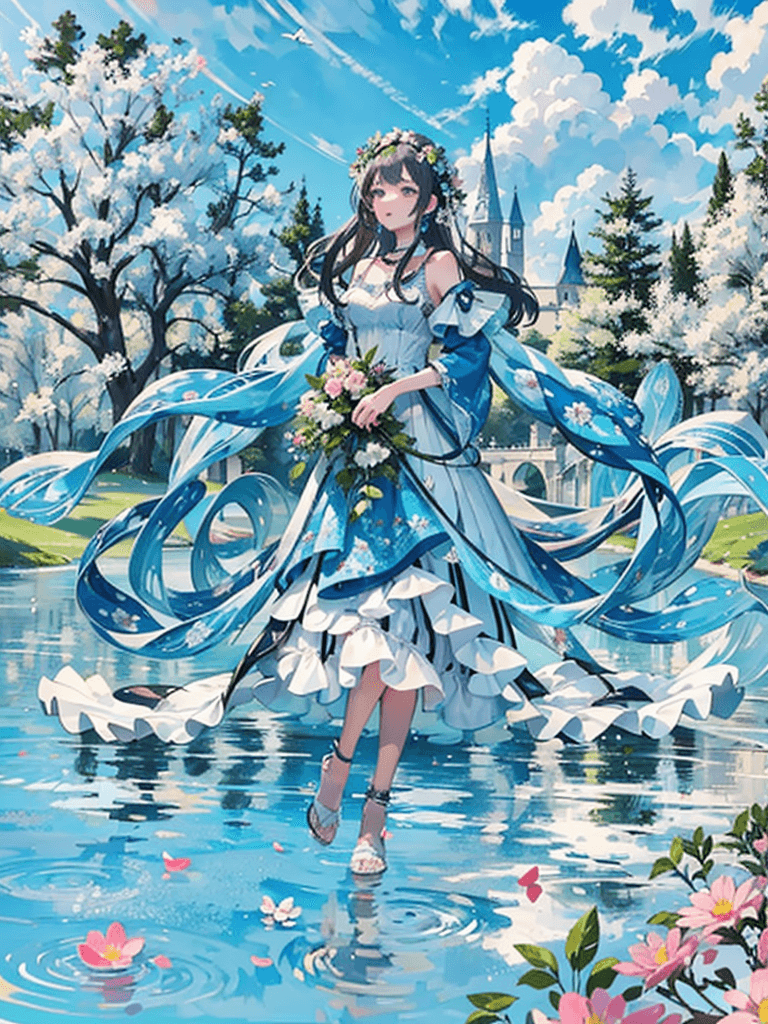
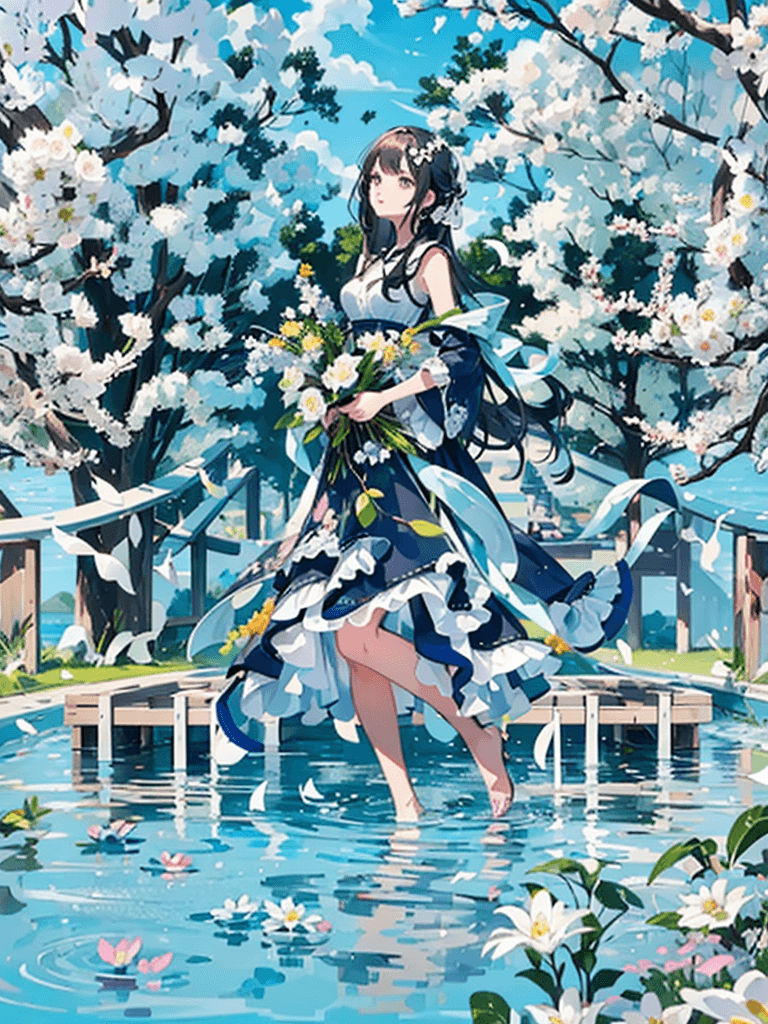
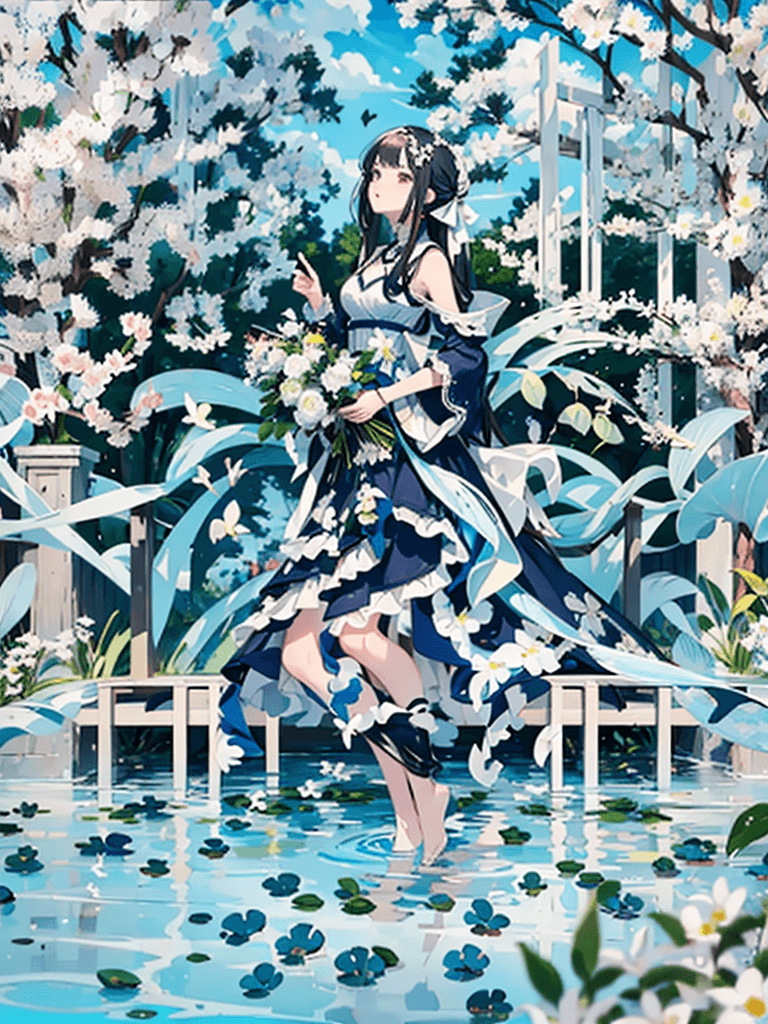
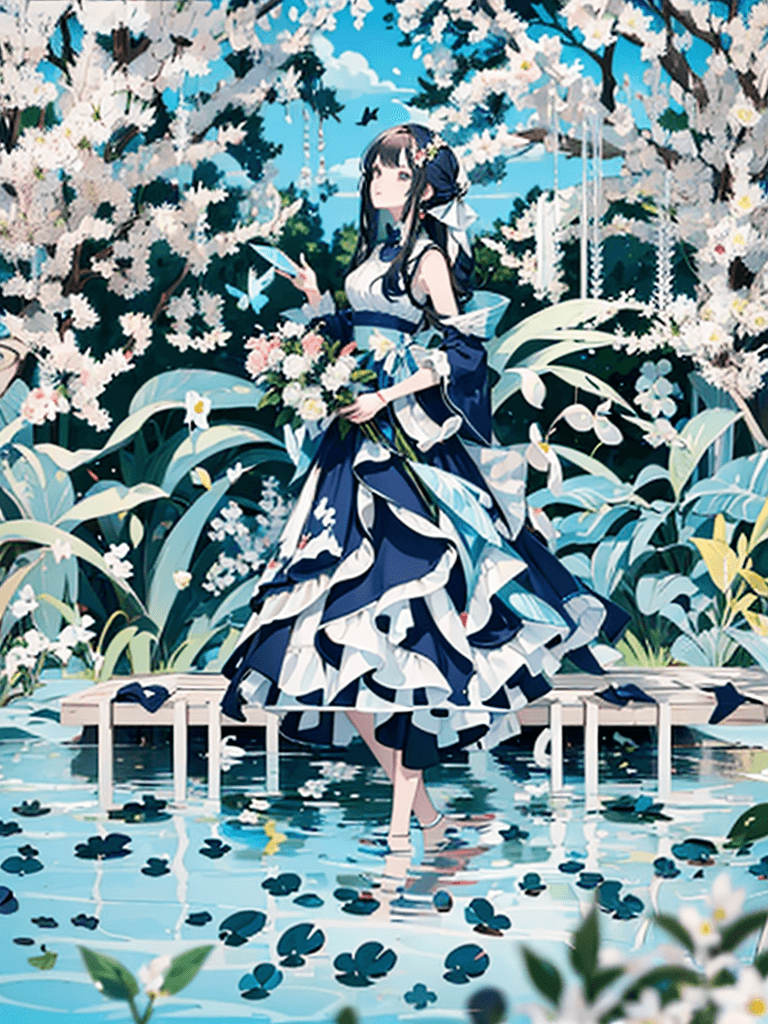
Thanks a lot to 赛博迪克朗 for running the following matrixes against each model.
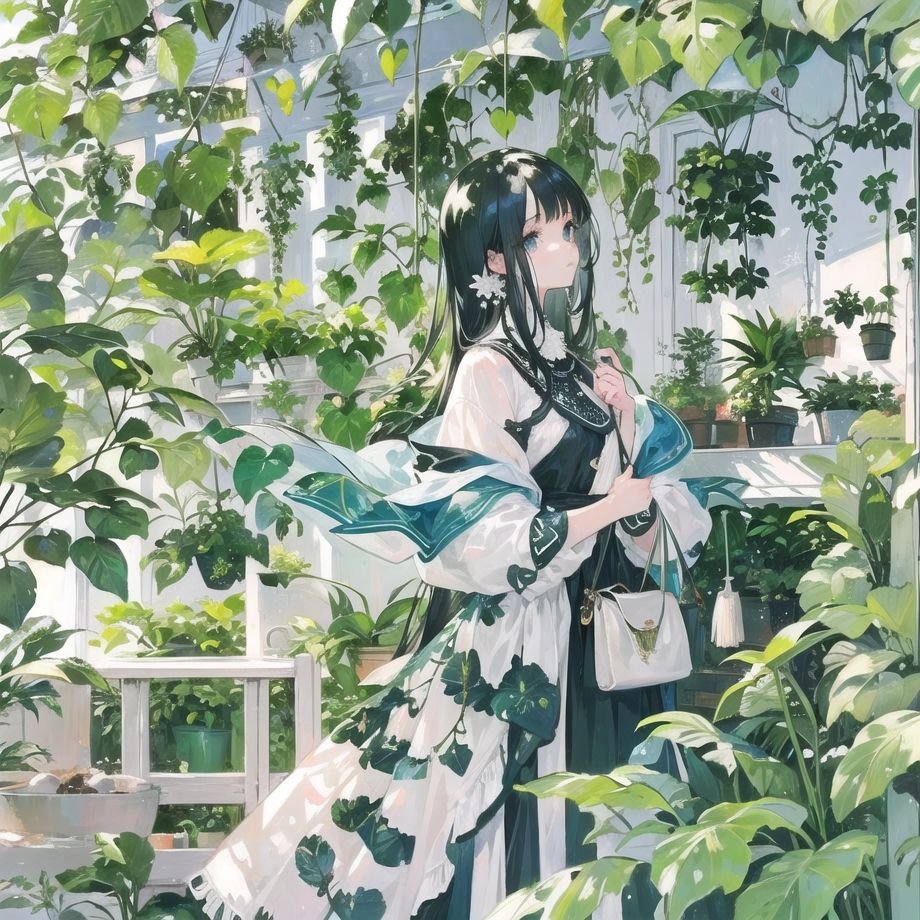
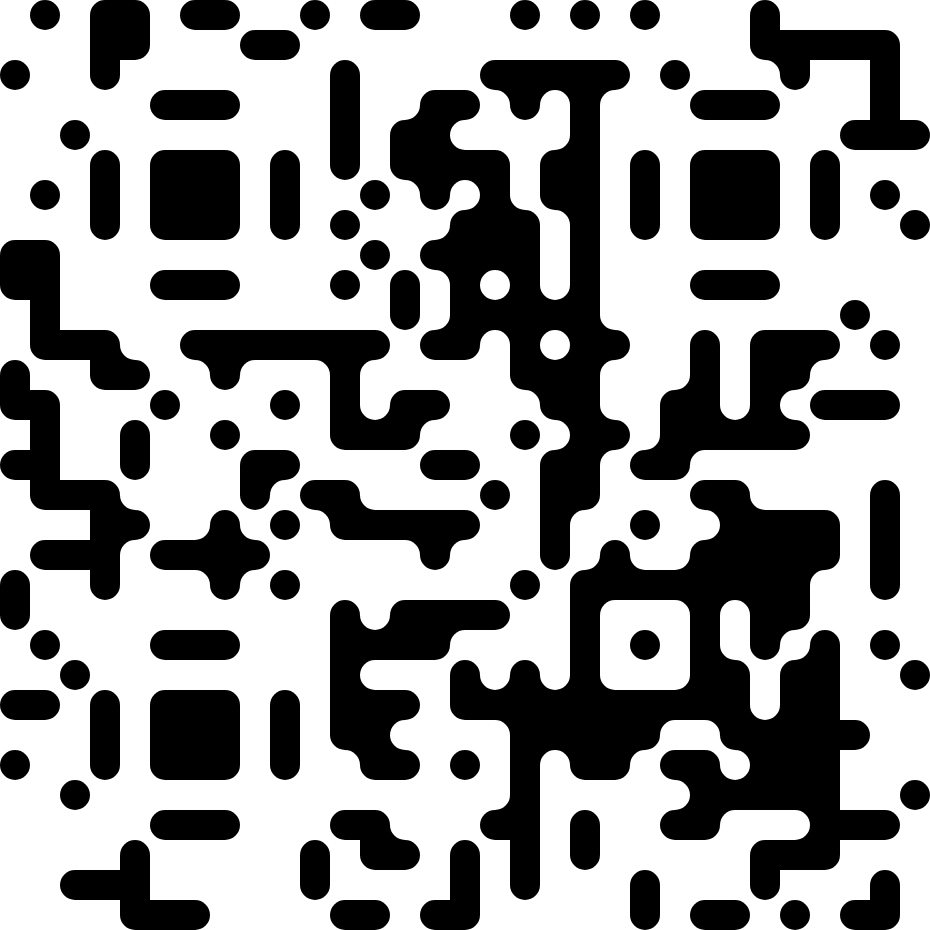
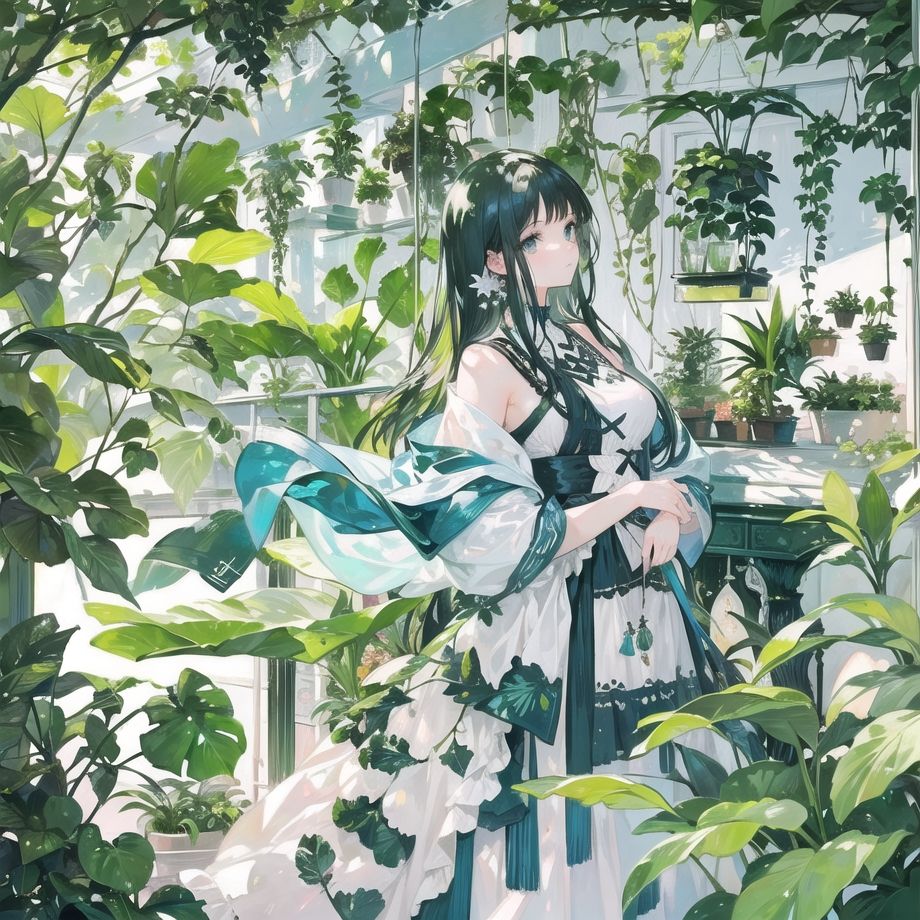
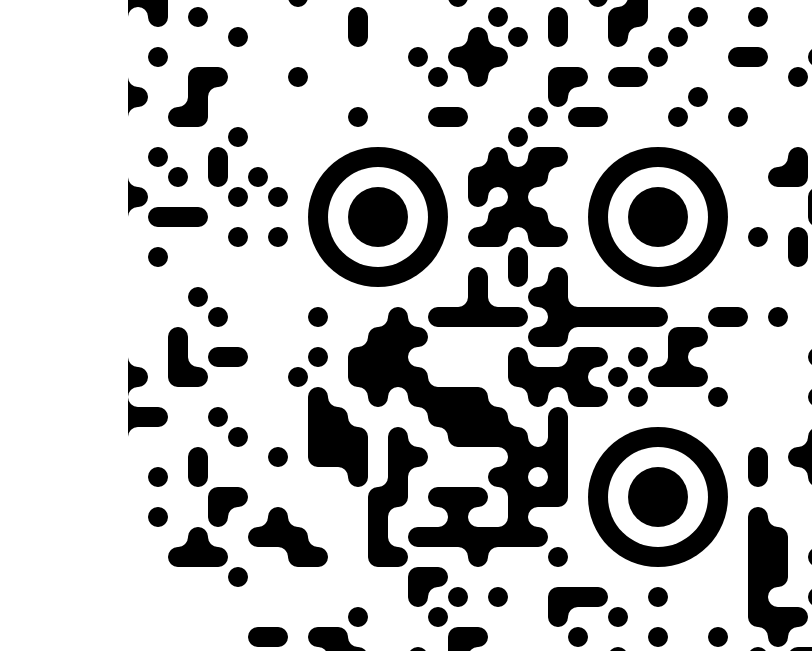
Here is the original image (without ControlNet) and the QR Code Input:
The comparison matrixes are generated with the exact same prompts and same seed as the original image, but only the parameters of the ControlNet are changed.
Detailed prompts and paramaters
best quality, masterpiece, depth of field, 1girl, dress, trees, flowers, sky, waterNSFW, nude, bad-hands-5, bad-picture-chill-75v, badhandv4, easynegative, ng_deepnegative_v1_75t, verybadimagenegative_v1.3, bhands-neg, watermark, character watermark, photo date watermark, Date watermarking- Checkpoint: PrimeMix
- Steps: 50
- Sampler: DPM++ 2M SDE Karras
- CFG scale: 7
- Seed: 1902542336
- Size: 768x1024
You can drag the sliders below to see the difference between the start and end control steps:
QR Pattern Model
QR Code Monster Model
IoC Lab Brightness Model
Improve the Result
Say that you already generated a bunch of QR Codes and find some of them you like. You want to improve them to make them more scannable, or more blended-in, or more artistic. Here are some tips we found useful.
Tweak the Input
The input QR Code is one of the most important parts of the whole process to generate well-blended code.
You can refer to this post to see a comparison of how different QR Code input affects the output.
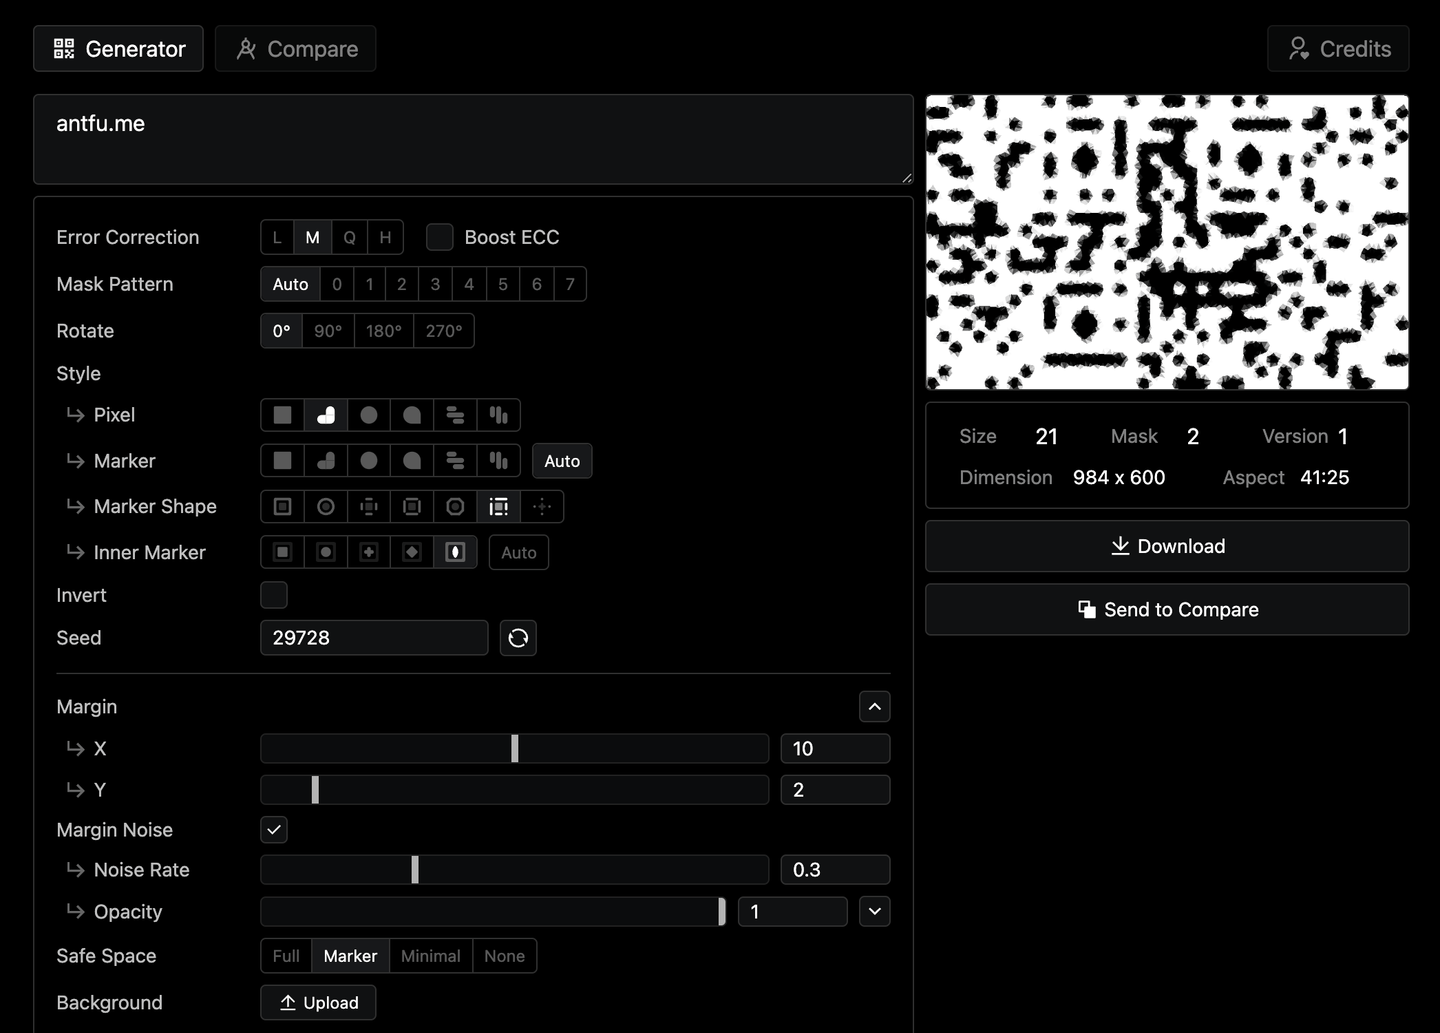
We recommend using Anthony’s QR Toolkit to generate the QR Code. It allows you to customize the QR Code and distort it as needed.
Meanwhile, the margin area of the QR Code also affects the look and feel, for example:
Improve the Prompts
Theoretically, you can use any prompts to generate those QR Codes.
To help the QR codes more blend in, we find that it’s helpful to include some fluidity or fragmented items in the prompts.
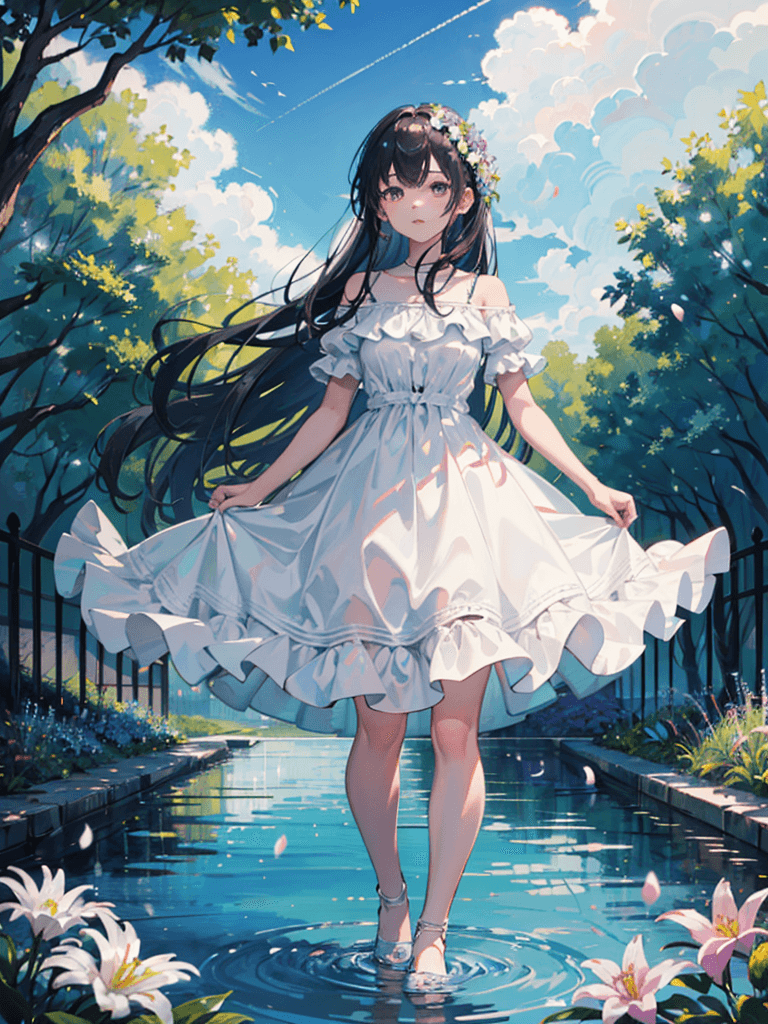
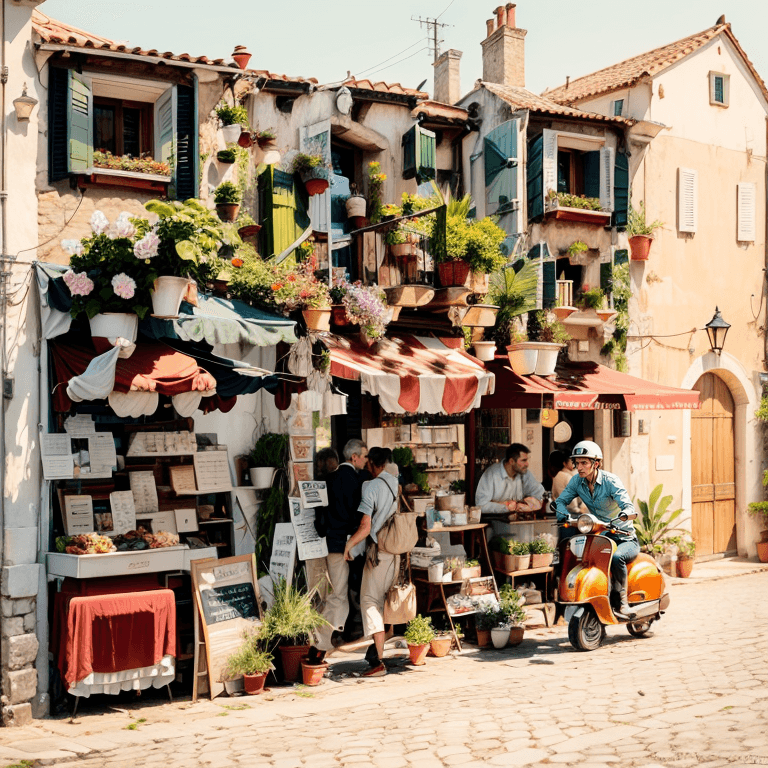
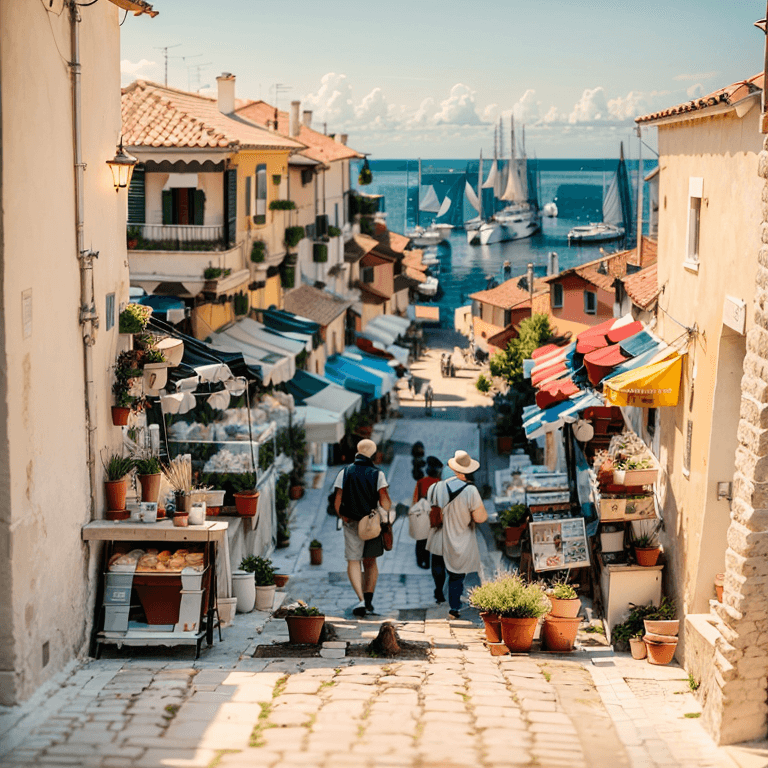
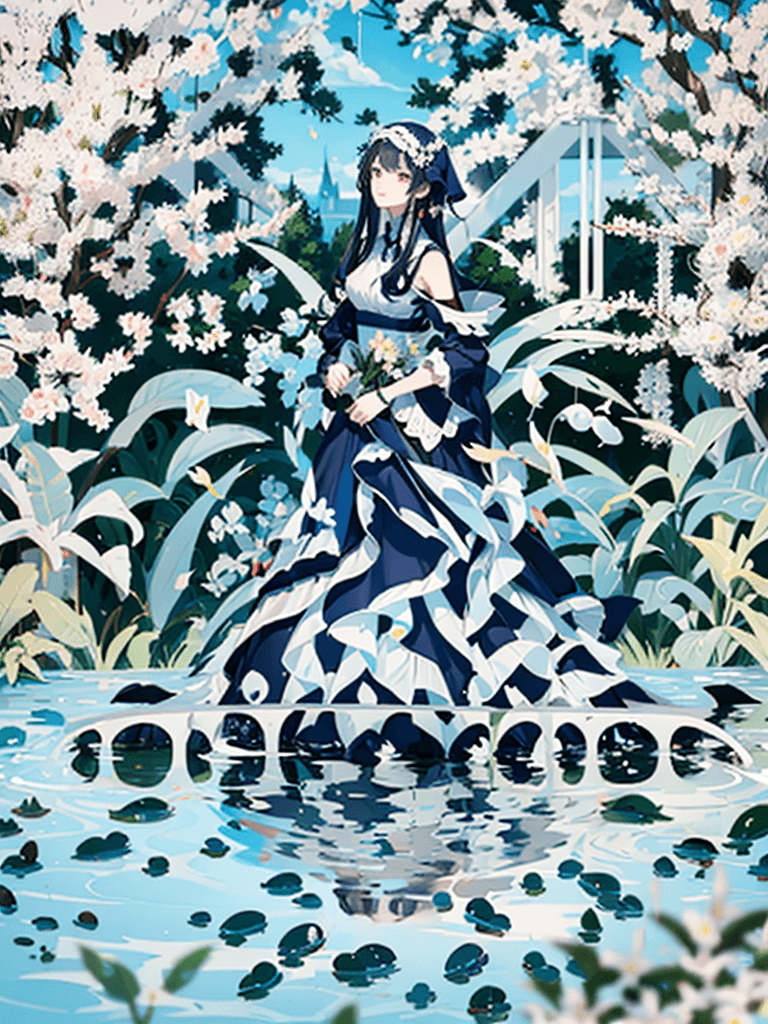
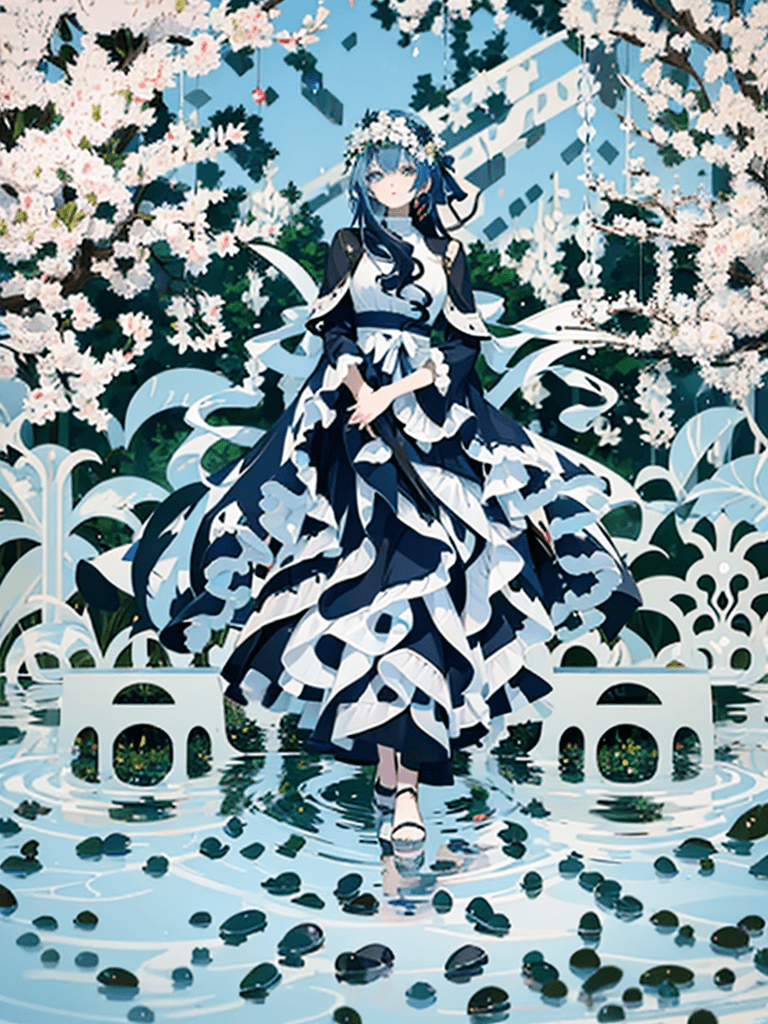
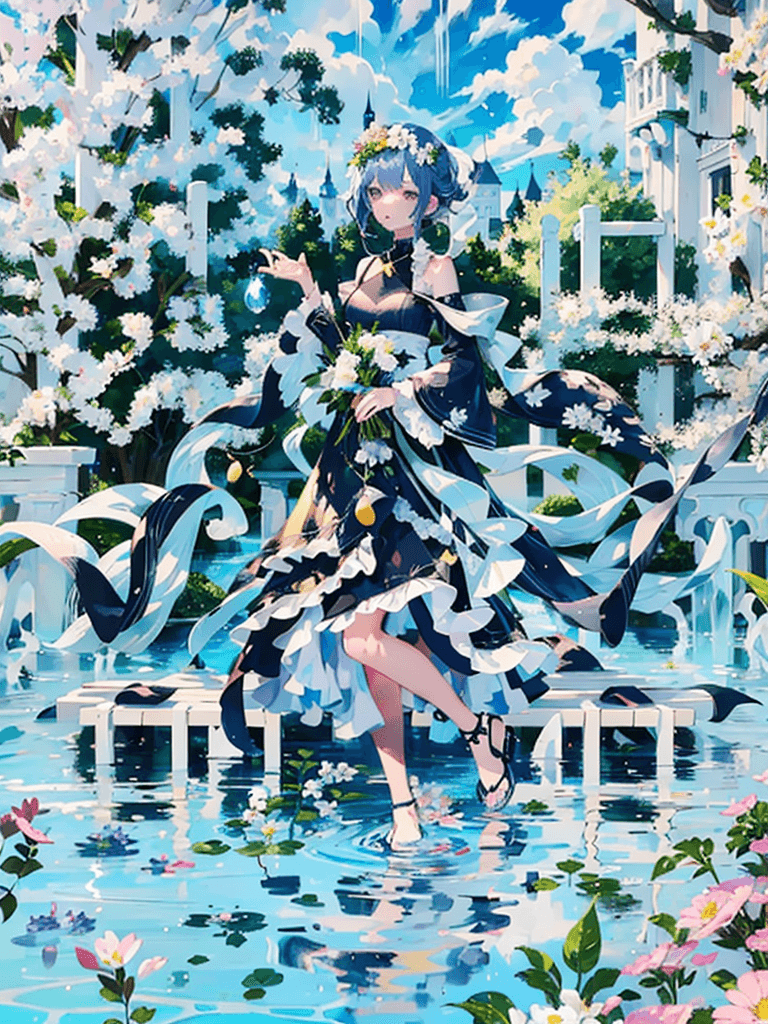
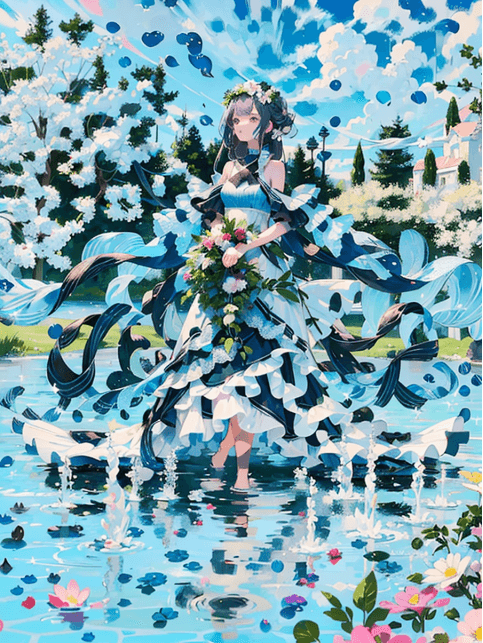
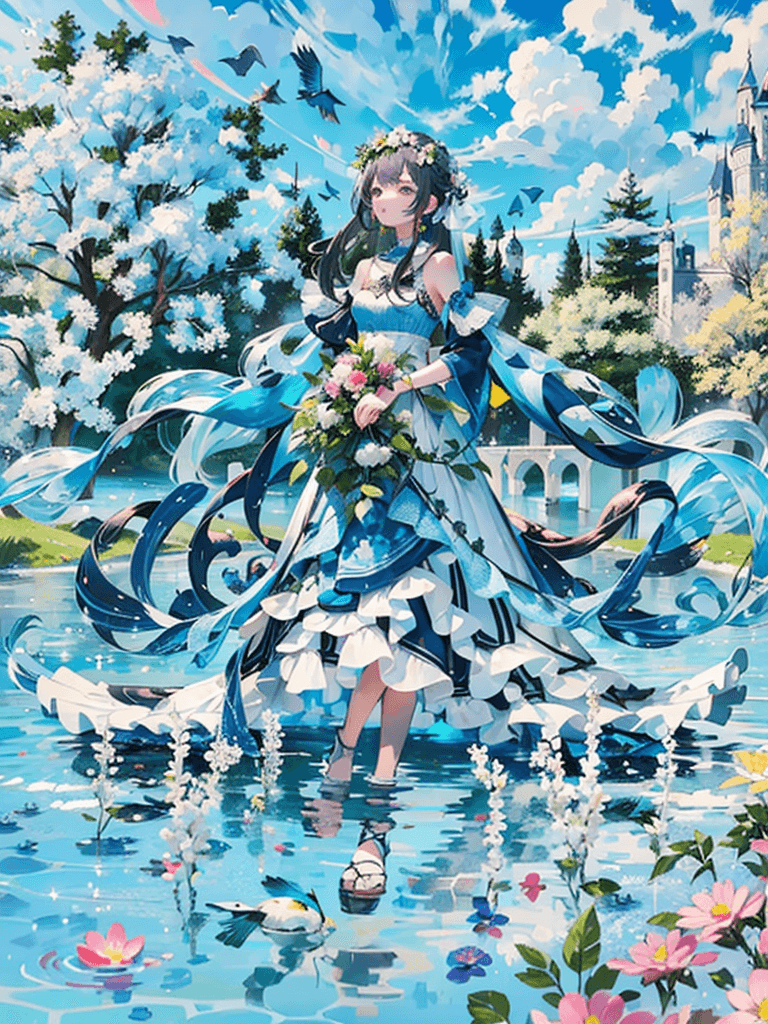
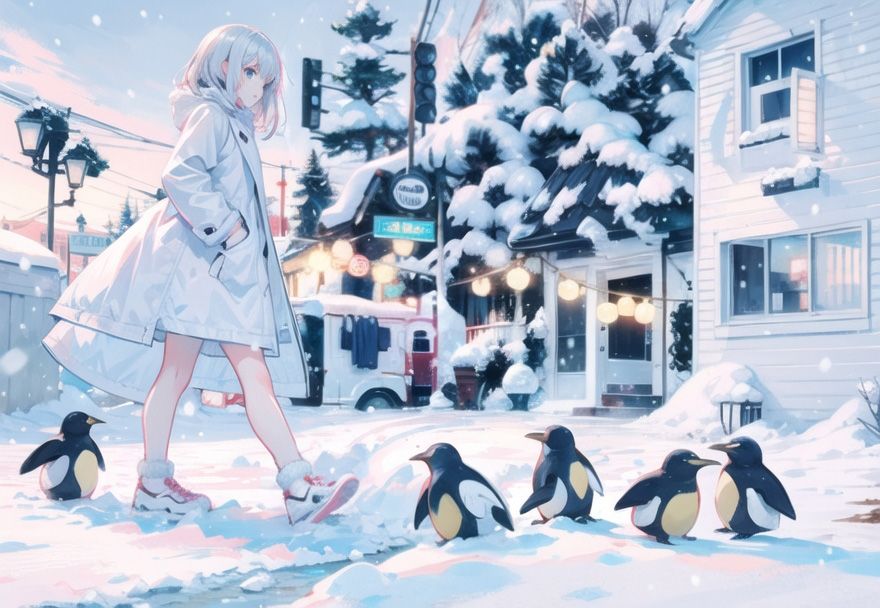
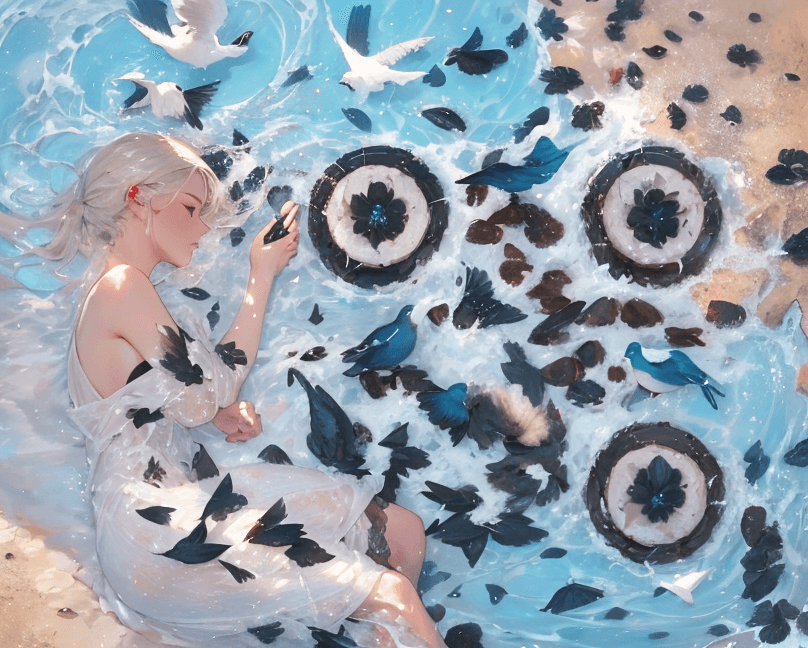
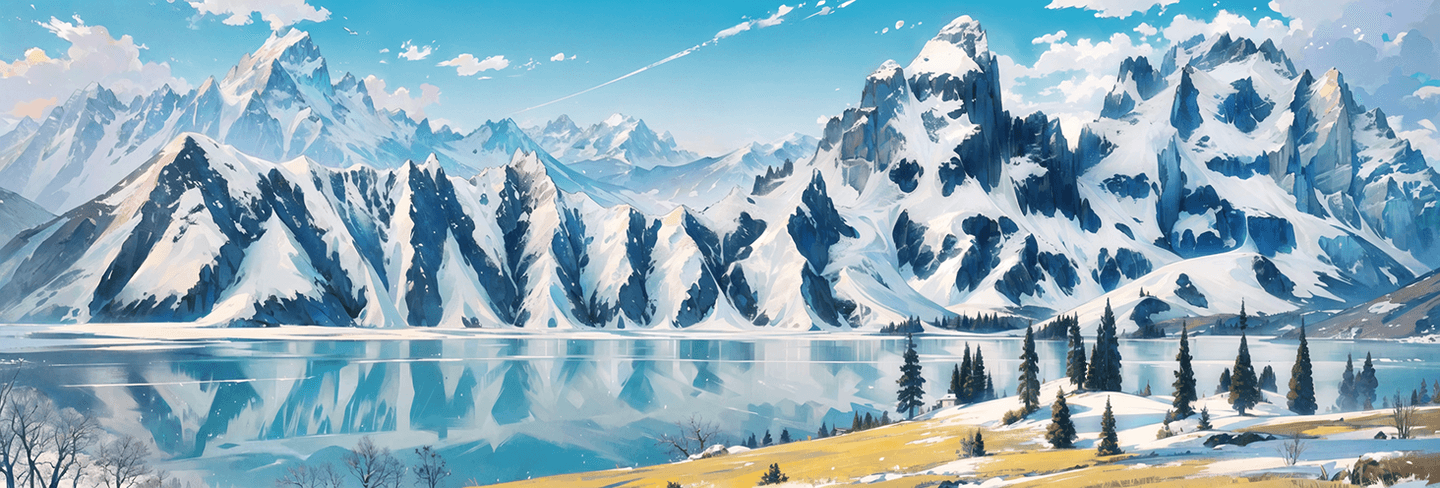
Example Outputs
Example Prompts
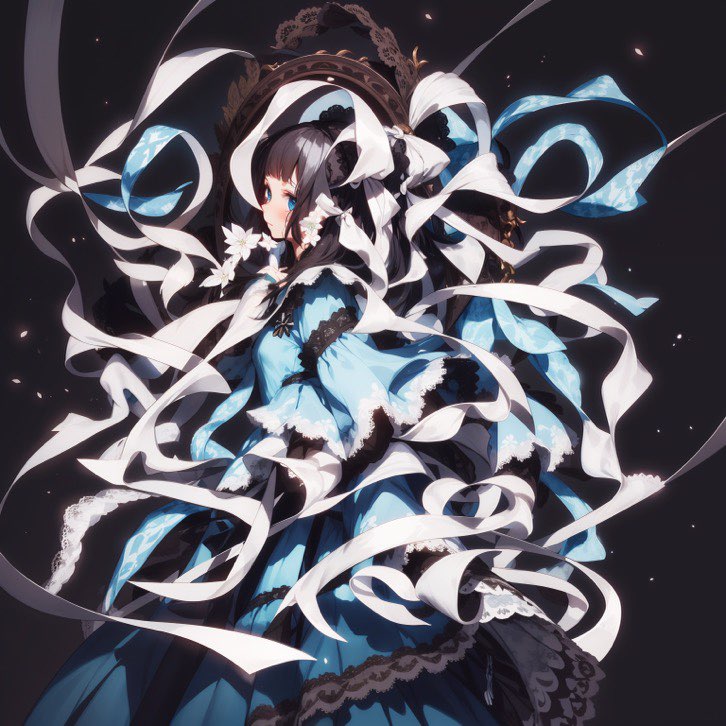
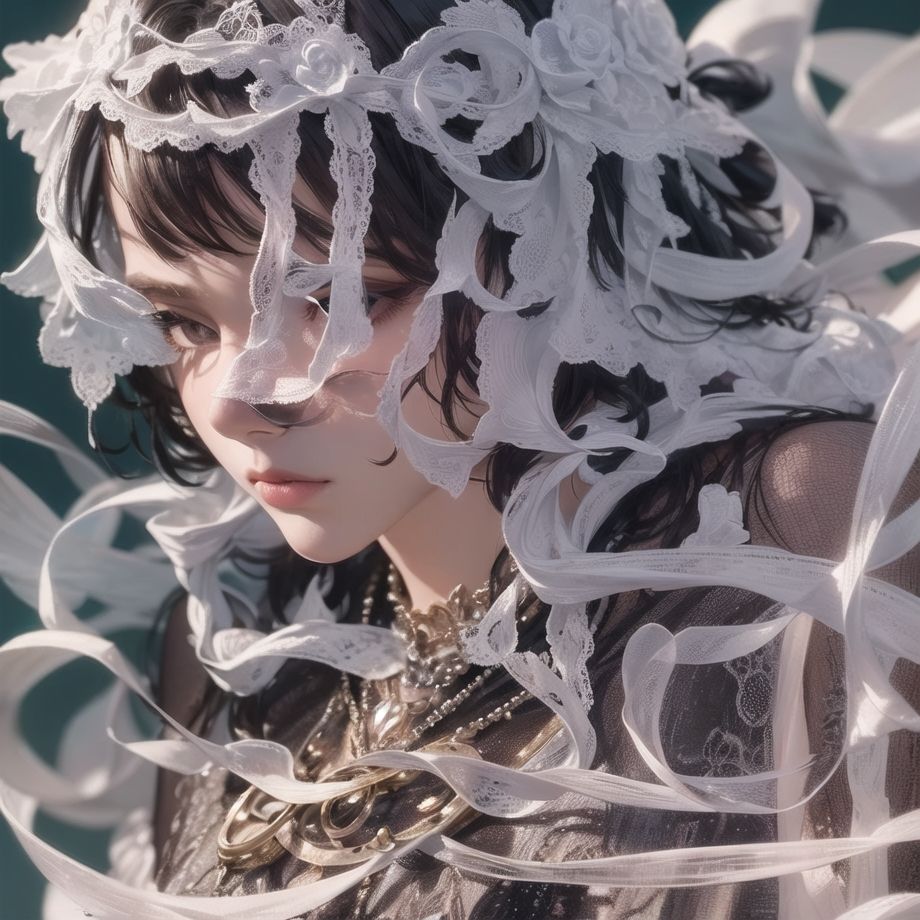
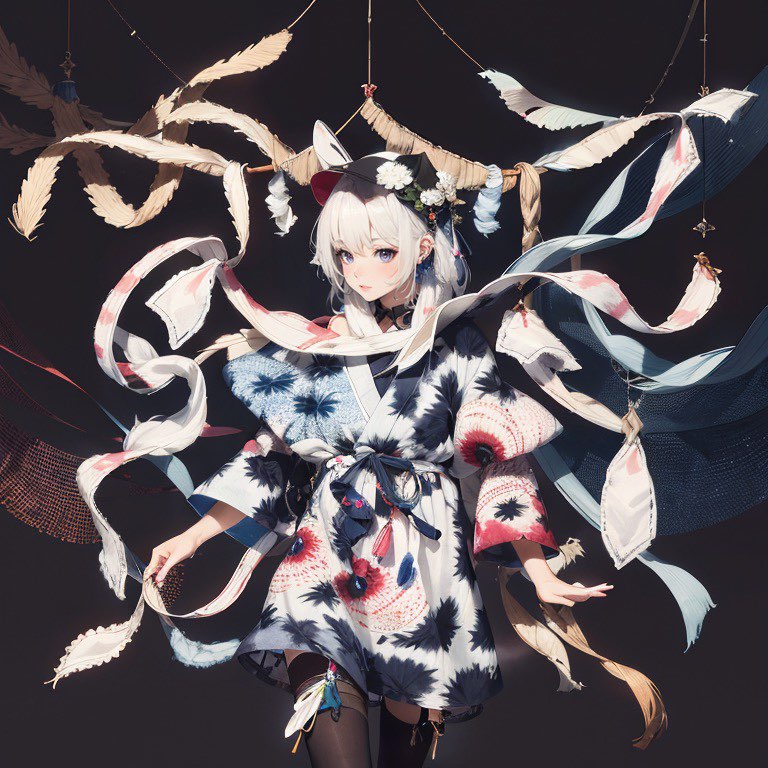
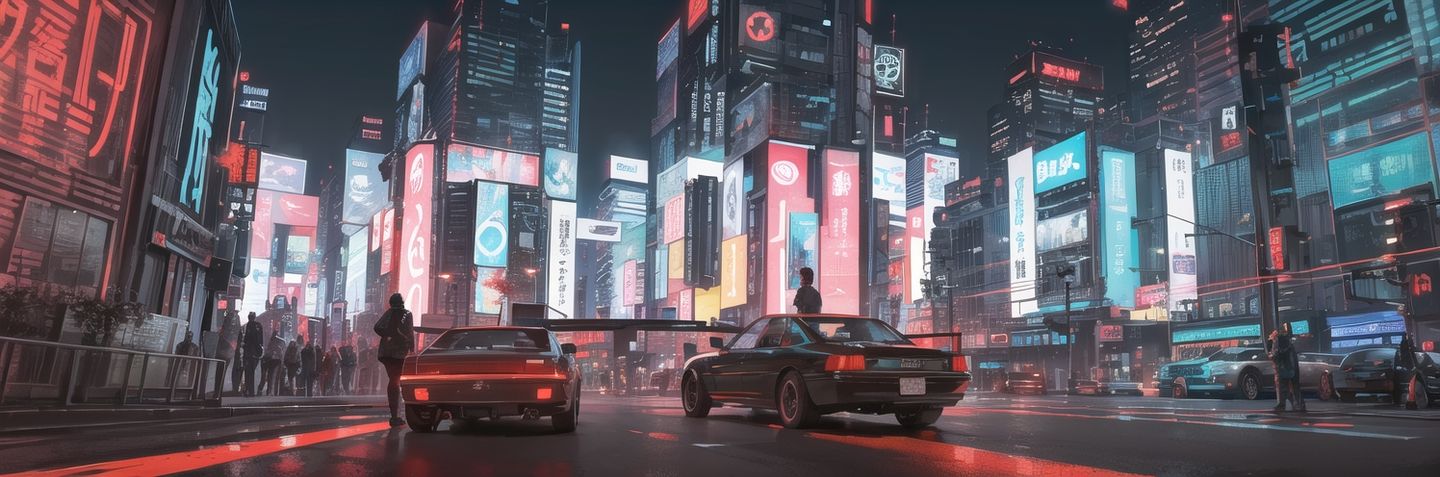
Ribbon - by 代々木
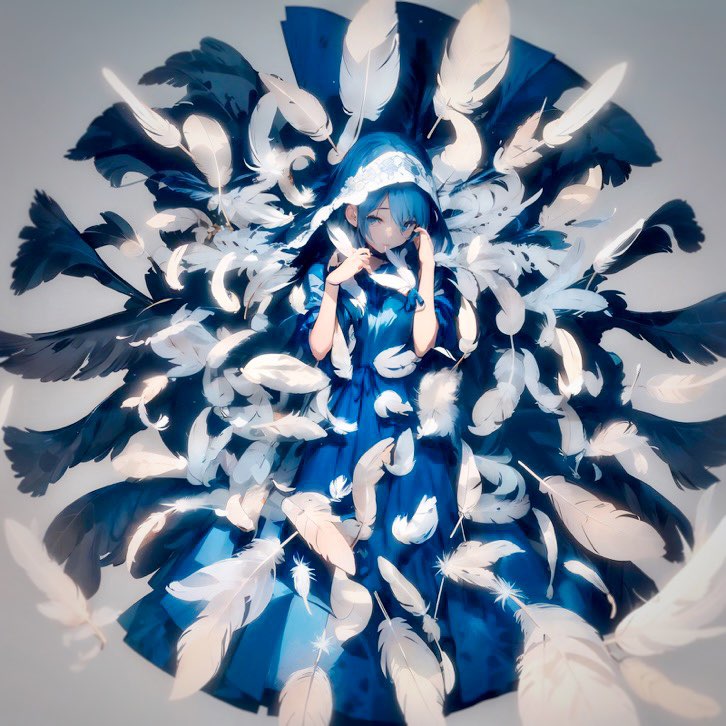
(1 girl:1.6), full body, from side, ultra wide shot, (azure blue dress:1.3), (grey long hair:1.3), (white ribbon:1.6), (white lace:1.6), BREAK, (dark background:1.3)Feather - by 代々木
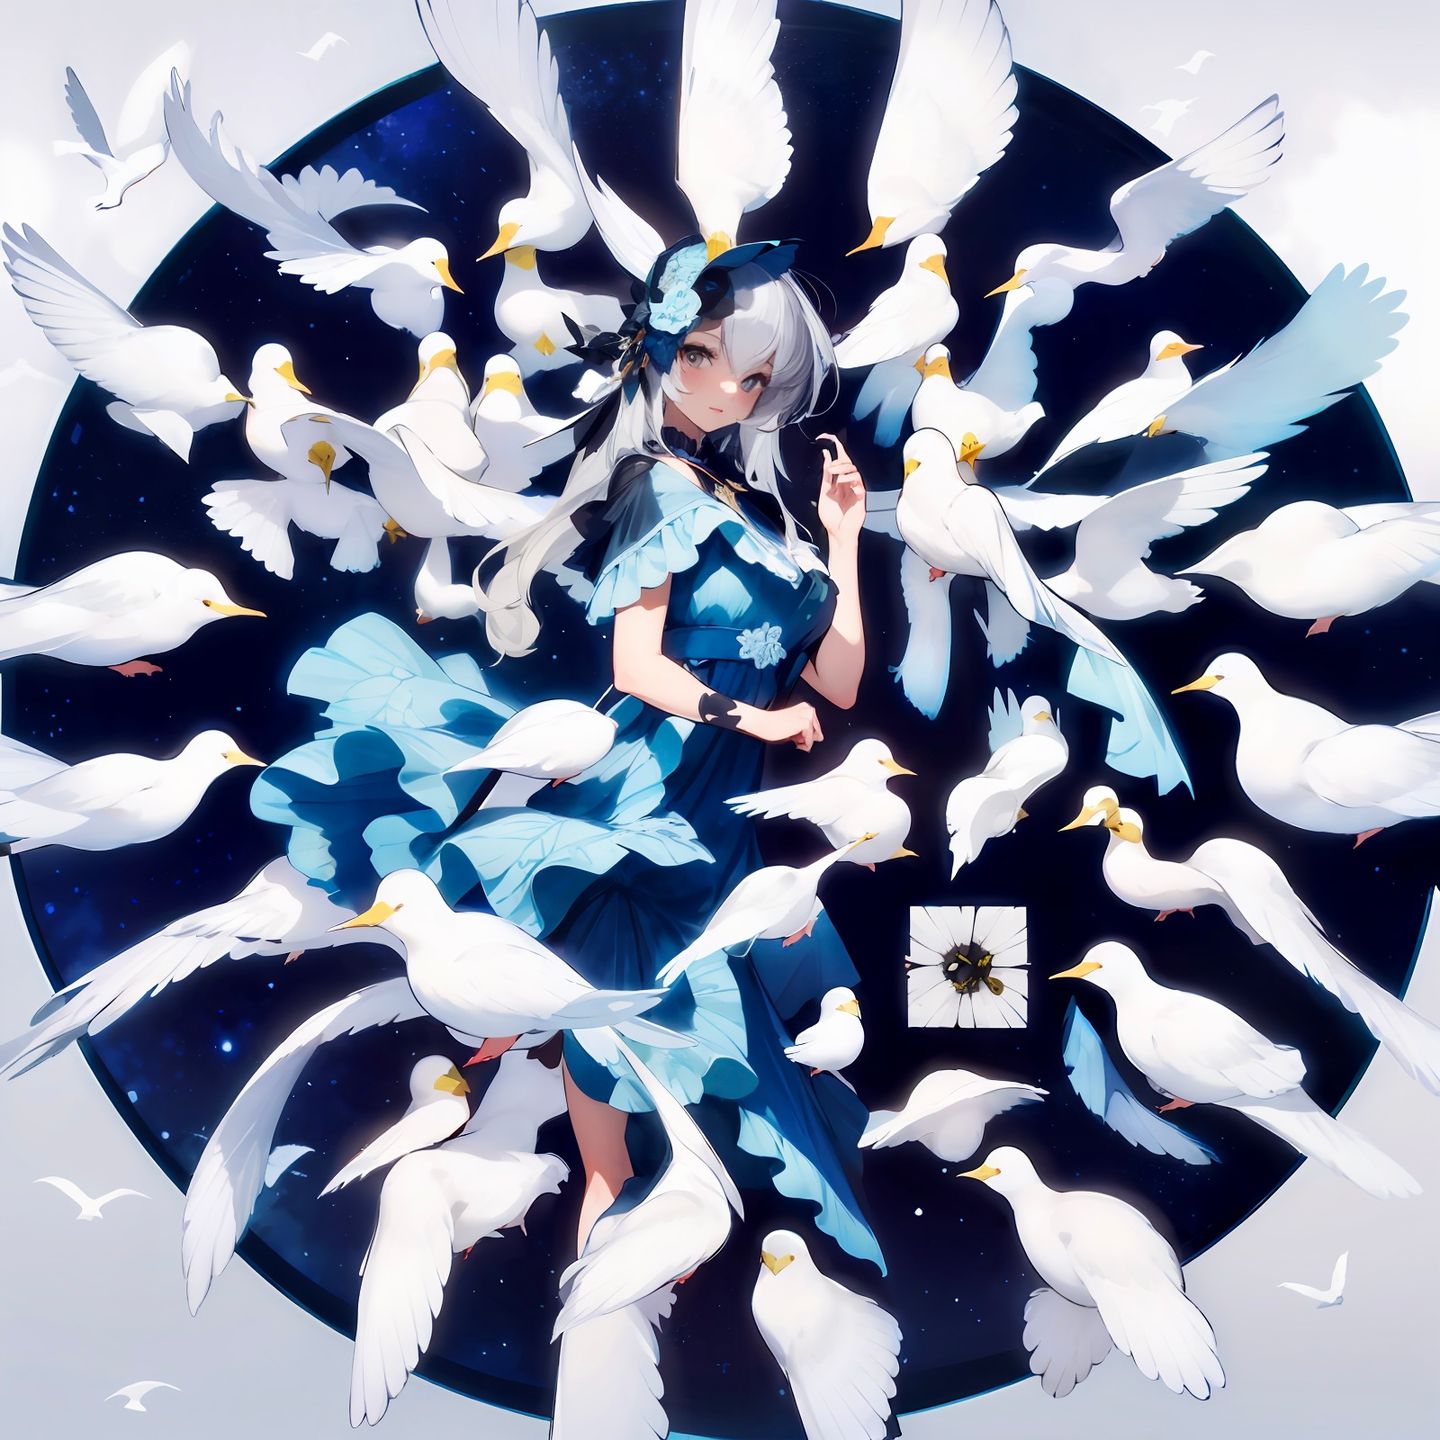
(1 girl:1.3), upper body, (grey long hair:1.3), (blue dress:1.3), zigzag patterns, graphic impact, (white feathers:1.6), BREAK, (dark background:1.3)Birds - by 代々木
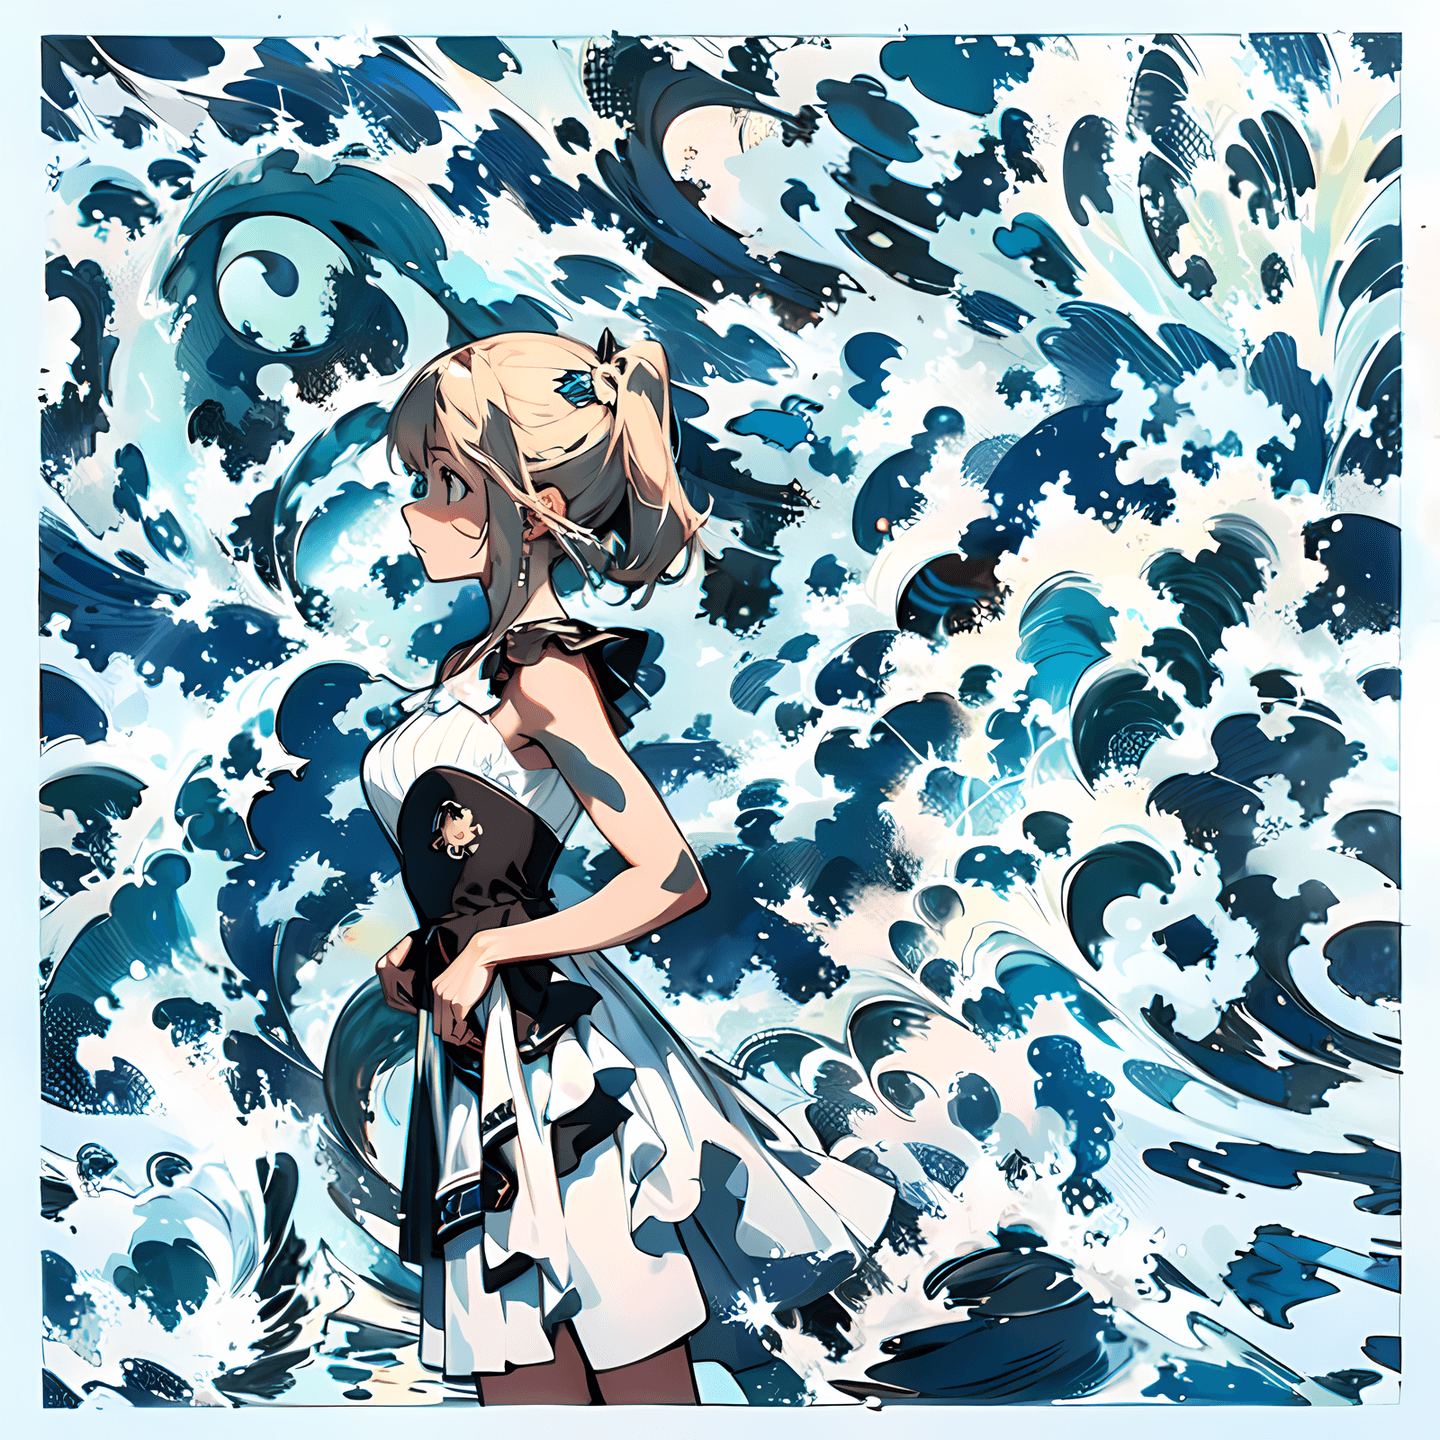
(1 girl:1.3), upper body, rosemaling patterns, Norwegian folk art, decorative designs, vibrant colors, (white birds:1.6), BREAK, (dark background:1.3)Wave - by 五倍速企鹅
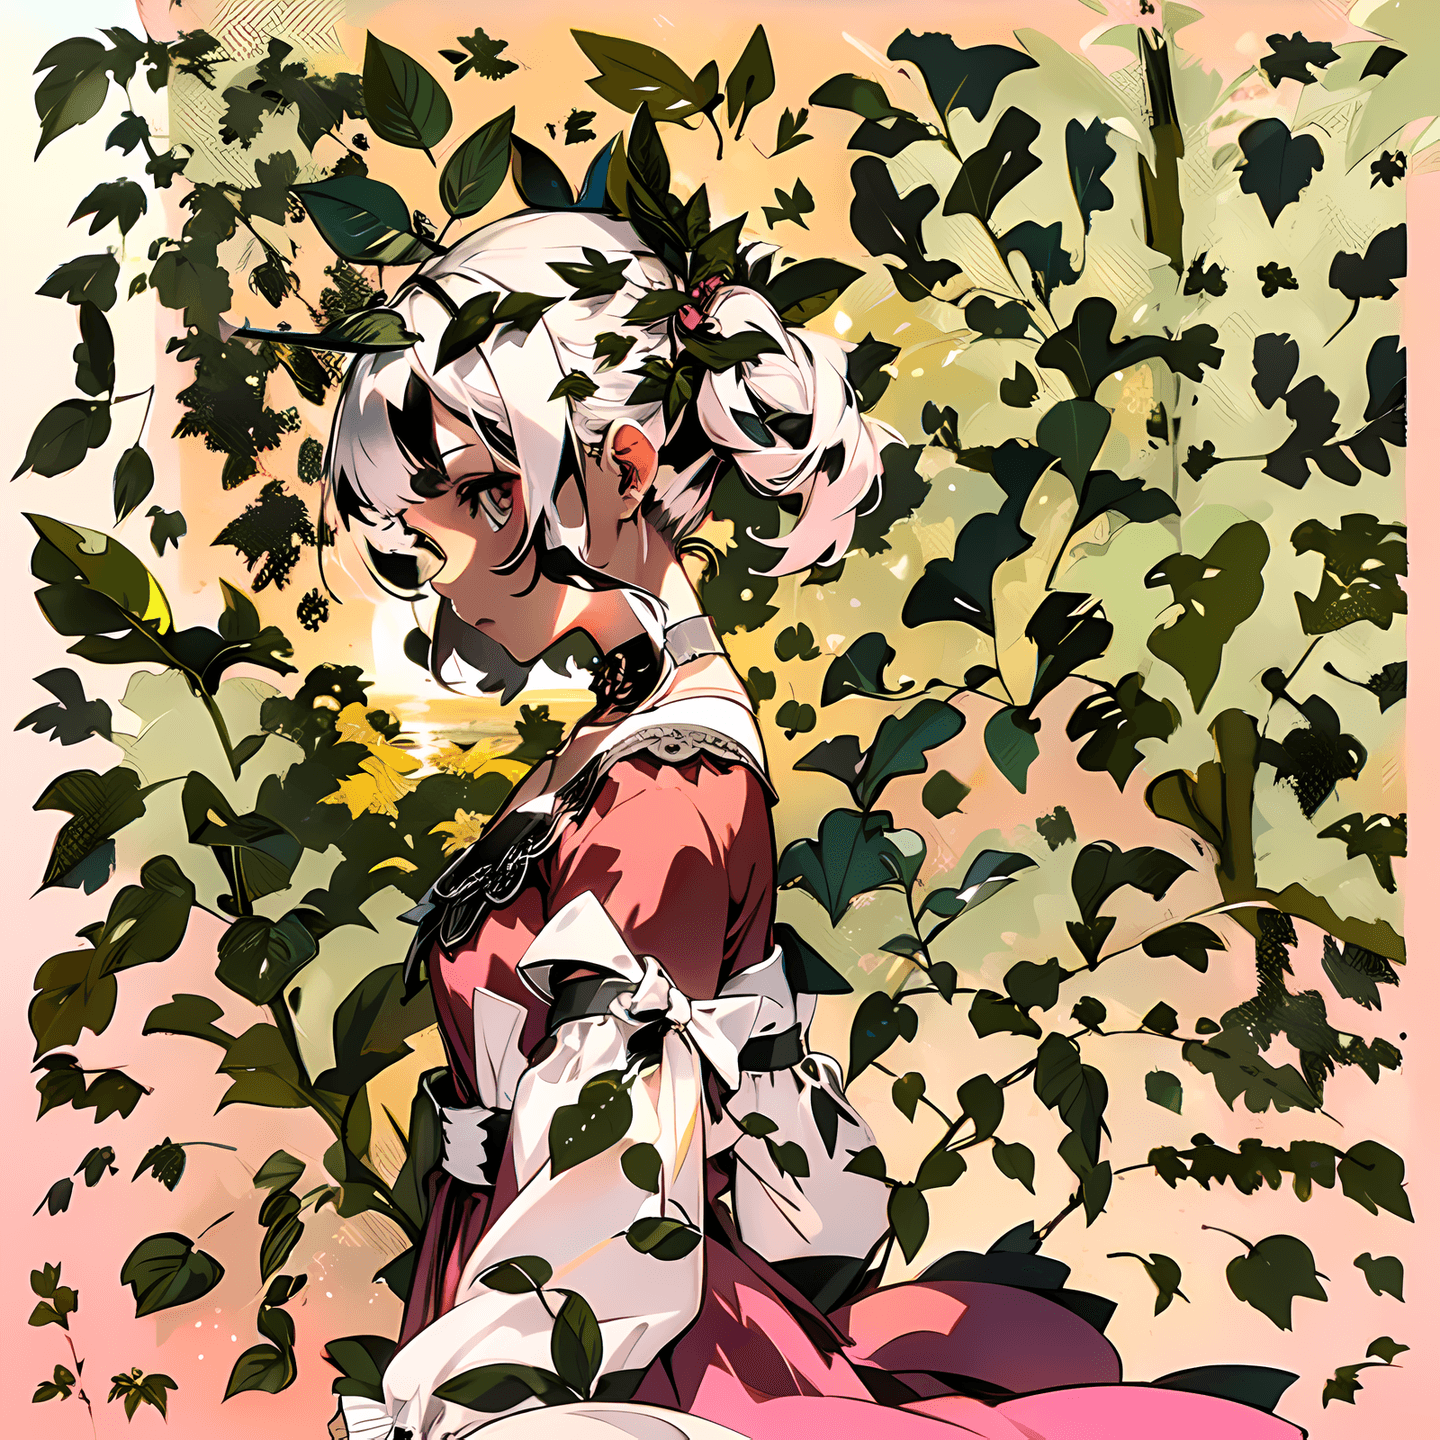
(1 girl:1.3),(white dress:1.3), upper body, blonde hair, from side, decorative designs, (wave:1.3),BREAK, (blue background:1.3)Leaf - by 五倍速企鹅
(1 girl:1.3),(pink dress:1.3), upper body, white hair, from side, decorative designs, (leaf:1.6),BREAK, (sunset background:1.3)XYZ Plot
In case you are uncertain about which model or prompts to use, you can utilize the XYZ Plot script to generate a matrix of images with different prompts and models for easier comparison.
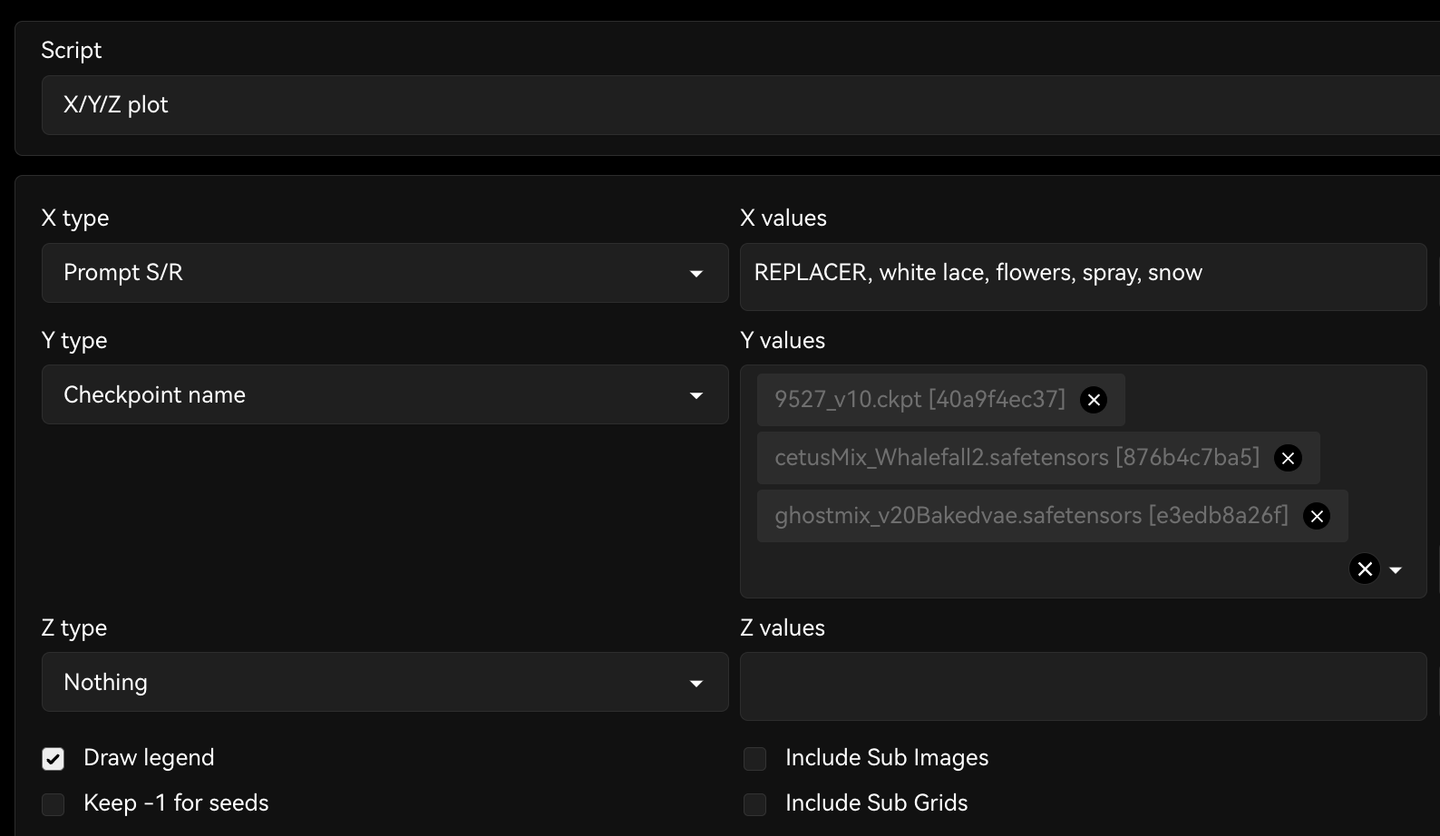
You can learn more about how to use XYZ plot in this tutorial.
Below is an example of a matrix runned by wangcai, testing some popular checkpoint models and the prompts we mentioned above. You can click to select different combinations, or click the image to see the full matrix.
Similarly, this is a matrix testing samplers:
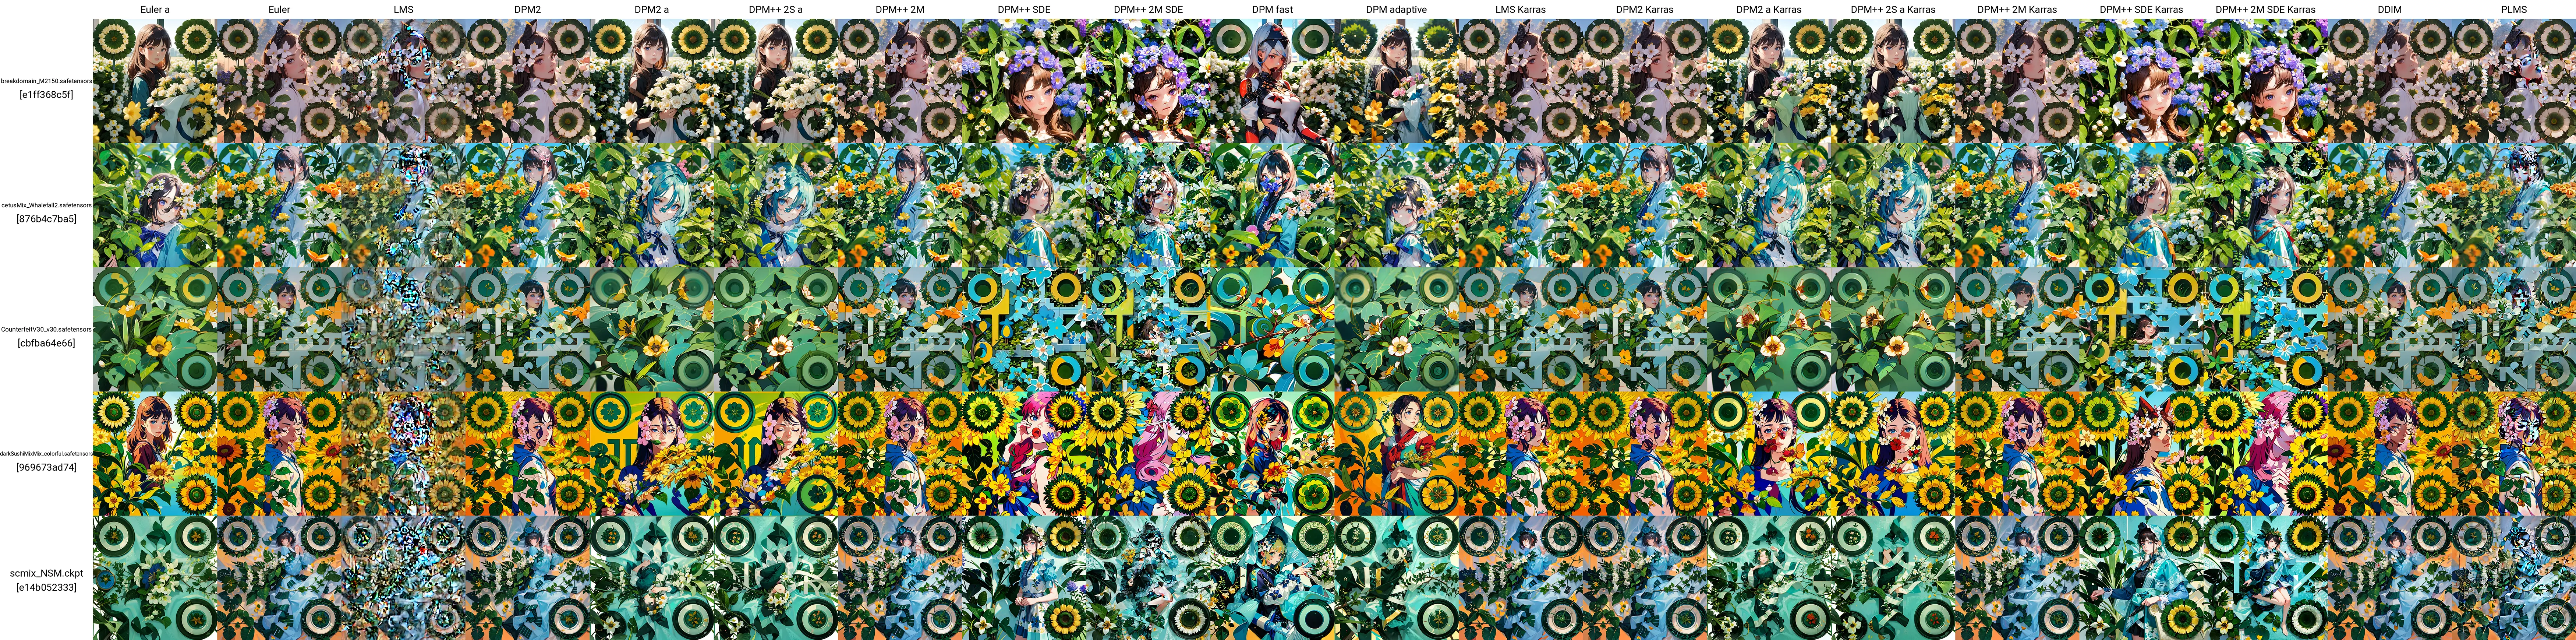
We encourage you to try different prompts and models to find the best combination for your use case.
Non-Square Image
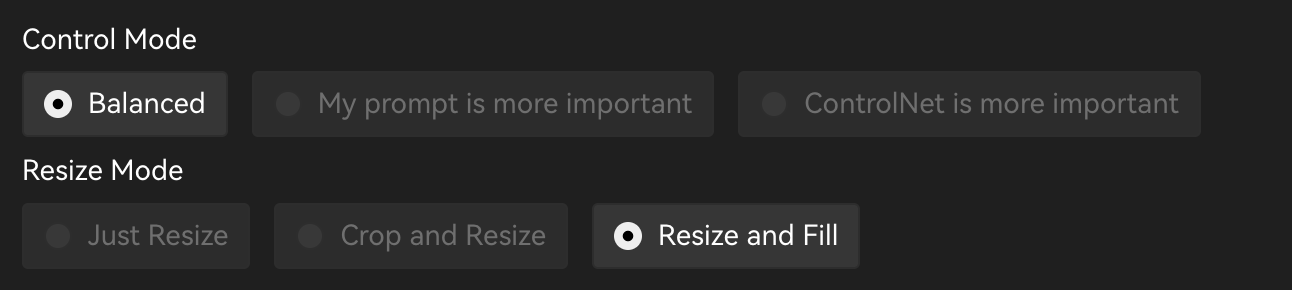
To make the QR Code less obvious, you can try to generate a non-square image, leaving some extra space around the QR Code for the Stable Diffusion to be creative. With that, you can shift the focus of the viewers to the other parts of the image.
To generate a non-square image, you can change the Resize Mode in ControlNet to Resize and Fill and change the Text to Image width or height.
Or in the Toolkit, you click the button on Margin to expand the option and have different margins for each side.
Perspective
You can also try to apply some perspective transformation to the QR Code to make it more interesting.
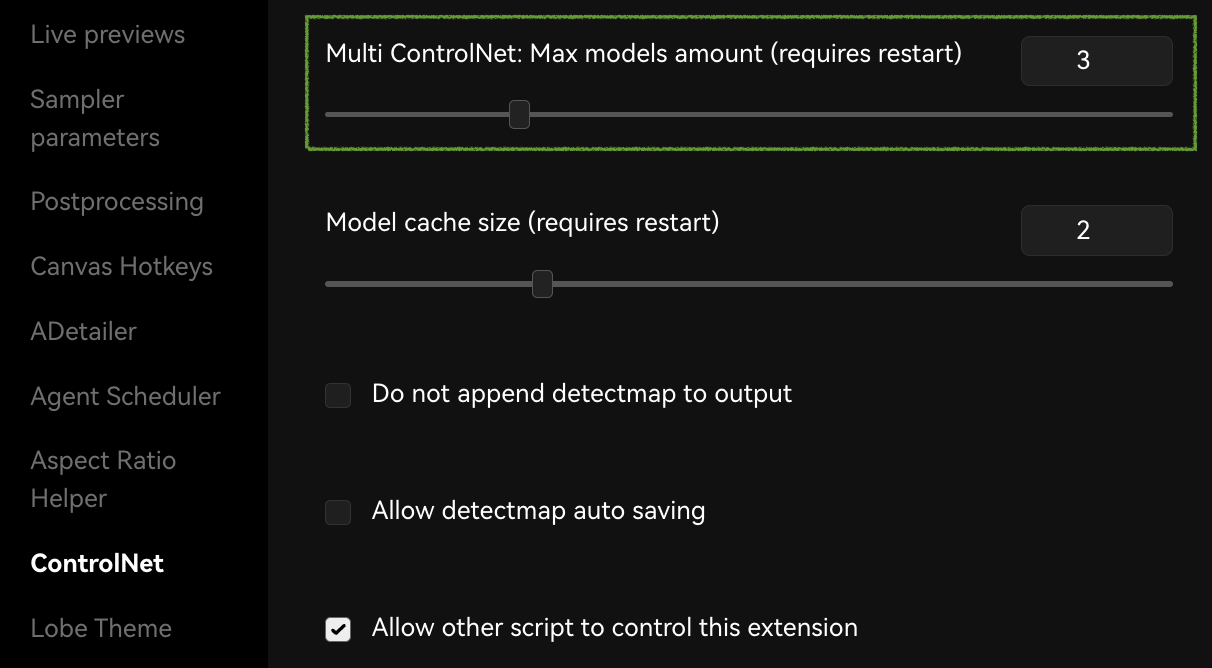
Multiple ControlNet
Multiple ControlNet layers are mainly used to increase the recognizability of the image when the model control is insufficient. Try to avoid the result deviation caused by excessive changes in the picture, causing the ideal picture cannot be obtained.
Difficulties in recognition may be due to changes in prompts or due to the characteristics of the SD model, resulting in too trivial details of the picture or too bright/dark overall tone to make it impossible to recognize.
This method can effectively improve the automatic recognition success rate of scanning.
Usually, we use QR Code Monster or QR Code Pattern model as the main guidance model, and use the Brightness Model from IoC Lab as the auxiliary model to improve the local contrast.
赛博迪克朗: It’s recommended to use the QR Monster model. The QR Pattern v2.0 still has too much interference, which may cause a great change in the style of the image.
For example, running the same prompts as the previous example, when using the QR Code Monster model alone (single model), with control steps 0.0 to 1.0, we got the following results with different weights:
We notice that only Weight 1.5 and 1.7 are scannable (and do not have very good error tolerant), and we also see the compositions of them are changed a lot as the weight increases.
So if we want to keep the original composition but still have good enough recognizability, we could add the Brightness Model as the second model.
Brightness: Weight 0.15 Start 0.1 End 1.0
Brightness: Weight 0.25 Start 0.4 End 0.8
We can see that even if we reduce the weight of the Monster Model to 1.0, the recognizability is as good as the single model with the Weight 1.5, while the composition is closer to the original image.
If you want to go further, it’s also possible to try more models. For example, here is the result of using QR Code Monster and Brightness Model together with QR Pattern:
Brightness: Weight 0.10 Start 0.4 End 0.8
QR Pattern: Weight 0.10 Start 0.4 End 0.8
If you didn’t see the tabs for multiple layers of ControlNet, you can go to the settings page to enable it:
OpenPose
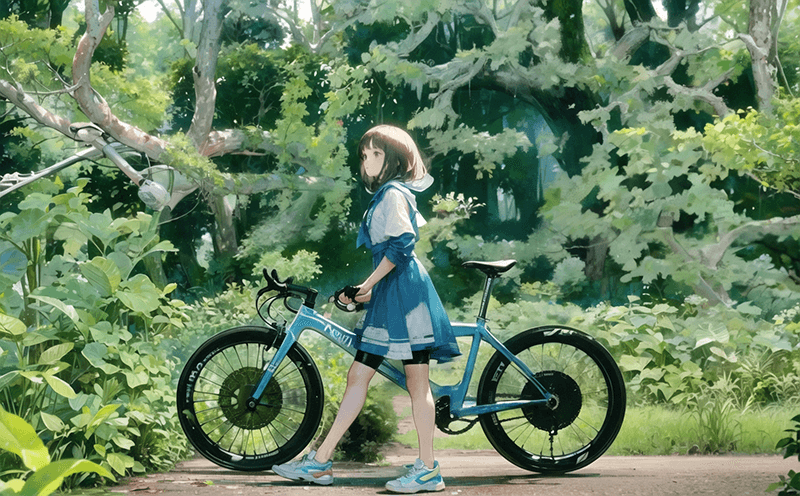
To get more control over the composition, you can also use other ControlNet models like OpenPose to generate a human pose and use it as the input of the QR Code.
For example, you can see the following image is generated with both QR Code and OpenPose as the input. With some tricks on the composition, you can shift the focus of the viewers to the other parts of the image and make the QR Code less obvious.
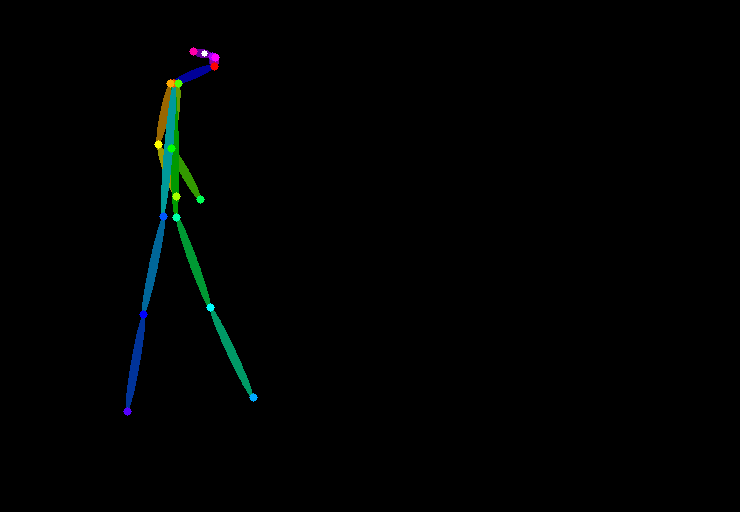
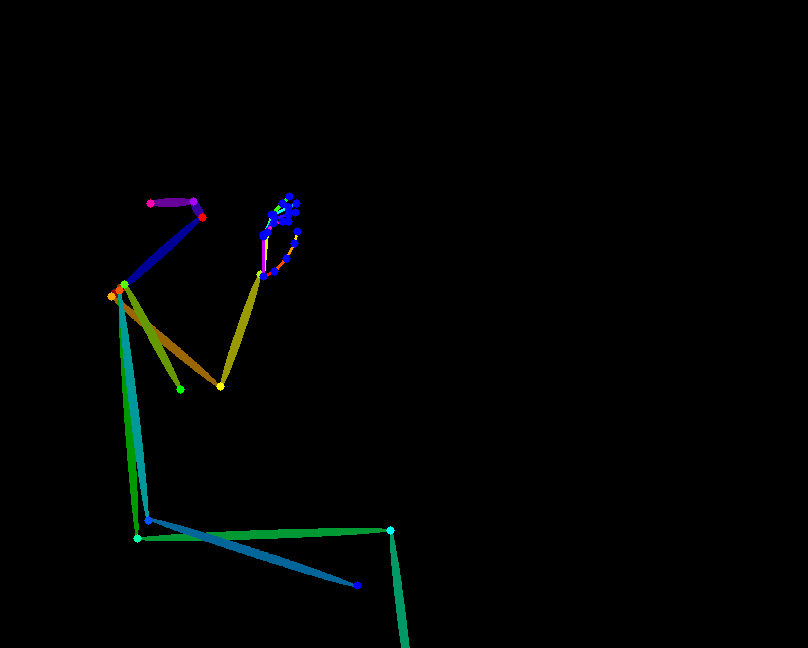
You can learn more about OpenPose in this tutorial.
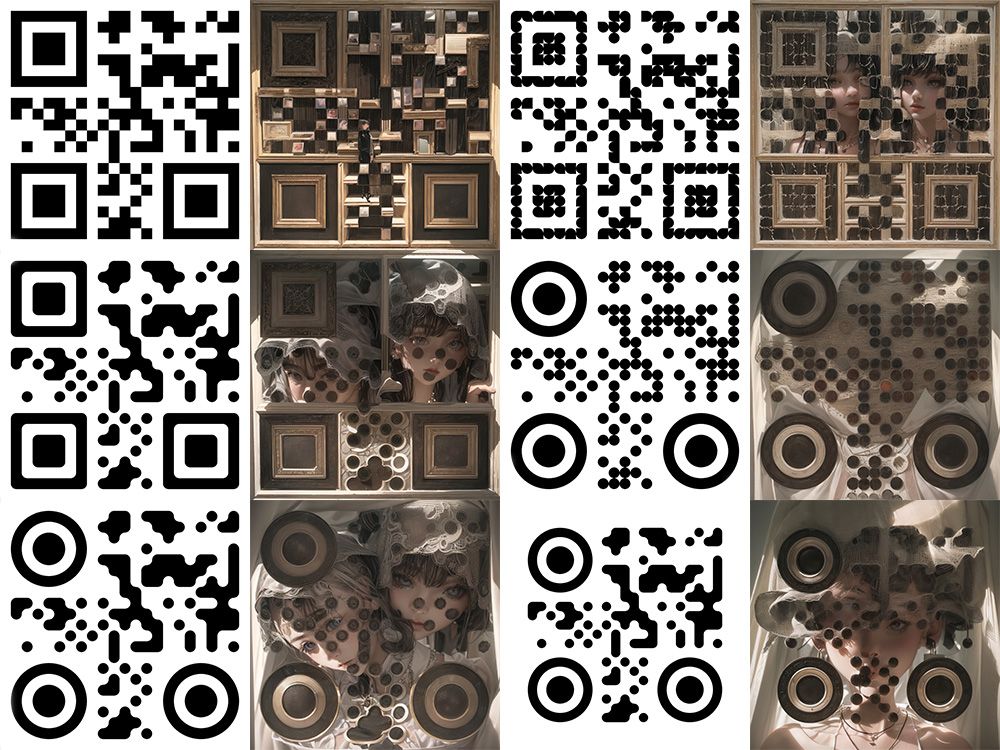
Selective Multi-layer Control
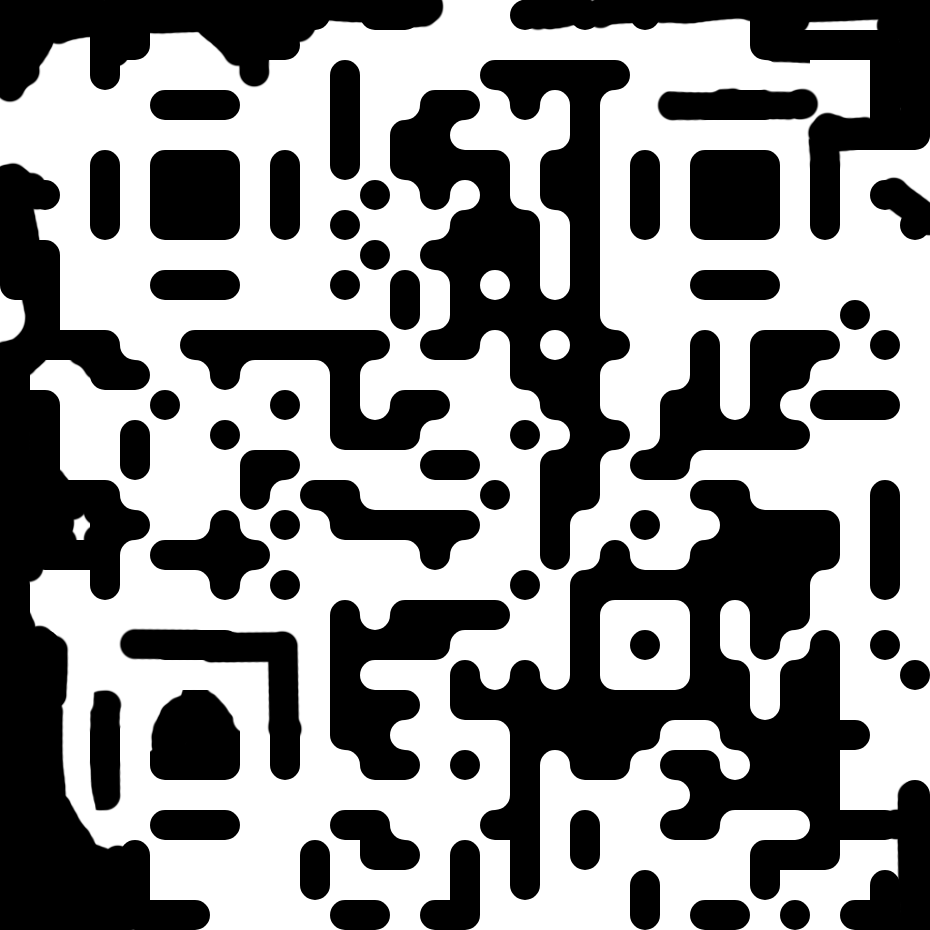
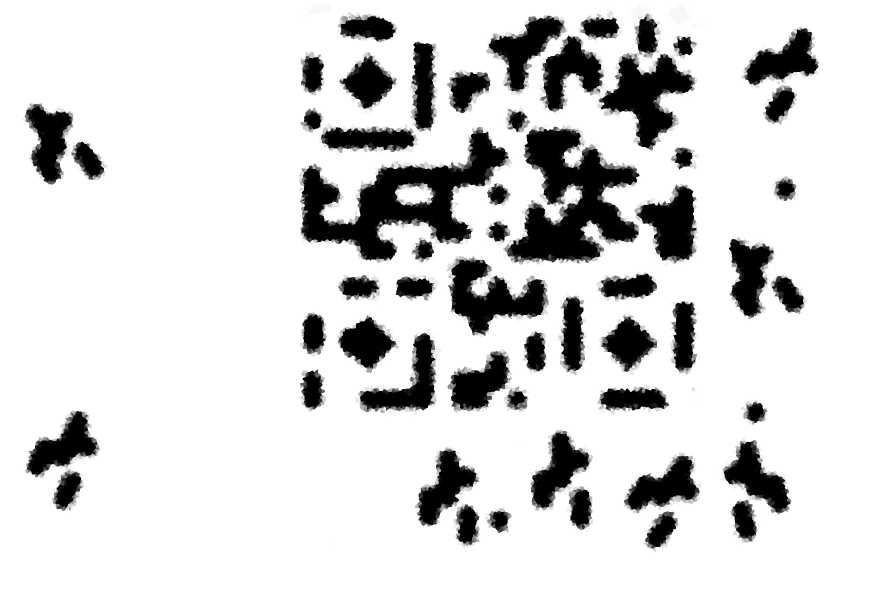
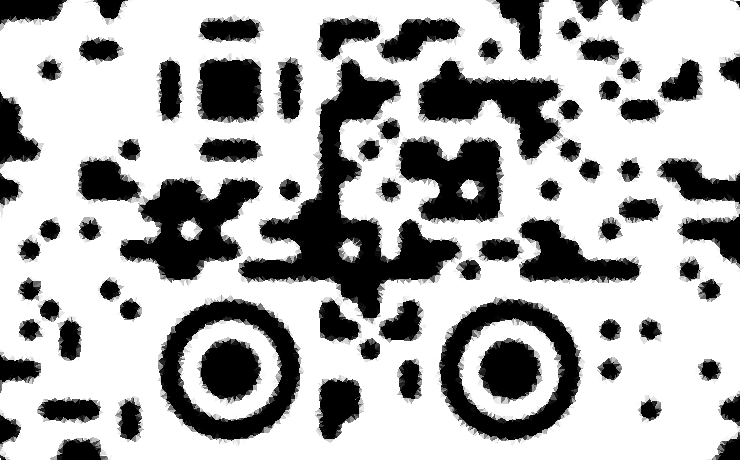
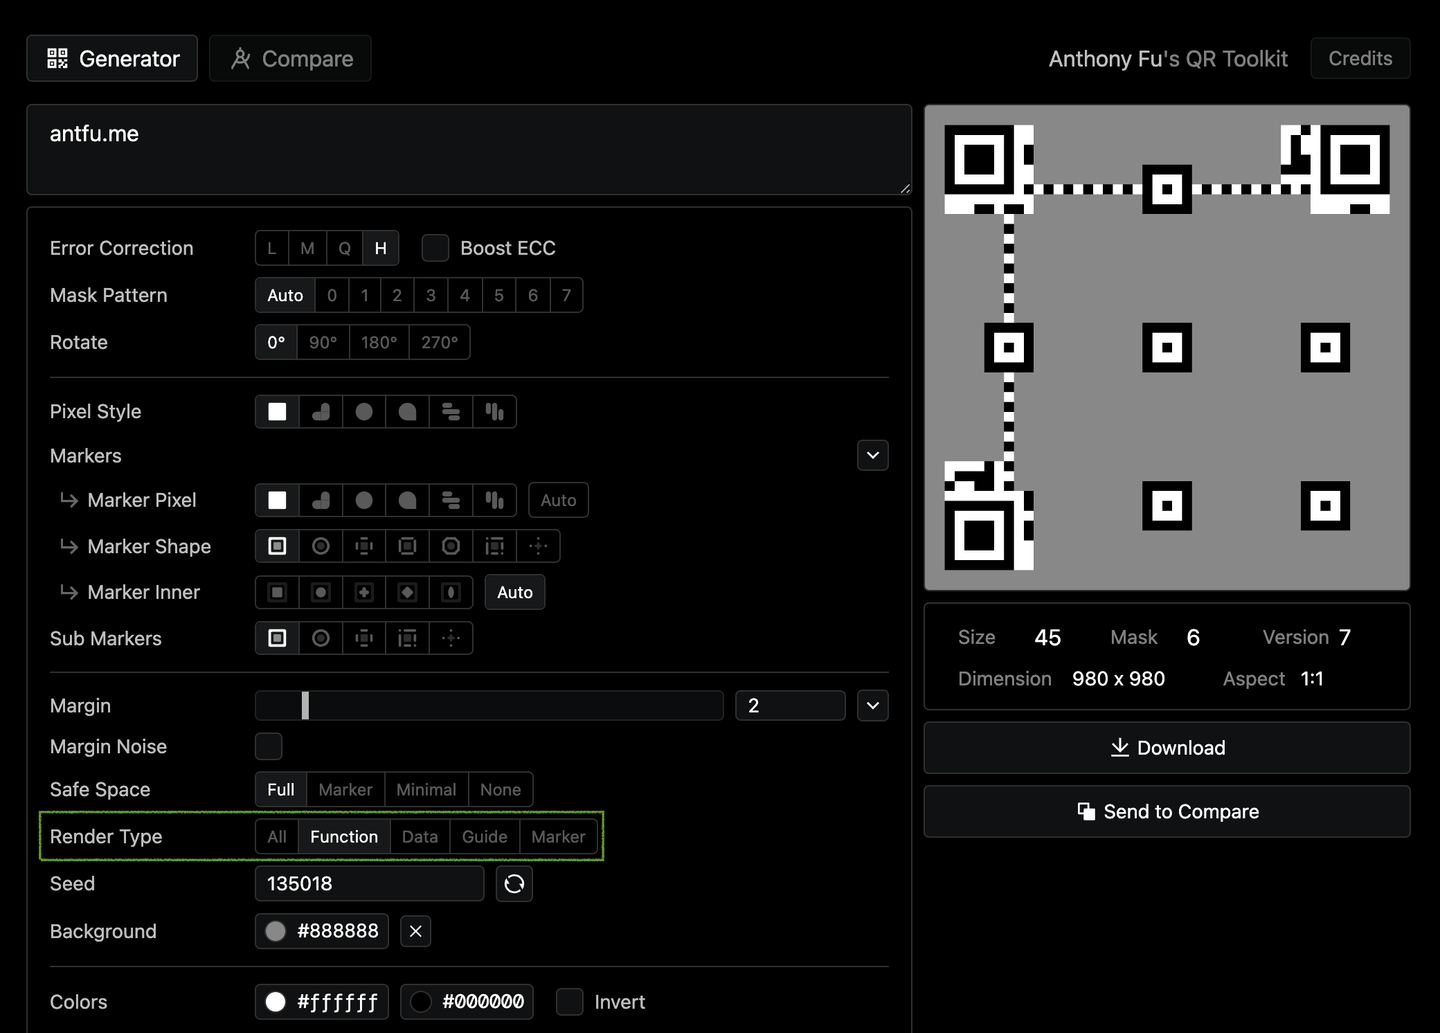
Look deep into the QR Code specification, you can see a QR Code is composed with different types of data and position patterns:
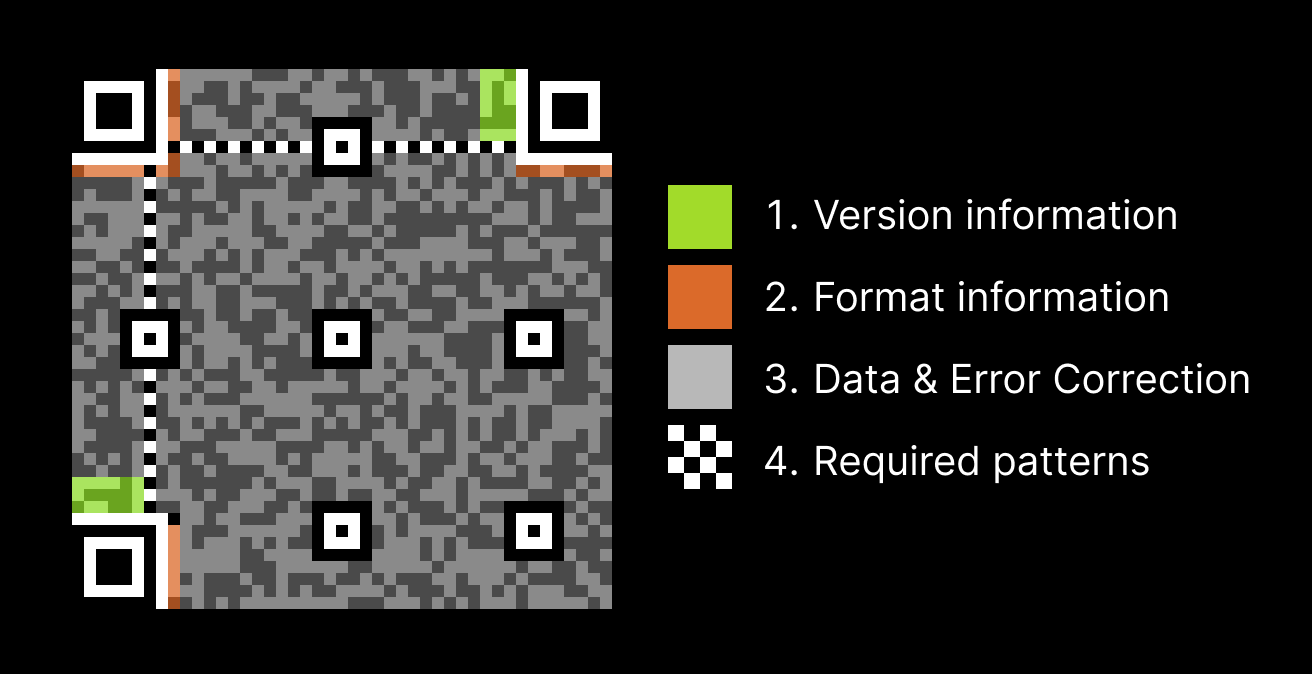
Other than the position markers that are obvious to find, we can see there are also the Version and Format information around the position markers. Those information are quite important because it tells the scanner how to decode the QR Code properly. On the other hand, since the Data area has good error correction and duplications, it’s actually fine for it to contain a few misalignment when needed. Now we realize that many QR Code that are not scannable are because those area are not distinguishable enough, causing the scanner to exit early before going into the actual data.
So, since the data points in a QR Code are not equally important, why would we control them equally? Maybe we could try to selective control different areas. Like increasing the control weight of the functional areas and decreasing the weight of the data area, to make the QR Code more scannable while being more artistic.
In the recent update of QR Toolkit, we added a new option Render Type to only generate some specific areas of the QR Code, combining with a grey background, we could have:
Both QR Pattern v2 and QR Code Monster models support having grey as the hint of arbitrary content (bypass the control). Thanks for the information from Nacholmo and Cyril Bareme.
With this, we could use two ControlNet layers:
- Layer 1: Full QR Code, with medium control weight.
- Layer 2: Selective parts of QR Code, with strong weight but shorter control steps.
For example, here I have two ControlNet layers, both using the QR Code Monster model:
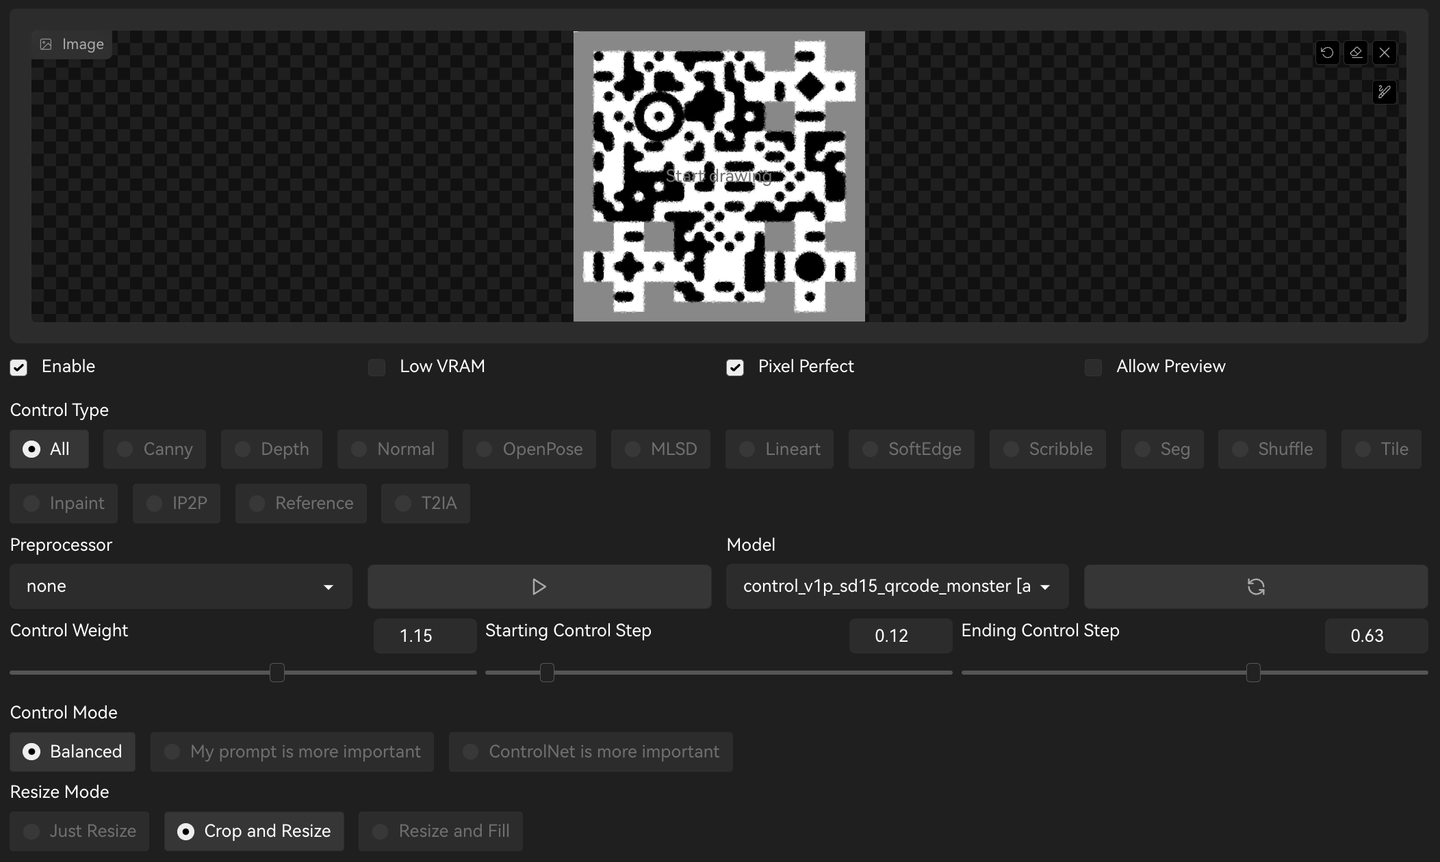
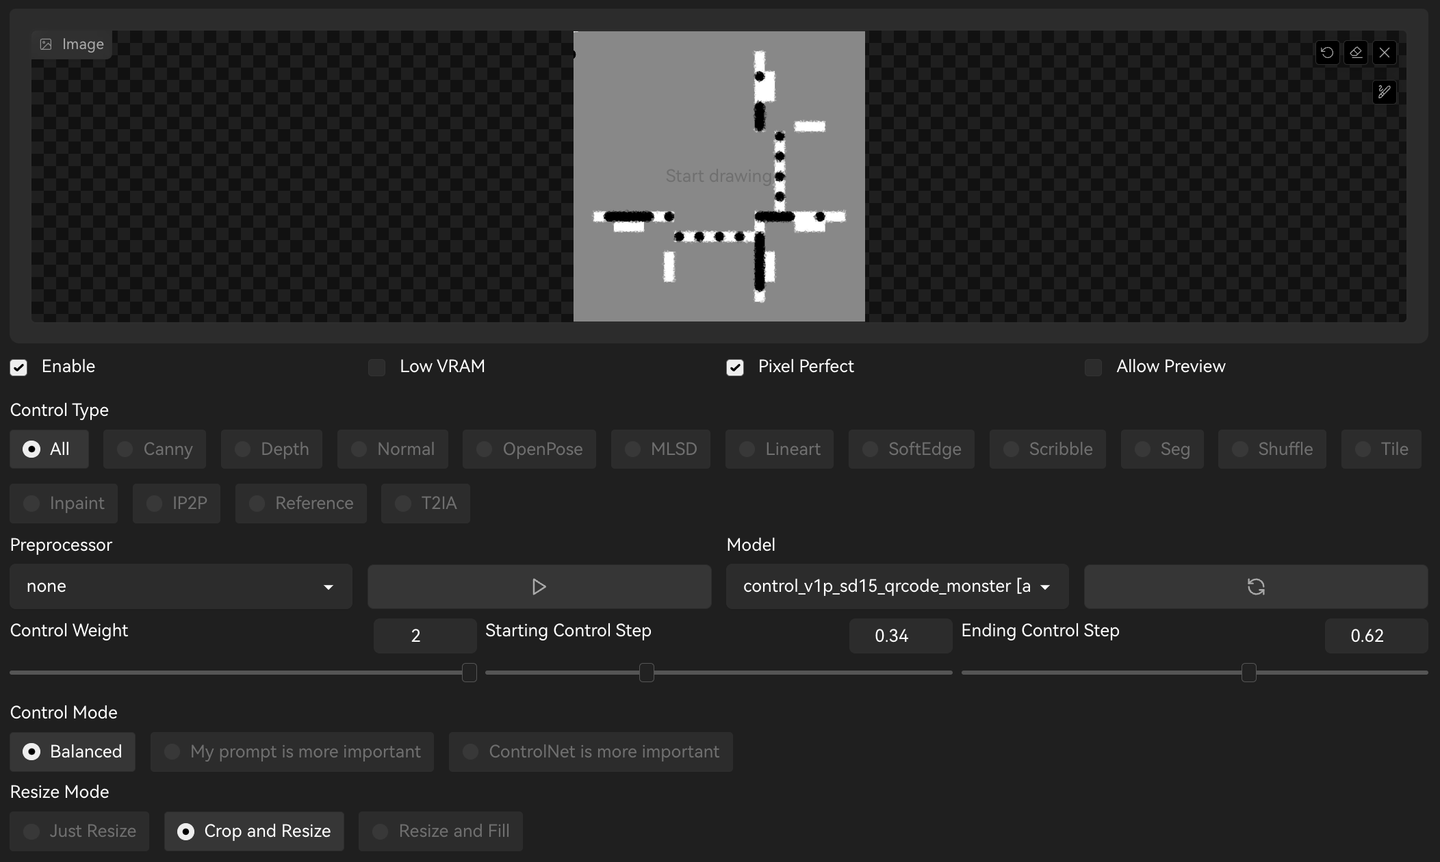
In the second layer of the example, I excluded the position markers as I was seeking for more blend-in image. You can also include them if you want to make the QR Code more scannable.
After a few tweaks, the result are surprisingly good. It’s able to retain the recognizability of the QR Code while being more artistic. Here are some of the results:
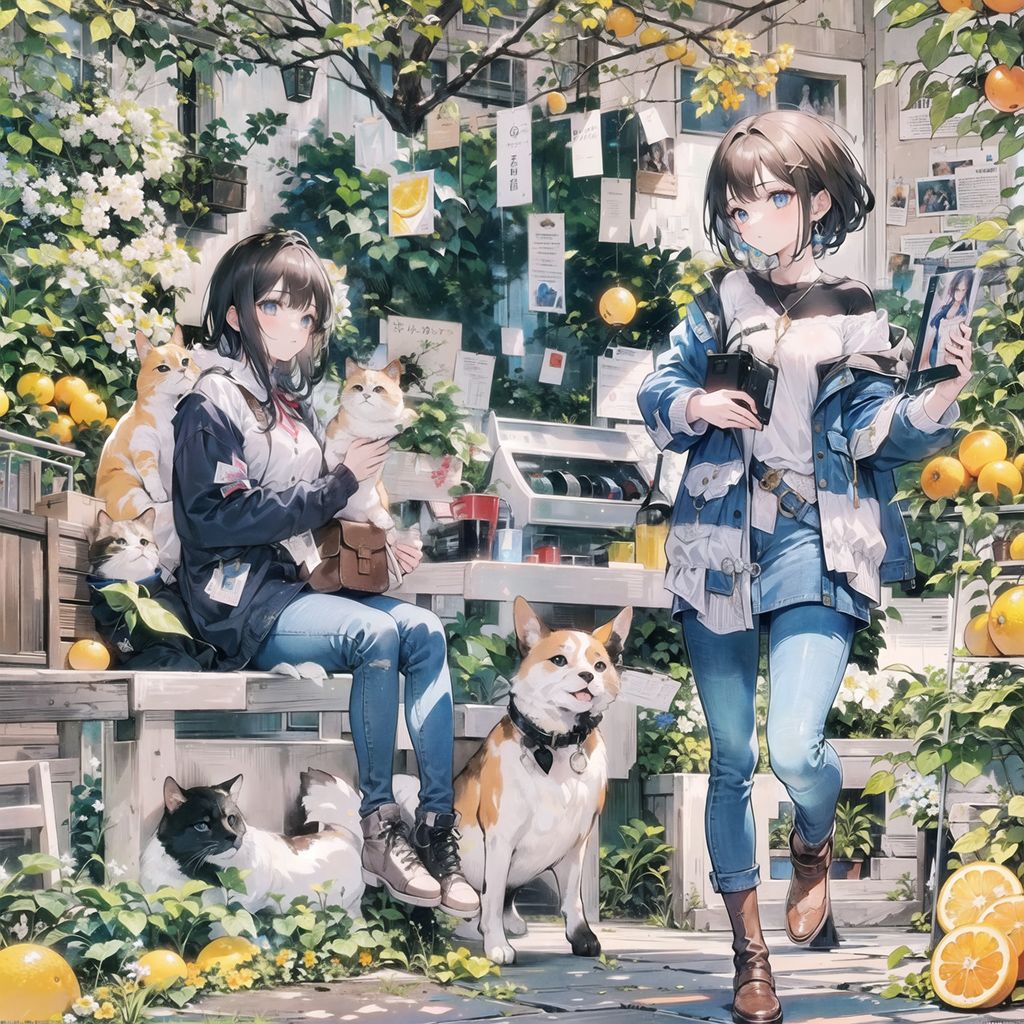
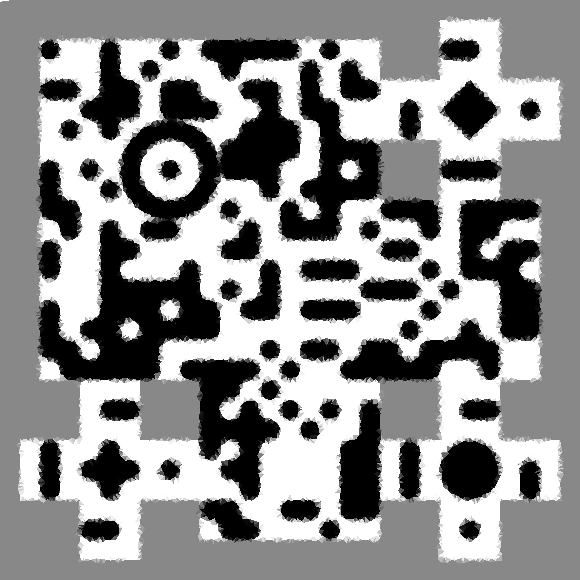
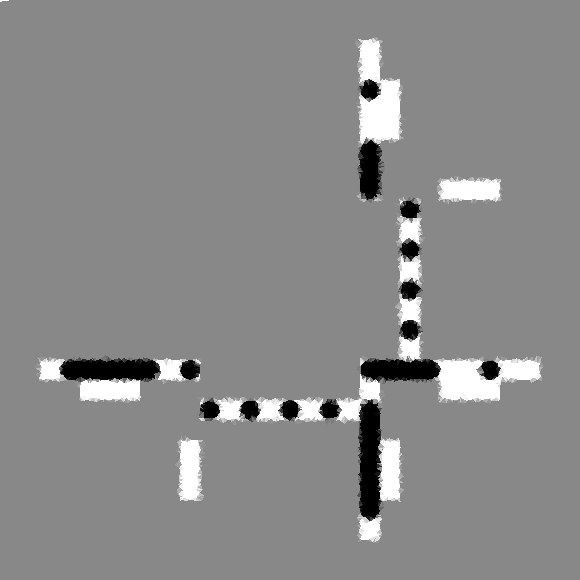
Image to Image Enhancement
When you find a generated image is hard to scan, you can try to send the image to img2img, enable ControlNet with your original QR Code input and:
- Decrease the Denoising strength to retain more of the original image.
- Increase the Control weight for better readability.
- A typical workflow for "saving" a code would be: Max out the guidance scale and minimize the denoising strength, then bump the strength until the code scans.
This tells the model to re-enhance the image by making dark areas darker and light areas lighter under the guidance of ControlNet.
Manually Editing and Inpainting
The ultimate solution is indeed to manually edit the output image. You can use editing tools like Photoshop combined with inpainting to fine-tune every part of the imaged image. It might require a lot of effort, we’d generally recommend focusing on tweaking the generation first before going to this step. More details can be found in this post.
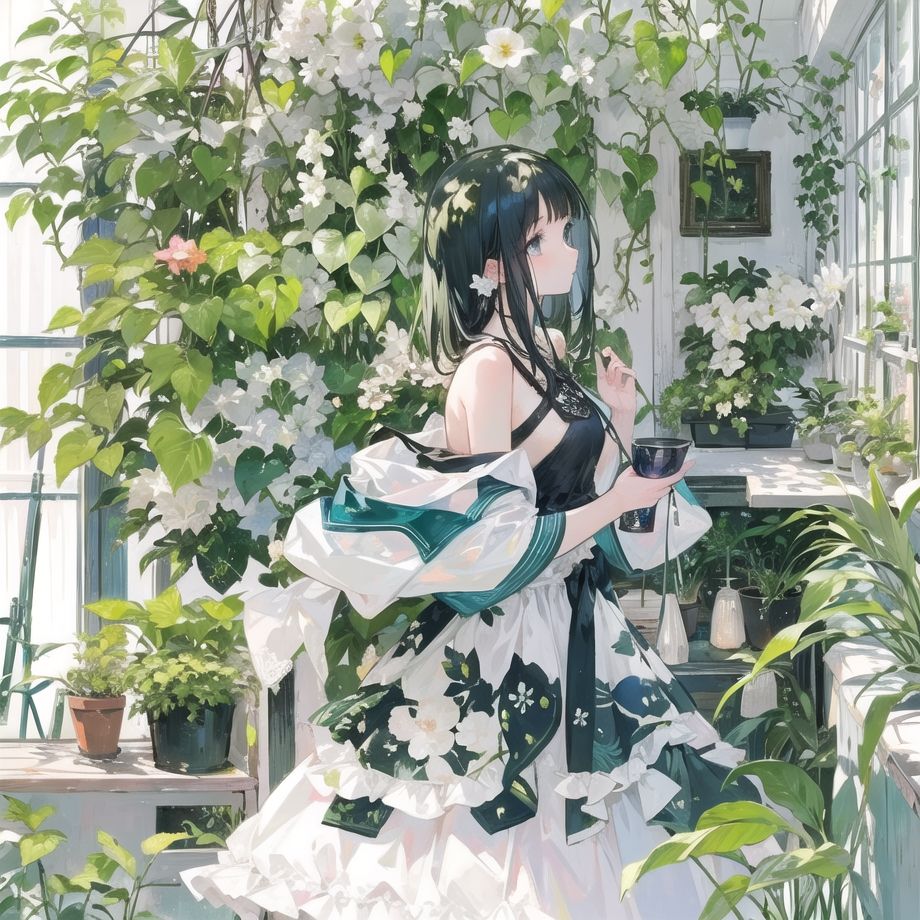
Extra: Hidden Text in Image
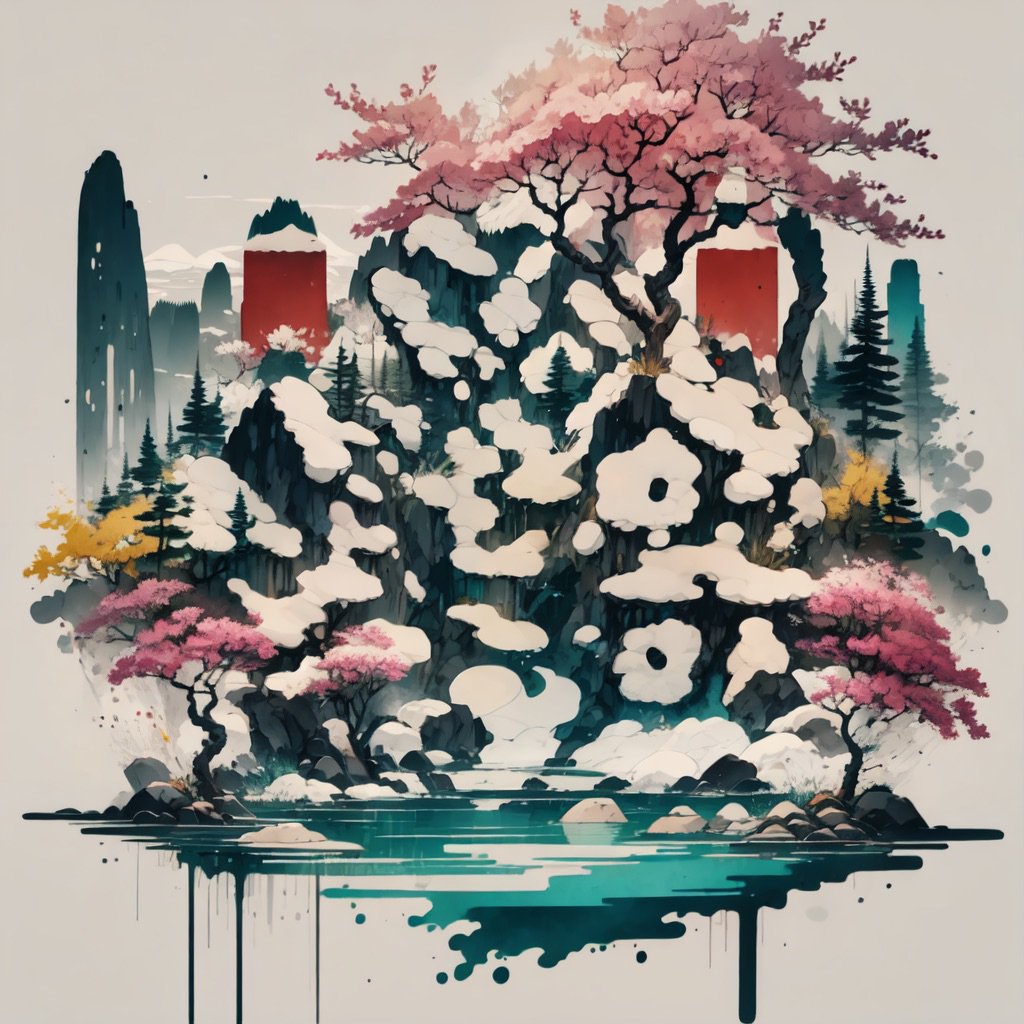
While the QR Code models are primarily designed for generating QR Codes, they are fundamentally brightness-contrast models. This means that they can be used to control and modify anything that exhibits distinct local contrast. So, in addition to generating QR Codes, we can utilize these models to hide text or any symbols inside the generated images. This opens up exciting possibilities for creative exploration beyond just QR Code generation.
For example, we could have this using the exact same methods we learned for generating QR Code:
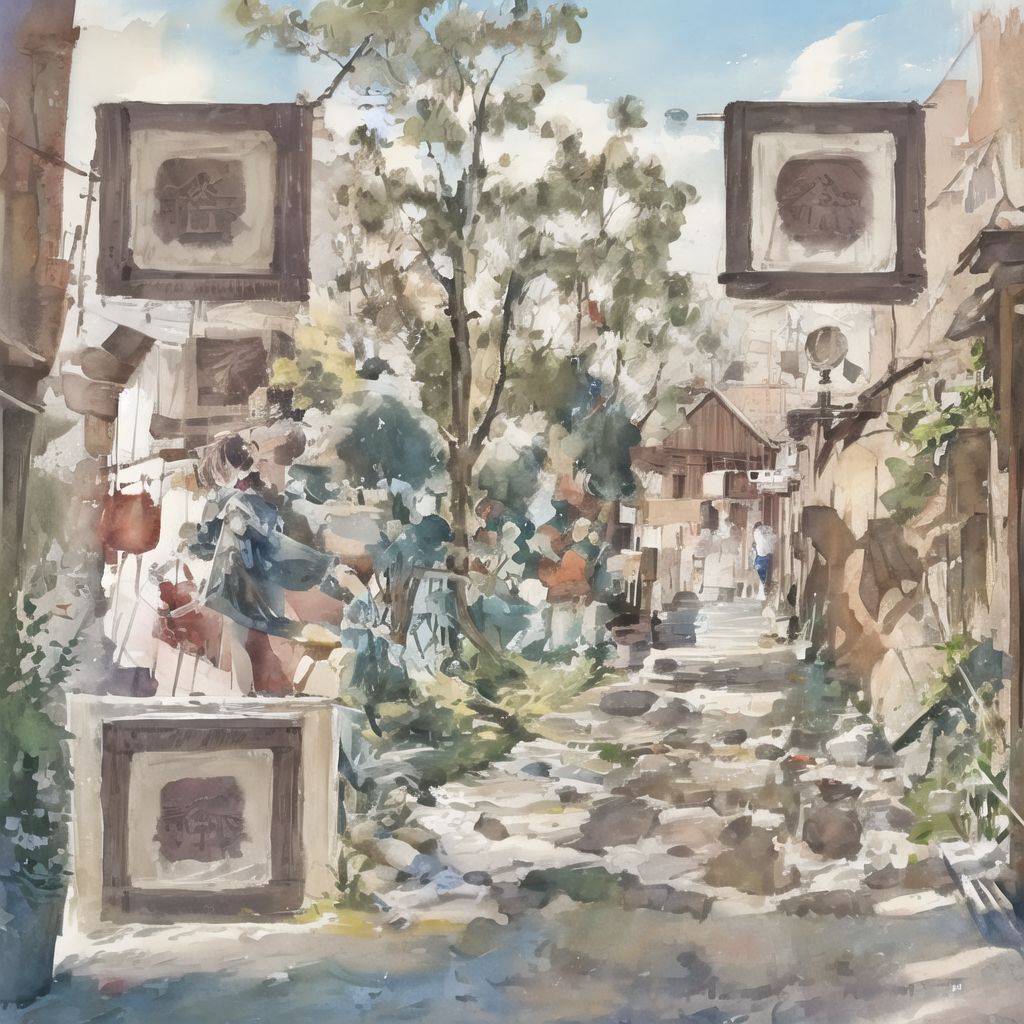
Input Image

You can click the image to see the full size. When you zoom in on the QR Code image, it can become challenging to distinguish the text from the background. However, when you zoom out significantly, the text becomes much clearer and easier to scan. This observation highlights an interesting aspect of human vision—our eyes are indeed excellent scanners.
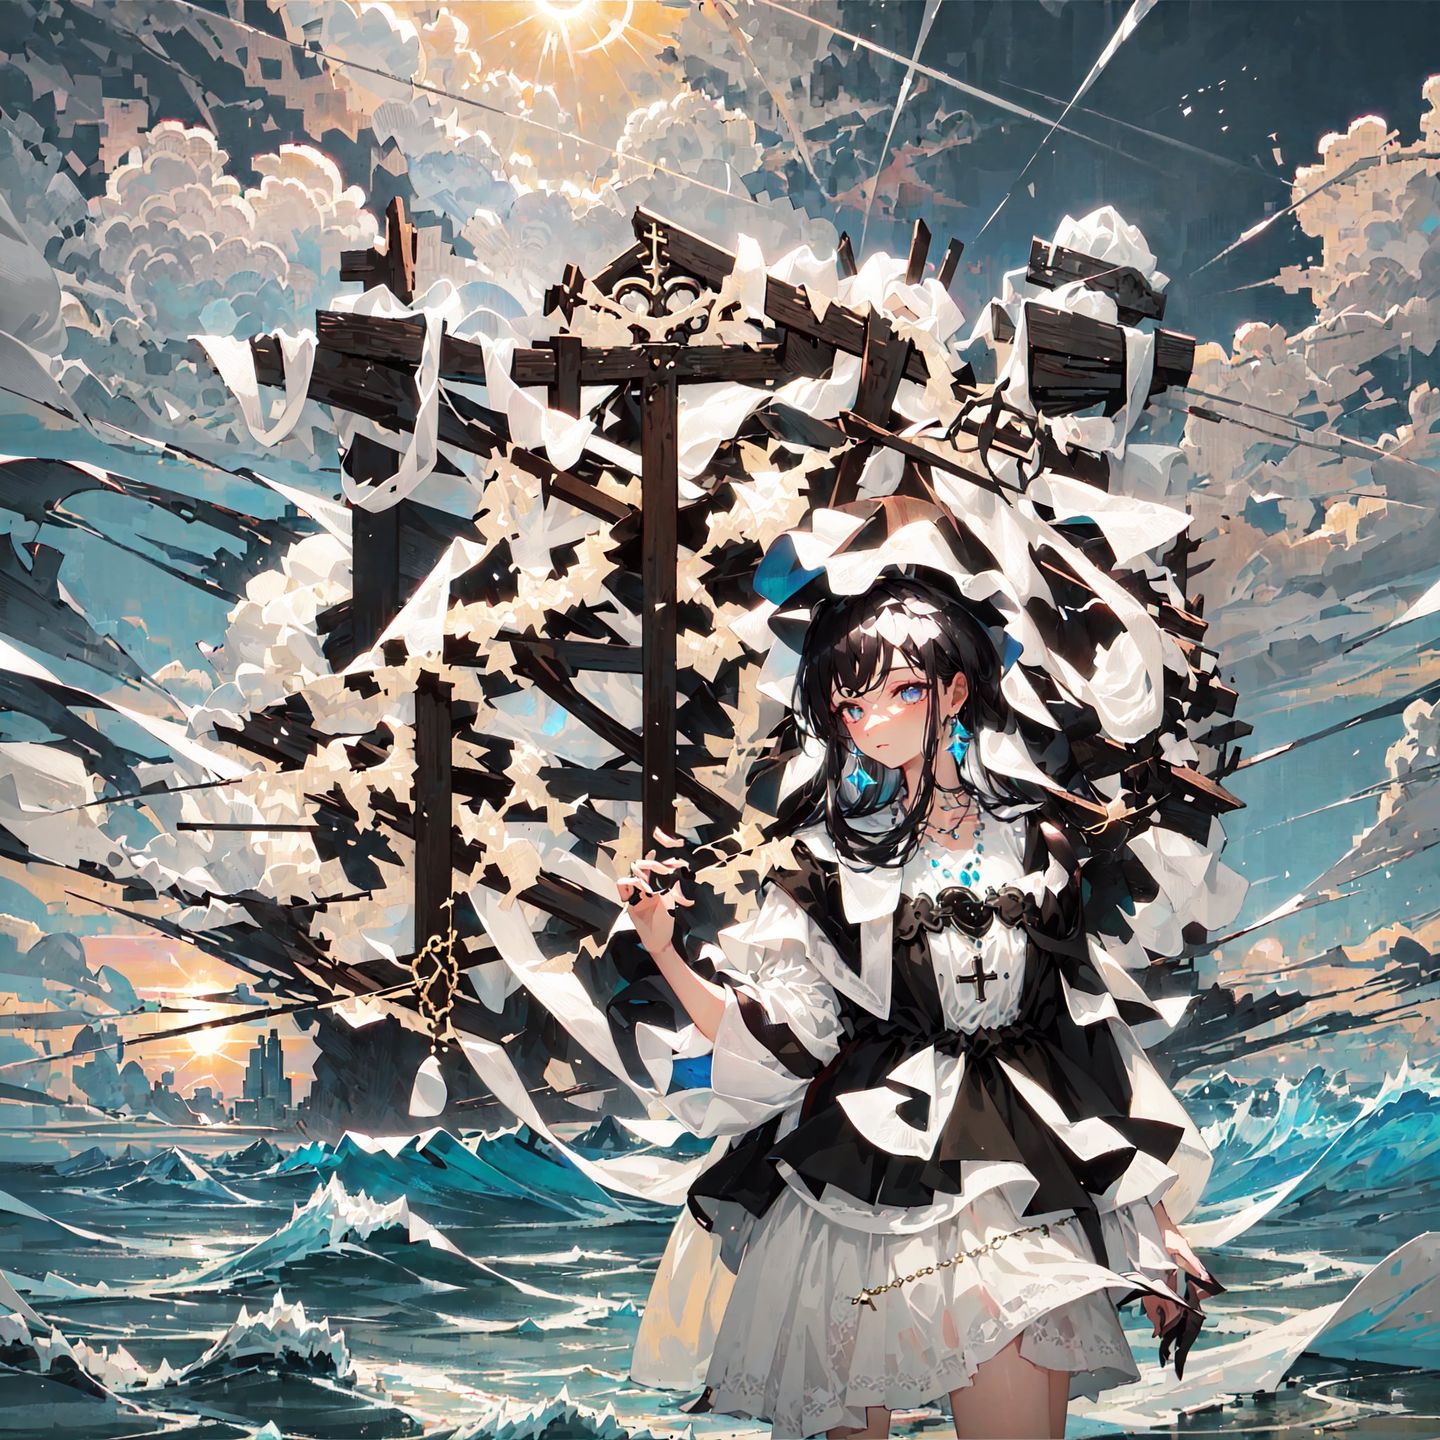
Similarly, we could combing with QR Code, or anything you can think of:
Input Image
Contributing
This guide is aimed to be a one-stop documentations and references for the community to learn about the QR Code models and how to use them.
If you are interested in contributing to this post, fixing typos, or adding new ideas, you can edit this page on GitHub. Or if you are not familiar with Git, you can also go to Anthony’s Discord server and discuss with us.